Author:
Morris Wright
Date Of Creation:
23 April 2021
Update Date:
1 July 2024

Content
- To step
- Method 1 of 3: Using Pixlr
- Method 2 of 3: Using Topaz DeJPEG
- Method 3 of 3: Using Adobe Photoshop
- Tips
JPEGs (also called JPGs) are images compressed to create smaller files - perfect for sharing or posting online. The image may therefore look grainy or blurry when you try to enlarge or reuse a JPEG. You can improve the quality of your JPEG files by adjusting the appearance, color and contrast of the image in a photo editor. If you are quite comfortable with image manipulation, Topaz DeJPEG can be a great addition to your current software; if you are just starting out, you may prefer to try free software like Pixlr. If you are already familiar with Photoshop, you can access the powerful tools to enhance your image file.
To step
Method 1 of 3: Using Pixlr
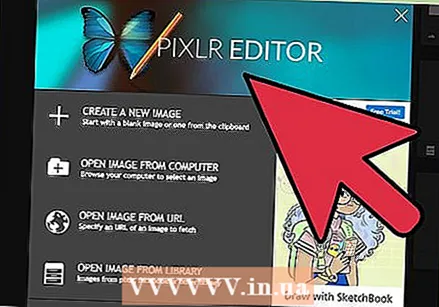 Download or launch Pixlr online. Pixlr is a powerful photo editing tool used by professionals and photo editing enthusiasts. Pixlr offers a free online editor and a simple editing app for desktop and mobile. You can also upgrade to a more advanced version of the product with a regular subscription.
 - Pixlr Editor is the company's web-based application. Go here to start Pixlr editor: https://pixlr.com/editor/
- Pixlr Express is the company's web, iOS and Android application. You can download it for free from the Google Play or Apple App Store or https://pixlr.com/express/.
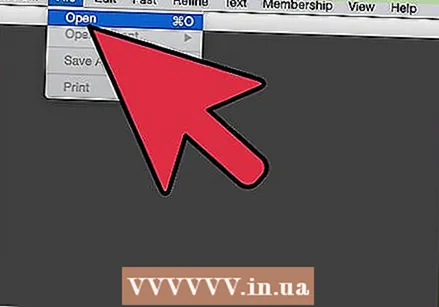 Open the image you want to edit. The quality of your final edited product will depend on the resolution or number of pixels of the original image. Pixlr strongly encourages its users to start any editing project with the highest possible resolution of the image. This is especially true if you want to enlarge the photo. As you enlarge the low-resolution image, the white space between the pixels increases, causing the image to appear distorted. To upload a photo with:
 - Pixlr Editor, click the "Browse" button, select the JPEG file, click "Ok" or search for an image on the Internet by clicking the "Open URL" button.
- Pixlr Express, click the "Photos" button and choose an image from the library of your phone or tablet. You can also capture a new image for editing by clicking the "camera" button.
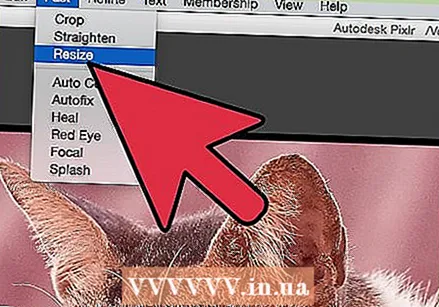 Resize the image. The size of a file is determined by the number of pixels: the higher the number of pixels, the larger the file. Emailing, uploading and downloading large JPEGs is a slow process. Resizing your image to a smaller number of pixels will help you share your photos faster.
 - To resize the image with Pixlr Editor, select Adjustments> Resize. Change the pixel dimensions to the desired size, keep the "Aspect Ratio" locked and click "Apply".
- To resize the image with Pixlr Express, click "Done" and select "Resize". Change the pixel dimensions to the desired size, keep the "Aspect Ratio" locked and click "Apply".
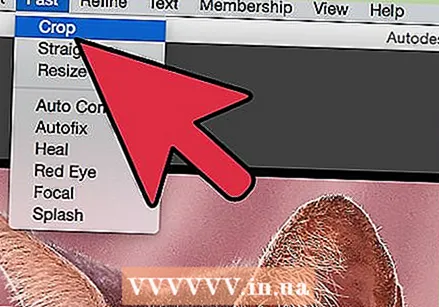 Crop the image. Cropping makes it easy to remove unwanted parts of a photo. Cropping an image also reduces the file size.
 - Select Adjustment> Crop to crop your image with Pixlr Editor. Manually change the width and length of the marquee. Click outside the image. When you are satisfied with the new dimensions, click "Yes" in the dialog box that appears.
- Select Tools> Crop to crop your photo with Pixlr Express. Enter the desired pixel dimensions or select one of the preset size options from the drop-down menu.
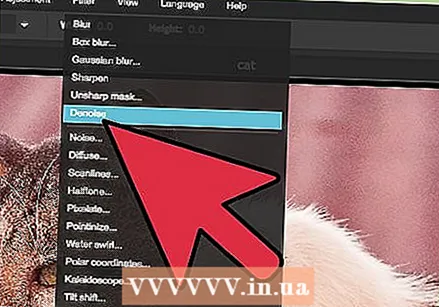 Reduce the picture noise. This filter is only available for free with Pixlr Editor or with a subscription to Pixlr. Select Filter> Denoise. The word "Denoise" will flash above the photo to indicate that the image noise or visual distortion has been reduced. Keep reducing the noise until you get the results you want.
 - You cannot control how much noise is reduced at the same time.
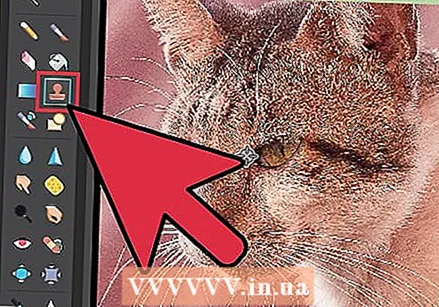 Retouch areas of fine detail with the Clone Stamp tool. This feature is only available for free through Pixlr Editor. Pixlr's clone stamp tool lets you capture and replicate parts of an image. With this tool you can copy and paste individual pixels or entire objects. Since the stamp can capture and replicate multiple colors, this tool is great for eliminating or reducing mosquito noise from fine detail areas.
 - Zoom in until you can see the individual pixels. Select View> Zoom In.
- In Pixlr, the stamp is applied with a brush. Select the brush and adjust the settings. Choose a soft edge brush from row two and reduce opacity. The soft edges and low opacity allow you to merge the colors.
- Select the Clone Stamp tool - it's located right below the paint cans icon. Move your cursor to the exact location you want to capture and replicate. To activate the clone stamp, Windows users need to Alt hold down, and Mac users should ⌘ Command keep pressed. While holding down the key, click on the area. Release the key and mouse.
- If you want to apply the stamp, move the cursor to the area you want to update and click on it. Repeat if necessary.
- During the entire process, zoom in and out to view your work.
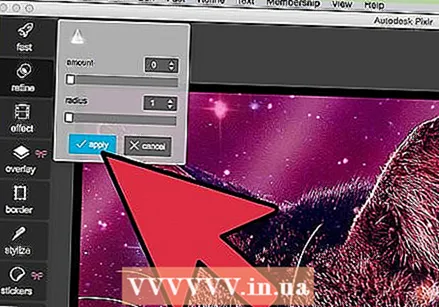
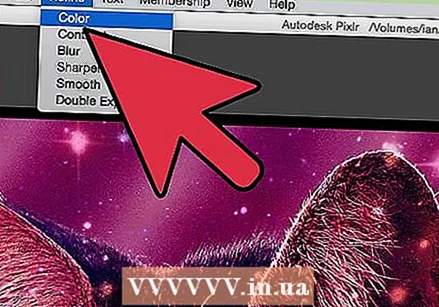 Refine the color and contrast of the image. Pixlr provides users with ways to modify and improve an image. You can use the "Color" tool to adjust the hue, saturation, lightness, and vividness of the image. If the image is over or underexposed, you can change the contrast or brightness of the photos with the "Contrast" tool.
 - To use these tools in Pixlr, select Refine> Color or Refine> Contrast.
- To access these tools in Pixlr Editor select Adjustment> Color or Adjustment> Contrast.
- To access these tools in Pixlr Express, select Tools> Adjustment> Color or Tools> Adjustment> Contrast.
 Refine the image with various tools. Pixlr is equipped with multiple brush-like tools and filters that can erase minor imperfections or change the whole image. These tools include:
 - Sharpen: Use this tool to sharpen soft edges
- Blur: Use this tool to soften hard edges
- Blanket: Use this tool to merge pixels
- Sponge: Use this tool to absorb or saturate colors
- Dodge: Use this tool to increase the brightness of the image
- Burn: use this tool to add shadow or contrast to your photo
- Fix stains: use this tool to remove blemishes and scratches
- Bloating: Use this tool to create a hollow effect
- Pinch: Use this tool to produce a convex effect
- Red-eye reduction: use this tool to remove red-eye
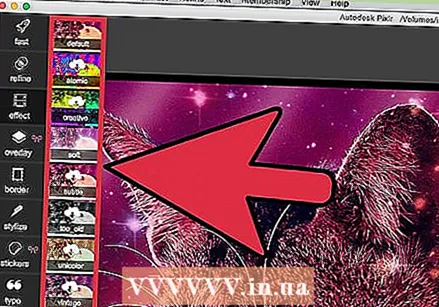 Apply an effect to the image. With Pixlr's effects pack you can transform every pixel in your image. Each effect tool uses math to change the appearance of individual pixels. Pixlr offers nine different effects. Each effect has different sub-effect options. The categories include:
 - Atomic, Creative, Standard, Soft, Subtle, Too Old, Unicolor and Vintage.
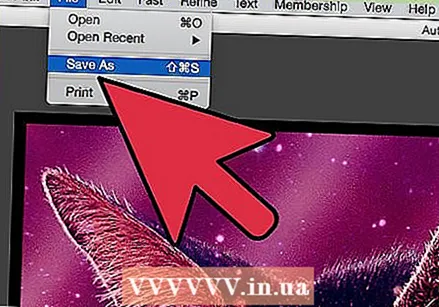 Save the image and adjust the quality size. When you have finished editing your image, select File> Save As, click the "Save" button or choose "Save Image". If you are using Pixlr or Pixlr Editor, a dialog box will appear on the screen. In Pixlr you have the option to rename the image, choose the "Files of type" - choose JPEG - and decide where you want to save the image. When you are done, click on "Save". In Pixlr Editor you have the option to rename the file. Before the image is saved, the program will ask you to select the "Image Quality".
 - High-quality images are less compressed - the pixels contain more data. This results in a large file and a clear picture.
- Low-quality images are more compressed - the pixels contain less data. This creates a small file size and a less bright or more pixelated image.
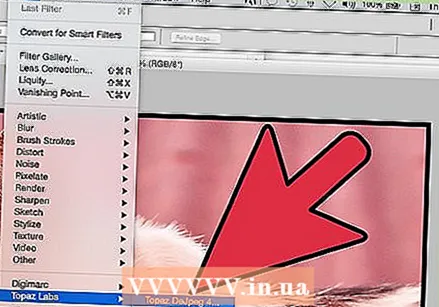
Method 2 of 3: Using Topaz DeJPEG
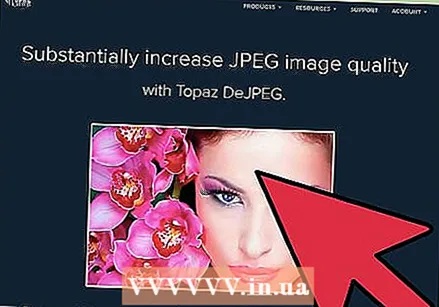 Check if Topaz DeJPEG works with your photo editing software. Topaz DeJPEG is a JPEG enhancing plugin for your primary photo editing software. The free trial version of the plug-in can be used with Adobe Photoshop (Windows and Mac), Paintshop Pro (Windows), Photo Impact (Windows) and Irfanview (Windows).
 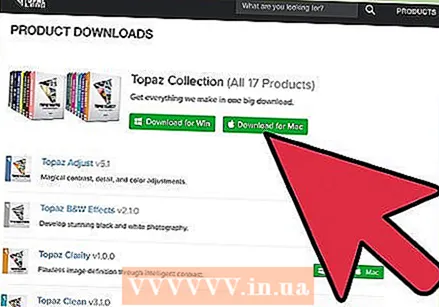 Download and install the plugin. To download the free trial version, go to www.topazlabs.com/download in your web browser. Enter your email address and choose an account password. Then click on "Download Now". Scroll down to "Topaz DeJPEG" and choose your operating system (Windows or Mac). The download will begin and your trial license key will be emailed to you.
 - Close Photoshop. If you are using Adobe Photoshop you must close it before running the DeJPEG installer. This step is not necessary for users of other programs.
- Run the installer. Double-click the downloaded installation file to start the trial version. Enter the trial license key (sent to your email) when prompted, then click "install" to begin the installation.
 Import DeJPEG into your photo editing software. Before you can use the plugin you need to add the DeJPEG filter folder to your program. The full path to the DeJPEG plugin folder is Program Files Topaz Labs Topaz DeJPEG 4.
 - Photoshop: Photoshop users can skip to the next step as DeJPEG will automatically install to the Photoshop plugins folder.
- Paintshop Pro: Select "Preferences" from the File menu and then "File Locations". Select "Plug-ins" on the left side of the screen and then click the "Add" button. Navigate to the TheJPEG Plugin folder, then click "OK".
- Photo Impact: Open the program and click F6 on the keyboard. Choose "Plugins" from the list and click the "…" button at the end of the first empty plugin folder in the list. Select the folder DeJPEG plug-in in the folder list and then click "OK". Restart the Photo Impact before trying to use the filter for the first time.
- IrfanView: Open the program and expand the "View" menu. Click on "Effects" and then "Adobe 8BF Filters". Choose "Add 8BF Filters" from the menu. Now navigate to the DeJPEG plugin folder and click OK.
 Start the filter. Open your JPEG in your usual photo editing software and then launch the DeJPEG tool:
 - Photoshop: Choose "Topaz Labs" and then "DeJPEG 4" from the Filters menu.
- Paintshop Pro: Choose "Plug-ins" from the Effects menu and then select "Topaz DeJPEG".
- Photo Impact: Open the Effect menu and then select "Topaz DeJPEG".
- IrfanView: Open the Image menu, click "Effects" and then "Adobe 8BF Filters". Choose "Topaz DeJPEG" from the filter list.
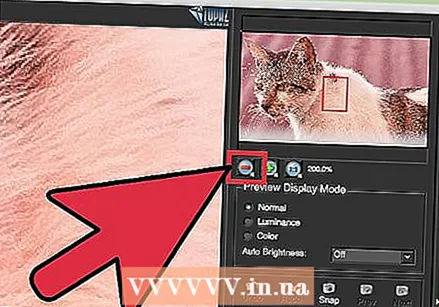
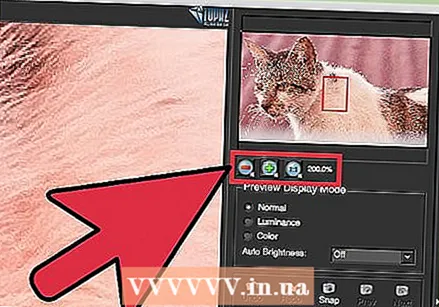 Zoom in on a problem area. Click on the magnifying glass (+) to zoom in to an area of your image where compression artifacts are visible.
 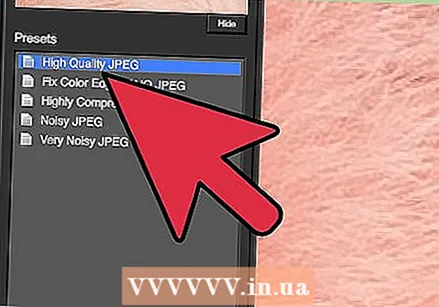 Cycle through the default presets. The default settings of DeJPEG are on the left side of the screen. Click on each default preset to apply the settings to the preview image of your image. Notice how each preset improves or disrupts the quality of the image. Choose the preset that best perfects your JPEG image. It's okay if it's not perfect, there are even more settings to change.
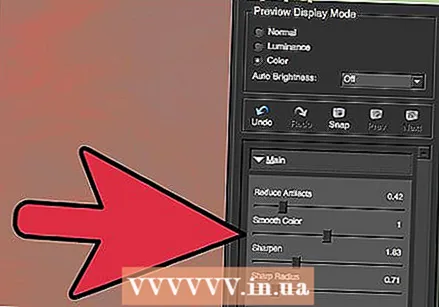
 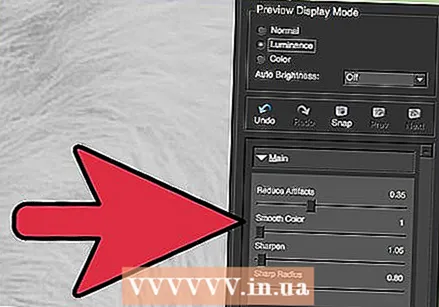 Adjust the sliders in Luminance mode. Select "Luminance" from the options under "Preview Mode". Now click on "General" to view various options to resolve the details omitted by the preset.
 - Reduce artifacts: First slide the slider all the way to the left. Gradually move the slider to the right while viewing the details in the preview window. As you move the slider to the right, the edges may soften, but noise and chessboard formation disappear. Keep moving to the right until you find a comfortable balance.
- Sharpen: This slider should help redefine the edges softened by the Reduce Artifacts slider. Moving this slider to the right increases the sharpness.
- Cutting radius: This slider should be used in conjunction with the Sharpen tool. Experiment by moving this slider left and right until the edges look clear and the artifacts are gone.
 Adjust color details. If the colors in your image appear to have been affected by the previous tools, switch to color mode by selecting "Color" under Preview.
 - Uniform color: Move this slider to the right and left until you are happy with the image in the preview window.
- Brighten edge radius. To adjust the details of the colors on the borders, click the "Advanced" settings and increase the "Brighten border radius" slider. Use this tool with the slider Edge threshold until you are happy with the image.
- Adjust saturation. If the colors appear dim, move the "Saturation" slider to the right to increase the color levels.
- Add grain. Try using the "Add Grain" slider to make the image more natural. Move the slider to the right to increase the amount of graininess.
 Zoom out to view your changes. Before saving your work, click on the magnifying glass (-) until you see the full image in the preview window. If you don't like the results, keep working with the presets, luminance, and color settings until you're happy with the full photo.
 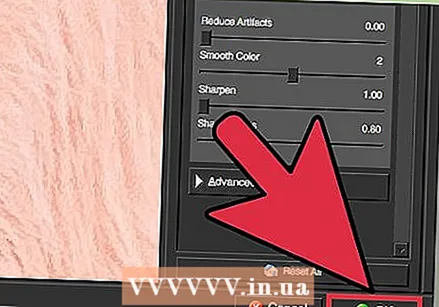 Click "OK" to process the image. You may have to wait a while for the filter to apply.
Method 3 of 3: Using Adobe Photoshop
 Consider what quality you want the image to have. Capturing the fine details of a low-quality compressed JPEG takes quite a bit of time and dedication.
 - If you've pressed too long or don't have Photoshop, check out the Topaz DeJPEG method.
- If you want to enhance images for use in apps like Facebook or Instagram, this method is not as convenient as using an app with filters. Pixlr includes free filters that can hide imperfect JPEGs. If you want to make your photos pop and don't care much about loss of compression, give Pixlr a try.
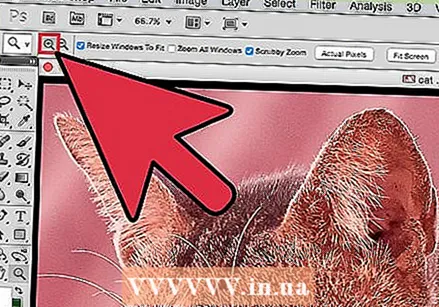
 Zoom in to get a better look at the image. Open your JPEG in Photoshop and zoom in by clicking on the magnifying glass (+) in the top left corner of the toolbar. Keep clicking this button until the percentage in the lower left corner of the screen reads "300%". Notice the blocks and compression coloration that appear at this detailed level.
 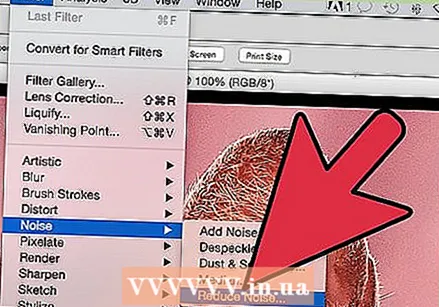 Find the filter "Reduce Noise". Open the "Filter" menu, select "Noise" and then "Reduce Noise".
 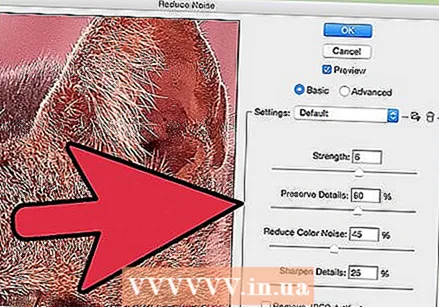 Adjust noise reduction options. First, put a check mark in the box that says "Preview" so you can see your changes in real time.
 - Get well soon: This number represents the desired degree of noise removal; it should be higher for lower quality JPEGs. Drag the slider to the right to see the effect of increasing the strength setting.
- Keep details: A lower percentage makes the photo blurrier and softer, but also reduces more noise.
- Sharpen details: You may want to compensate for a low setting to preserve the details with a higher setting for Sharper Details, as this will make the edges of your image clearer. Make sure "Delete JPEG Artifact" is checked.
- When you are satisfied with the preview image, click "OK" to save the new image.
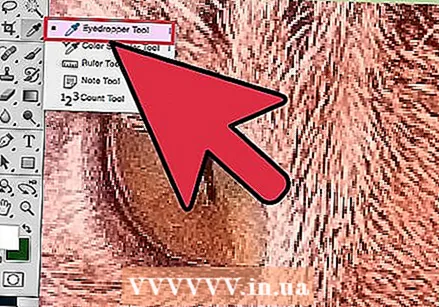 Minimize mosquito noise and color blocking in large areas without much detail. (For example human skin, cheeks, hair). Your goal is to make the different color transitions in the image as smooth as possible. Leave important details in specific objects (such as eyes, ears) for the Rubber Stamp / Clone Tool, covered next.
 - Zoom in on the image until you can clearly see the color blocks (small colored squares) in the area you are working with.
- Use the pipette tool to select a color near the color blocks you want to remove.
- Select the brush. You will essentially be painting lightly over the color blocks. Set the brush hardness to 10%, set the Opacity to 40% and go to 100%.
- ’With a few clicks of the mouse, dab the brush over the color blocks. Don't hold the cursor down to paint - this will appear unnatural. Feel free to switch colors liberally to exactly match the colors, shadows, and highlights of the original photo.
- Decrease the brush opacity up to 10% for smoothing transition areas, such as where the eyebrow touches the skin. Choose colors from both the skin and the brow to dab over this transition space. Due to the low opacity, any changes you make will be incremental and thus appear natural, so don't be afraid to dab the skin tone on the brow edge and vice versa.
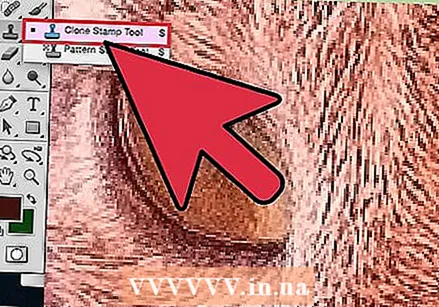 Use the rubber stamp / clone stamp tool in areas with a lot of detail. (eg eyes, teeth, insect wings.) As it is difficult to choose a color suitable for dabbing in these areas with a brush, we can compensate by using the rubber stamp to get an exact match of colors. The rubber stamp allows you to select an area of the image that you can literally stamp and replicate elsewhere in the image.
 - Click on the rubber / clone stamp while pressing the button Alt until the cursor changes to the crosshair. Select an area right next to a color block or other compression artifact, but avoid the color block. You don't want to highlight compression artifacts.
- Set the brush size to whatever is appropriate for dealing with the compression artifact - you probably want to stay between 1 and 10px. Set the "Hardness" to a value between 10 and 30% and "Opacity" to 30%. "Dep" again with a few mouse clicks to correct blocks that are the wrong color. Often re-select the area you want stamped (by holding down the alt key) as you move across the image.
- Reduce transparency for transition areas. Incorrect blocks of color sometimes interfere with the shape of the image (note that parts of the iris do not have a smooth rounded shape but are rather interrupted by protruding lines). You may need to dab to essentially redraw edges damaged by incorrect color blocks.
 Repeat your use of these tools until you are satisfied with the results. Regularly zoom out to 100% to view the results across your entire image.
 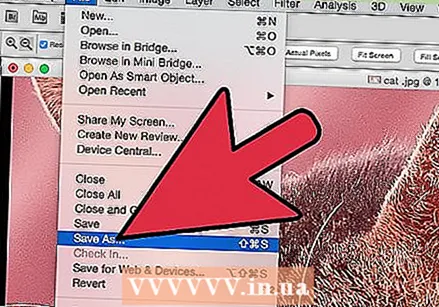 Save the image as a high quality JPEG or a PNG, which supports more colors. You don't want your efforts wasted with another round of compression.
 - In Photoshop, go to File Save for web and devices.
- Select "JPEG" from the drop-down menu and set the quality to a value between 80 and 100. Note: higher quality means larger file size.
- You can also select "PNG-24" to save your file as a PNG. PNGs are usually larger than JPEGs, but they do not compress the images very much.
Tips
- Don't be afraid to play around with brush and rubber stamp settings, especially if you're more experienced with Photoshop. If you're not happy with how something affected your image, change the settings.
- Photoshop history only stores a certain number of clicks in the past, and you make many clicks to fix your image. You can zoom out and see a big mistake made more clicks ago than Photoshop saved. To avoid this, take screenshots of your image regularly so you can always go back to those stages of your image if you're not happy with any change you've made. The screenshot button is located at the bottom of the history window. Scroll all the way to the top of the same panel to view all of your screenshots.
- When working with a photo, pay attention to the different colors that are present. A blue flower can have shades of blue, navy, green, purple, brown, etc., depending on the lighting, shadows and reflections. Do your best to include these colors as much as possible with a brush with little opacity. Consider switching to the Rubber Stamp tool if there are an overwhelming number of different colors in a small space.


