Author:
Sara Rhodes
Date Of Creation:
10 February 2021
Update Date:
1 July 2024

Content
- Steps
- Method 1 of 3: Adjustable table
- Method 2 of 3: Bedside Table
- Method 3 of 3: Floating Table
- Tips
- Warnings
- What do you need
Instead of buying a ready-made table, you can make it yourself and save more than one thousand rubles. If you need a spacious table of non-standard design, then you can make it yourself so that it will not differ from those made by professional carpenters. Measure the room, choose the look of the table, and make a table that fits in with your surroundings. If you have experience working with carpentry tools, and you have already done something for the home, then this work will not seem difficult to you.
Steps
Method 1 of 3: Adjustable table
- 1 Purchase the materials you need. You will need a piece of MDF or plywood measuring 120x50 centimeters, two adjustable wooden supports (they are easy to find in Ikea and similar stores), screws and paint. If the sheets are not cut to the correct size, then you will need a circular saw.
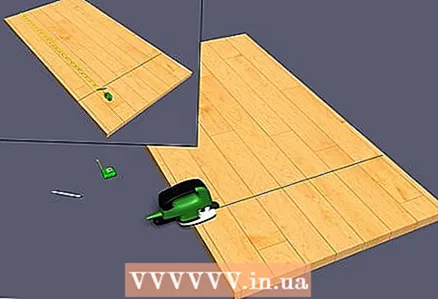 2 Saw the sheets with a circular saw. Take the necessary measurements and saw the wood sheets to the desired size. Do not forget the adage "Measure seven times, cut once."
 - You can cut holes for cables and wires in the worktop at your discretion.
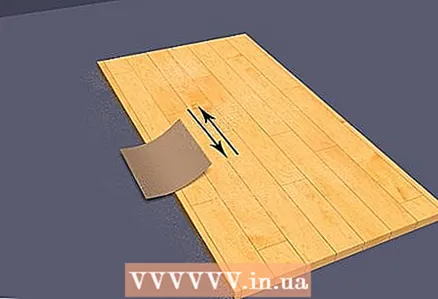 3 Sand the countertop. If you have not bought an already sanded sheet, then you need to sand it yourself. To save time, he might borrow a sander from someone. Wipe down the table after sanding.
 - If it is necessary to remove the top layer or restore the surface of the countertop, then use P40 sandpaper.
- To smooth uneven surfaces, use P80 sandpaper.
- For final sanding to prepare the surface for painting, use P360 sandpaper.
- 4 Paint the countertop. You can paint the table and legs with paint if you like. It can be painted both in the usual way and by spraying (which will be faster). Please note that only unpainted and not stained wood can be stained.
- The tabletop and legs can be painted in any color, but you should still choose a color that fits in with the environment.
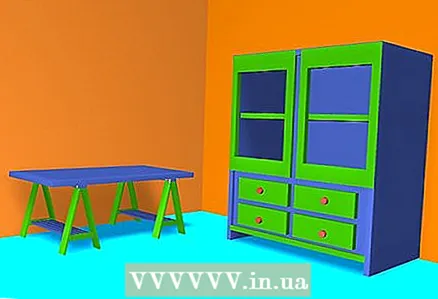
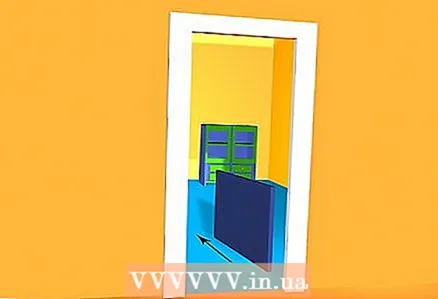 5 Bring the pieces of the table into the room. Bring the disassembled table into the room in which it will stand. This will save you the hassle of dragging the table through the doorway. Place the tabletop on supports, which should be approximately 10 centimeters from each edge of the tabletop. It is possible to level the table with a level, but in most situations this precision is not needed.
 - 6 Screw the tabletop to the supports. Using screws long enough, screw the tabletop to the legs, three screws (spaced evenly apart) per leg. If necessary, the table can be reinforced with metal corners.
 7 Final touches. Seal the heads of the screws or cover them with plugs. Add details as you see fit. Your new table is ready!
 - Thanks to the adjustable feet, the height of the table can be changed.
Method 2 of 3: Bedside Table
- 1 Purchase the materials you need. You will need: a side table or bedside table of the same height as the future table; MDF or plywood, the thickness of which is equal to or several centimeters greater than the thickness of the surface of the bedside table; legs (2 pieces, if it is the same height as the bedside table, or 4 pieces, if the table is of a different height). You will also need wood glue, screws, and corner brackets.
- The height of the legs and the bedside table must be the same. It is better to buy wooden legs so that if something happens they can be filed.
- 2 Saw out the tabletop to the correct size. Use a jigsaw or circular saw to cut the tabletop to the desired size. Then sand it down.
- 3 Paint the countertop. Paint the countertop with any color you like. Spray painting may be the fastest option.
- 4 Connect the legs. Attach the legs to the tabletop using self-tapping screws. They need to be attached only on one side, since the bedside table will play the role of legs on the other side.
- 5 Connect the table and bedside table. Lubricate the surface of the bedside table with wood glue and glue the countertop to the top of the countertop with the legless side.
- 6 Fasten the countertop and nightstand together. Use the corner brackets to secure the table top and cabinet together for added security.
- 7 Apply the final touches. The table can be painted or decorated in some other way. That's all!
Method 3 of 3: Floating Table
- 1 Purchase the materials you need. You will need: boards measuring 25x150x5 and 25x180x2.5 (centimeters) made of high-quality and light wood; glue for wood; self-tapping screws; three L-shaped staples. You will also need an irregularity detector and any paint / stain you want.
- 2 Prepare the boards. You will need two boards 150 centimeters long and two boards 12 centimeters long. The latter should be sawn from a board with dimensions 25x180x2.5.
- 3 Attach the top of the table to the wall. Using self-tapping screws and L-brackets, attach a 150 cm long board to the wall. For reliability, the brackets need to be attached to dense sections of the wall, the inhomogeneity detector will help to find them. Fasten the tabletop to the brackets with short self-tapping screws.
- 4 Attach the walls to the underside of the table. Glue and secure with self-tapping screws 12 centimeters long boards to the underside of the table.
- 5 Attach the bottom of the table to the table top. Apply glue to the upper ends of the walls, press the lower part of the table to the tabletop and connect them with self-tapping screws.
- 6 Let the glue dry. Press the bottom of the table against the table top until the glue dries.
- 7 Make the final touches. The table can be painted or other decorative elements can be added. Remember that a table can only support the weight of one monitor or laptop. Do not place a desktop computer on it.
Tips
- If you are using MDF or plywood and do not want to paint the table, then you can upholster it. Lay linen, denim or canvas on top of the table, turn the table upside down and lay it on the fabric. Pull the fabric over the edges and secure with a stapler. To give the finish a high-quality look, stick finishing studs around the perimeter.
Warnings
- Be careful when working with tools. Always wear safety glasses, gloves and clothing that protects your hands and feet.
What do you need
- Roulette;
- Door leaf or unnecessary, discarded boards;
- Wooden supports, legs;
- Coarse, medium and fine sandpaper;
- Grinder;
- Stain, paint on wood;
- Upholstery materials (optional);
- Circular Saw;
- Trestles for manual sawing of timber;
- Industrial vacuum cleaner;
- Cleaning material;
- L-shaped staples;
- Self-tapping screws;
- Protective gloves, glasses, clothing.


