Author:
Ellen Moore
Date Of Creation:
18 January 2021
Update Date:
1 July 2024
Content
- Steps
- Part 1 of 4: Designing the Table Model
- Part 2 of 4: Assembling the table top and support frame
- Part 3 of 4: Attaching the Feet
- Part 4 of 4: Sanding and tinting wood
- Tips
- Warnings
- What do you need
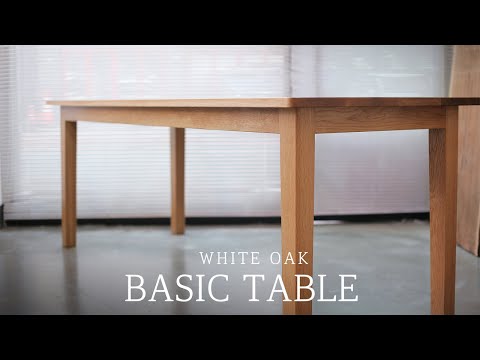
Making a table is a great simple project for the aspiring carpenter, but it can also be quite challenging for more experienced carpenters. The simplest table consists of a table top, legs and a support frame. With a little lumber for these elements, you can make a table to suit your needs.
Steps
Part 1 of 4: Designing the Table Model
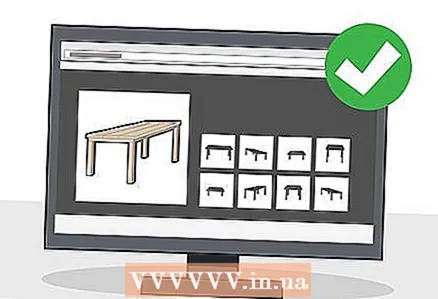 1 Check out the different table options to determine which table you want to build. There are so many different types of tables, so take some time to deliberately choose a specific project. Go online and look for pictures of the tables, paying attention to the style of each item. You can also find possible ideas in furniture catalogs and carpentry magazines.
 - Base your selection on your own needs, for example, consider what you will be using the new table for and how much room you have for it.
- Perhaps you need a large, rustic dining table. Or you want to make a small coffee table or an elegant bedside table.
"If you are an aspiring carpenter, the easiest place to start is with a side or coffee table."

Jeff Huynh
Craftsman Jeff Win is the general manager of Handyman Rescue Team, a full-service home maintenance and renovation company in Greater Seattle. Has been renovating for over five years. He holds a BA in Business Administration from California State University at San Francisco and a Certificate in Industrial Electronic Technology from the College of North Seattle.Jeff Huynh
Professional master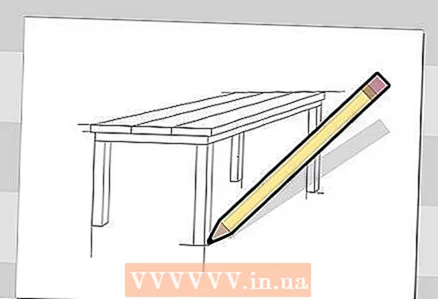 2 Sketch the table on paper. Use a pencil and ruler to draw your ideal table. Don't worry about the exact size just yet. Just imagine what your finished table should look like. Give it the features you need, and only then think about the sizes.
 - When the approximate design of the table is ready, mark it with the appropriate dimensions with a pencil. Check with hardware stores for the exact dimensions of the lumber you intend to use.
- The dimensions of the table will depend on the type of table. For example, a dining table is usually noticeably larger than a bedside table.
 3 Calculate how much lumber you need. Break down your table design into its constituent base elements. A simple table will have elements such as a table top, legs and a supporting frame that connects them. If you are planning to equip the table with additional elements, be sure to consider the materials for them too.
 - For example, try making a table with a tabletop made of three 5cm x 30cm boards 150cm long, legs made from four 10cm x 10cm timber 70cm long and a support frame made of two 5cm x 10cm boards and 75 cm long, as well as two boards with a section of 5 cm x 10 cm and a length of 145 cm.
- Purchase additional lumber for any additional items you want to add to your table. For example, you can add crossbars for the legs to increase the strength of the table or provide for sliding elements of the table top.
 4 To make a long lasting table, choose an inexpensive but reasonably strong wood like pine. Pine is not a particularly hard type of wood, but it is convenient for beginners to work with. From it, you can easily make a table that will last for decades. Also, durable tables are often made from solid maple and cherry.
 - Consider other options for inexpensive wood. For example, building quality fir can be used to make tables. Also, good furniture is obtained from poplar, but this wood is more difficult to tint with stain.
- For outdoor furniture, it is better to opt for mahogany, cypress or specially treated wood, such as pine, impregnated with preservatives under pressure.
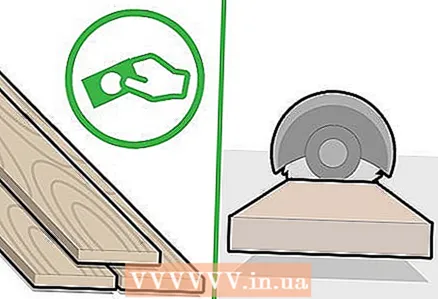 5 Buy lumber and cut it into pieces. When you know exactly what you need, go to the hardware store and buy lumber. Many stores can even cut materials to your size, so do not be lazy to ask about this service. This will reduce the amount of work to be done a bit so you can start assembling the table right away.
 - If you have a workbench, vise, circular or conventional hand saw, you can cut the wood yourself. Always wear polycarbonate safety goggles and a respirator when using the saw.
Part 2 of 4: Assembling the table top and support frame
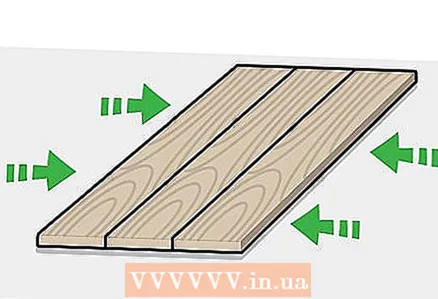 1 Lay the planks of the countertop on a flat surface side by side. Try to choose the most flat surface to work with so that the tabletop is flat. Select the right side of each countertop you are using. Lay all boards face down.Arrange the boards exactly as the table design you prepared suggests.
 - When making a large table, work on the floor. In order not to damage or scratch anything, the floor can be pre-covered with a sheet or tarpaulin.
- One of the ways to connect the boards to each other is butt joint on self-tapping screws. It is even easier to connect various structural elements to each other by locking the boards (through grooves and protrusions), but you can also fasten the parts on dowels if you know how to do this.
- Alternatively, you can make a solid wood worktop. However, this will be noticeably more expensive and somewhat more difficult due to the weight of the solid wood board. Consider using hardwood-faced construction plywood to save money.
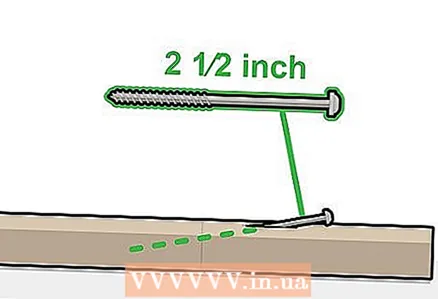
 2 Drill oblique basting holes for self-tapping screws in the boards of the table top to connect the edge of the outer board of the table top with the edge of the next (inner) board. The presence of basting holes will prevent the wood from cracking when you screw the screws into it. To make the basting holes, first measure the length of the countertop. Mark the holes about every 18 cm. You will need a fairly long wood drill bit (about 7.5 cm long and slightly smaller than the screws you will be using). Use it to drill oblique basting holes from the edge of one board to the edge of the other (from the outer board to the inner one) every 18 cm.
 - To make your work easier, you can use a special deep hole drilling machine. Simply adjust the drilling depth on it and drill the perfect basting holes at a specific angle to the wood surface. This machine reduces the risk that you will drill through the wood.
- It will also become noticeably easier to work if you first tighten the boards together with a vice.
- This is not the only way to connect the planks of the countertop. You can also first assemble the support frame and table legs, and then attach the tabletop boards directly to the support frame with self-tapping screws through the basting holes.
 3 Fasten the boards with self-tapping screws. Screw 6.5 cm long self-tapping screws into the basting holes.Use an electric drill to screw in the self-tapping screws to the very end. They will not lead to cracking of the wood and will securely hold the boards of the countertop together.
 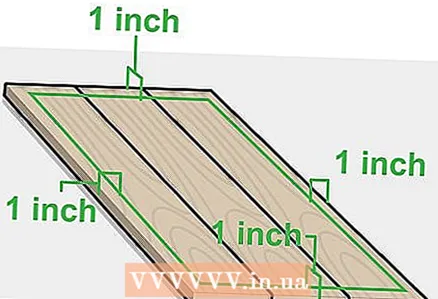 4 Mark the position of the support frame on the underside of the table top. The support frame is attached to the tabletop itself and table legs, preventing these parts from moving. From the edges of the tabletop, measure about 2.5 cm deep. Then, with a pencil, draw a line here that will indicate where the support frame is attached to the tabletop.
 - The presence of an indent of 2.5 cm will prevent such a situation when the support frame sticks out from under the table top. It also leaves a little more space under the table for free placement of legs between its legs and, in general, improves the appearance of the table.
- If you have not yet sawn wood for the support frame, to calculate the dimensions of its parts, use the dimensions of the tabletop (in length and in width), taking into account the required distance from the edge and the section of the boards used.
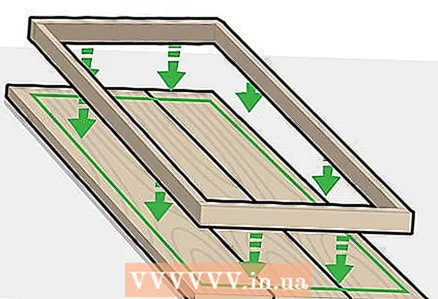 5 Glue the support frame to the worktop and clamp it in a vice. Set the details of the reference frame to the previously drawn lines. You will have two long pieces along the edges along the table and two short pieces across it (and inside the long pieces). Coat the inside of the pieces with an even coat of wood glue to secure them to the countertop. Secure the parts with a vise overnight so that they do not move.
 - You can also securely attach these parts to the countertop using self-tapping screws. In this case, use a deep hole drilling machine to pre-create the basting holes for the self-tapping screws.
- Alternatively, you can first attach the legs to the table and then connect them to the support frame using self-tapping screws. To make the legs stronger, you can additionally attach corner braces inside the support frame.
Part 3 of 4: Attaching the Feet
 1 Saw the legs of the required length from the bar. Fixing the legs is the most difficult operation in making a table. If you do not attach the legs well, you will not end up with a solid and reliable table, but a flimsy, unstable structure. Start by measuring the exact length of each leg and sawing off the corresponding pieces of the beams with the saw.
 - Even if you have the materials cut at the store, the parts may appear slightly uneven. Check their size before attaching the legs to the table.
- If you are making your own legs, first roughly cut the parts with a circular saw. Then fold the legs evenly, clamp them in a vice and, if necessary, trim to the same size.
 2 Glue the legs at the corners of the support frame. The legs must be positioned in the corners of the support frame, where its parts fit together. Apply adhesive in the corners to the inner side of the support frames and the underside of the countertop. Then place the legs in the corners and secure with a vise.
 - You can wait for the glue to dry, but this is not necessary. Just keep the legs securely in place with a vise so they don't move when you fix them with the screws.
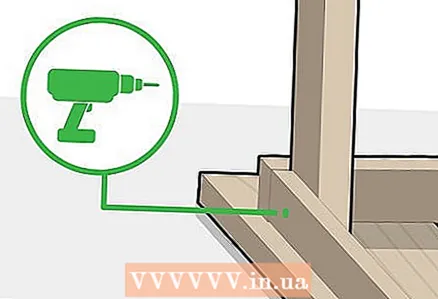 3 Drill basting holes in the support frame and table legs. The screws should be centered on each foot-to-support frame. Drill holes from the side of the support frame towards the leg. Use a drill with a diameter of about 6 mm (but thinner than the self-tapping screws used) to make the first basting hole in the wood of the leg. Repeat this on the other side of the reference frame. In total, you will have 8 basting holes.
 - If you want to additionally fasten the legs with crossbars, the process will be somewhat more complicated. You will need a circular saw to make grooves on each leg a little less than half the thickness of the bar. On each leg, it will be necessary to make 2 grooves (one on each side where the crossbars will be attached.
 4 Attach the table legs to the support frame with self-tapping screws. Use two self-tapping screws with a diameter of about 7 mm for each leg. Screw the screws through the support frame into the legs. Use a ratchet screwdriver for this.
 - Do not use a drill to screw in self-tapping screws. They can go very tight and accidentally break off.
- Make sure the legs are level and at right angles to the table top before screwing in the screws.
 5 Wait until the glue you used is completely dry and set. Read the manufacturer's instructions that came with the glue to find out how long you will have to wait. If you leave the table alone overnight, you can be sure that the glue will dry out. Usually the table can be turned into the correct position even earlier.
 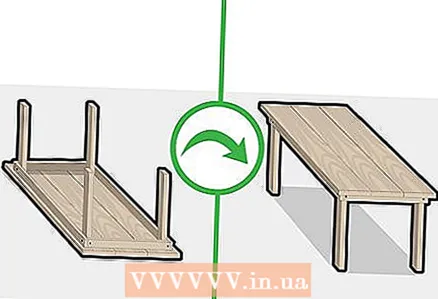 6 Turn the table over on its legs to check its stability. Turn the table over carefully. It can be pretty heavy! Place it on the floor and try to rock it. If the table is wobbling, it means that the legs are not perfect enough. Perhaps they are of different lengths - in this case, you will need to turn the table back and shorten the legs to the same length.
 - Although the legs can be cut with a circular saw or hacksaw, it is easy to make mistakes and shorten them too much. Instead, it is better to grind some of the feet down a little with 80-grit sandpaper and then sand them with 220-grit sandpaper.
- The position of the legs themselves can also create problems. Make sure they fit snugly against the table top and support frame. If necessary, unscrew the screws and correct the position of the legs.
Part 4 of 4: Sanding and tinting wood
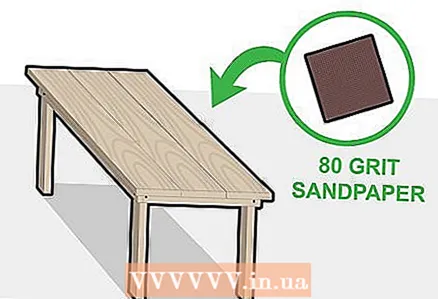 1 Sand the table with 80-grit sandpaper. This is a coarse sandpaper, so it will roughen the wood, which is perfectly normal. Just think about what the finished table will look like! If you look closely at the wood, you will notice the direction of its grain (lines).Sandpaper the entire surface of the wood in the direction of the grain (including the underside of the table and legs).
 - To make your job easier, use a belt sander. It is unlikely that it will leave any permanent defects on the surface of the table when you process your product with it just once.
- It is not necessary to sand the wood and tint it with wood stain. If you like the surface quality of the wood, leave it as is. You may just want to varnish it to protect it from moisture.
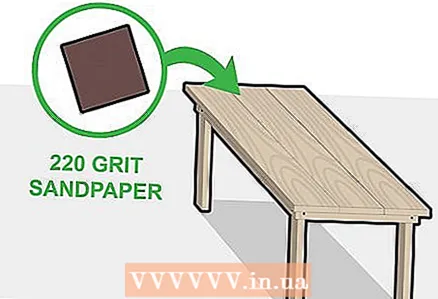 2 Use 220-grit sandpaper to finalize the table surface. A second time, use a fine-grained emery paper over the entire surface of the table. Be sure to work in the direction of the wood grain. Gently grind off any rough areas to prepare them for staining with the stain.
  3 Wipe down the table to remove any dirt from it. At this point, there will be a lot of ordinary dust and sawdust on the surface of your desk. Dampen a microfiber cloth or special dust cloth in lukewarm water. Wipe the entire table with it to remove dust, and wait for it to dry.
 - You might want to vacuum the table before wiping it down. Use the hose directly from the vacuum cleaner to collect as much dust as possible.
 4 Process the wood stain with a sponge brush or rag. Put on rubber gloves, open the stain and prepare according to the manufacturer's instructions. Then dampen a sponge brush or cloth with the stain. Paint the entire surface of the wood with the compound, working non-stop in the direction of the wood grain. Cover the entire table with stain, and then wipe off any excess with a rag.
 - Stains are different. Oil-based compositions penetrate well into wood and create a fairly long-lasting result. Water-soluble stains are easy to apply, but unevenly absorbed into the wood. Gel stains are thick enough and create a strong toning effect.
- To process wood with a high-quality stain, process only one side of the table at a time.
 5 When the first coat is dry, apply a second coat. Let the first coat dry overnight before painting the wood again. The first coat of stain is likely to look dull and uneven. Cover the table with another coat of stain just as you did before, then let it dry again. When you return to the table again, it should be ready.
 - Wipe off excess stain before leaving the table to dry. This will allow you to achieve a uniform toning effect without overly dark spots.
Tips
- Search the internet for table making diagrams. A variety of detailed diagrams can be downloaded free of charge or purchased for a small fee.
- Create the table you want! For the table, you can use not only different types of wood, but also other materials. For example, table legs can be made of pipes, and the table top itself can be made of metal or glass.
- When assembling wooden furniture, be sure to drill basting holes, especially in wood that is 2.5 cm or less, so that it does not crack.
- Consider recycling lumber. This may require more effort in designing and shading the table, but will often produce a more interesting final result.
- Fasten wood exclusively with self-tapping screws. Nails do not hold well and can lead to cracks. In addition, the screw will be easier to remove if you make a mistake.
Warnings
- Be careful when working with tools! Drill or other equipment can be quite dangerous if mishandled.
- Be sure to use protective equipment when working with tools. Wear ear plugs and goggles. Use a dust mask and do not wear long clothing that can get caught on tools.
- Many tinting products contain toxic substances that evaporate during work, so work with them with a respirator and with good ventilation.
What do you need
- 3 boards with a section of 5 cm x 30 cm and a length of 150 cm (for a tabletop)
- 4 pieces of timber with a section of 10 cm x 10 cm and a length of 70 cm (for table legs)
- 2 boards with a section of 5 cm x 10 cm and a length of 75 cm (for the transverse parts of the support frame)
- 2 boards with a section of 5 cm x 10 cm and a length of 145 cm (for the longitudinal parts of the support frame)
- Self-tapping screws with a length of 6.5 cm (for screed boards of a tabletop)
- Self-tapping screws with a thickness of about 7 mm (for secure fastening of table parts)
- Electric drill
- Screwdriver
- Deep hole drilling machine
- Vise
- Wood glue
- Pencil
- Microfiber cloth
- A circular saw
- 80-grit sandpaper
- 220 grit sandpaper
- Stain


