Author:
Janice Evans
Date Of Creation:
26 July 2021
Update Date:
1 July 2024
Content
- Steps
- Method 1 of 3: Pantyhose and Wire Filter
- Method 2 of 3: Hoop Filter
- Method 3 of 3: Filter from the coffee lid
- Tips
While listening to your favorite songs or podcasts, you can note the excellent sound quality that they use. You can try to record sound with a similar quality yourself, but it can be quite difficult to do without special equipment and technology. Fortunately, one important piece of such equipment, namely the pop filter, can be easily created from available tools. With this new filter, you can get rid of the annoying “P” and “B” popping sounds while recording.
Steps
Method 1 of 3: Pantyhose and Wire Filter
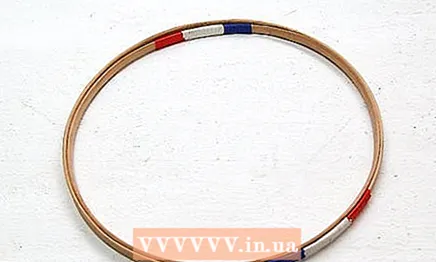
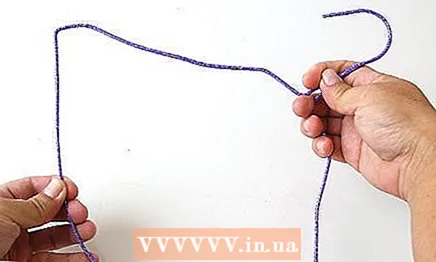 1 Shape the wire hanger into a circle. To do this, pull its lower part down, like a bowstring on a bow. You will get a square-shaped outline.
 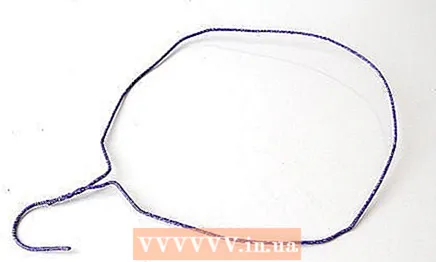 2 Bend all the straight portions of the path to create a more rounded shape, but it doesn't have to be perfect.
- If you are having difficulty bending the wire or it slips out of your hands, then you should use a pair of pliers. If you have a vise, you can clamp one part in it, and start bending the other until you get the desired shape.
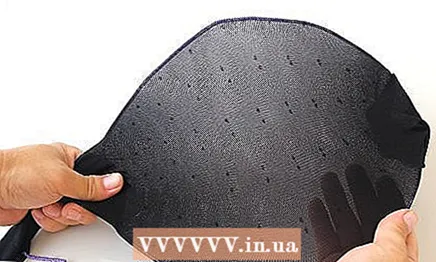 3 Pull the pantyhose over the resulting circumference. Pull them as tightly as possible to get a flat, springy surface like a drum. Gather the loose part of the pantyhose around the hook of the hanger. Secure it there using electrical tape or elastic so that the section of the stretched surface is held tightly.
  4 Place the filter directly in front of the microphone. The distance from the microphone should be 2.5-5 cm. The filter should not touch the microphone. It should sit directly between your mouth and microphone while recording. There are no “correct” installation methods here; all you have to do is place a new filter in front of the microphone. Here are some ideas on this topic!
 - If you want, you can straighten the hanger hook and bend it again around the microphone stand, below the microphone itself. If necessary, bend the wire so that the filter is at the desired point in front of the microphone.
- Use a clip to secure the filter to the stand. You can get small, cheap clips at most hardware stores.
- Tape the filter to another stand and place it in front of the first one on which the microphone is installed.
- Keep in mind that some microphones are designed to pick up sound into the head and others into the front. The filter should be placed directly in front of the recording surface of the microphone.
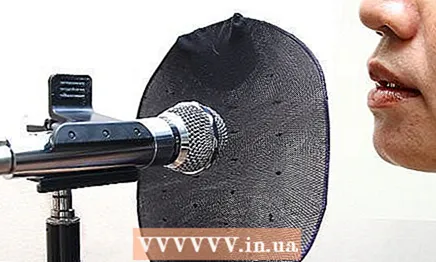 5 Speak or sing into the microphone through the filter. You are now ready to record. Turn on your recording equipment and stand or sit with the filter between you and the microphone. Your mouth should be 5 cm from the filter. Break a leg!
 - Hear how “P”, “B”, “S” and “H” sound on the recording. If the audio levels are adjusted correctly, you should not hear “clipping”.If you remove the filter now, you will end up with a record with many defects. On the Internet, you will find many semi-technical guides on clipping (and how to avoid it!)
Method 2 of 3: Hoop Filter
 1 Get a hoop.
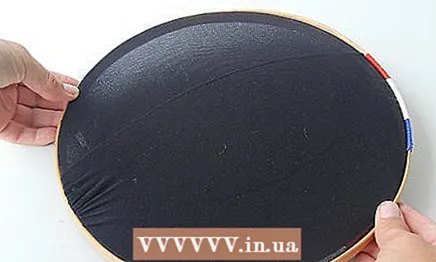 2 Hoop the nylon fabric over the hoop. An embroidery hoop is a simple metal and / or plastic hoop that holds a piece of fabric for sewing or embroidery purposes. Any size hoop can be used, but it is best to choose the same diameter as most pop filters, which is 15 cm.
 - Embroidery hoops usually have a simple snap on one side. They ensure that the fabric is secured to the inside of the hoop at the expense of the parts that extend beyond it. Place the inner hoop in the outer hoop and slide the latch to secure the fabric taut. Read our hoop article for more guidance.
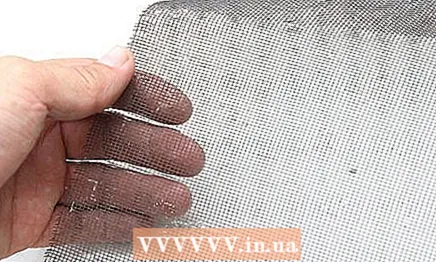 3 Alternatively, you can use the material from which the mesh for windows and doors is made. It may seem counterintuitive, but in practice tougher materials tend to provide better pop filtering. If you have a metal or plastic mosquito net that is used on windows and doors, you can safely use it. Just hoop it over the hoop like a regular embroidery fabric.
 - Door nets are available at most major hardware stores. It's cheap, but you will likely need to buy a whole roll of this material instead of the little scrap you really need.
 4 Place the embroidery frame in front of the microphone. Now all that remains to be done is to place the resulting pop filter in the work area. As with the above method, you can attach it to a free microphone stand using tape, glue, or a clip. You can also attach this filter to a stick or curved wire hanger and place it in front of the microphone.
 - As usual, sing or speak through the filter into the microphone. With this method, you can get a filter with a thickness of only one layer, but it should be so. It should work just as well.
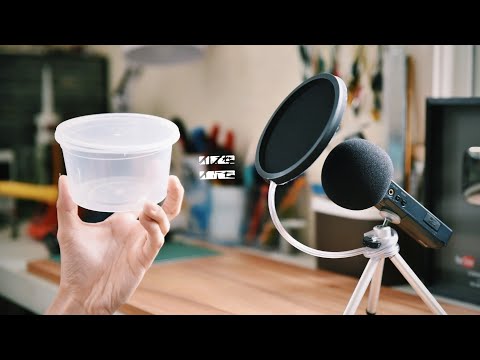
Method 3 of 3: Filter from the coffee lid
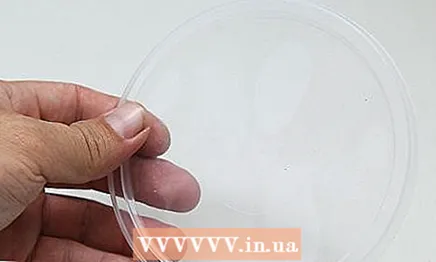 1 Take the plastic lid from the large coffee can. In this method, we will consider the creation of a frame for a fabric from the cover, which will act as a filter. You can use different sizes of lids, but it is best to use a 15 cm diameter.
 - Hard plastic covers work best. Bendable lids are not well suited for this purpose.
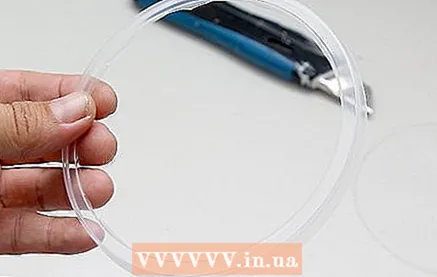 2 Cut out the middle of the lid, leaving only the rim. Use a pair of scissors or a utility knife to cut out the entire center of the lid. You should end up with a hard plastic rim. Remove the cut out center part of the cover.
 - For too rigid plastic caps, you may need to use a drill, an awl, or even a saw to mark the hole for the primary cut. Be very careful when using these tools. Wear a tight pair of work gloves and safety goggles.
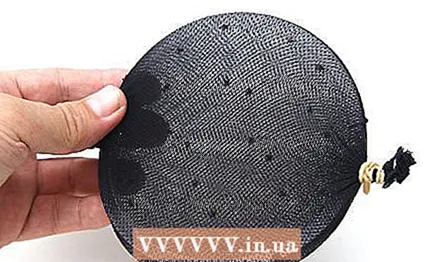 3 Pull pantyhose or nylon fabric over the cut hole. Now that you have a stiff plastic rim, all that is left to do is stretch the layer of porous fabric. Tights are a great option. Simply pull them over the rim, collect any slack and secure with elastic or duct tape.
 - You can also use embroidery canvas or window fabric as in the previous method, but this will be more difficult. You can use clamps, clips, or duct tape to secure these materials securely enough.
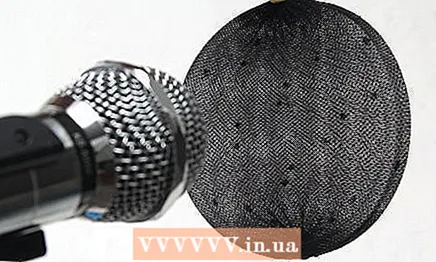 4 Use the filter as mentioned earlier. Your pop filter is now ready to use. Use electrical tape or clamps to secure the filter in the desired position in front of the microphone, as in the above methods.
Tips
- Some sources recommend using the sock-over microphone technique as a simple alternative to the pop filter. The opinion of experts on this issue is divided: some argue that this does not give any result, while others note a decrease in the amount of "clipping" and other defects.
- Plastic ties are a reliable and affordable tool for securing the filter in position. In case of unsuccessful fastening, you will need to have a knife or scissors on hand to cut the tie and try again.
- Speaking or singing into the microphone from the side of the microphone (as opposed to the “frontal”) can also help reduce the “clipping” on the sounds of “P”, “B”, etc.


