Author:
Mark Sanchez
Date Of Creation:
3 January 2021
Update Date:
29 June 2024
Content
- Steps
- Method 1 of 3: Ball Fountain
- Method 2 of 3: Flowerpot Fountain
- Method 3 of 3: Watering can fountain
- Tips
- Warnings
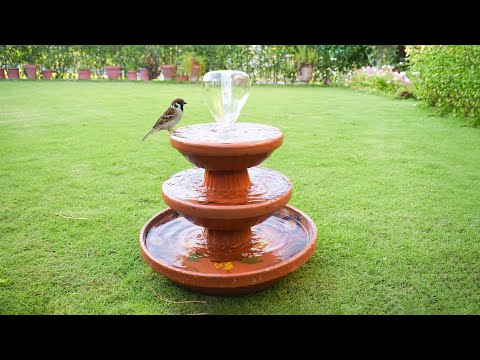
A garden fountain is a great source of relaxing noise in your garden, and it will also give it a professional, picture-like look. Besides, making a garden fountain is not difficult and not expensive! Below you will find three different versions, all cheap, everything can be done in a day. Just start at step 1 below, or browse the content above to see options.
Steps
Method 1 of 3: Ball Fountain
 1 Make a base. Take a 20 liter barrel bucket and cut a hole in the bottom for 3/4 of the PVC pipe. Turn the bucket upside down and insert a 61 cm PVC pipe into the hole, leaving about 15 cm of space at the bottom. Use silicone or caulking compound to seal up any gaps. Place this structure on a large piece of thin plywood, and then place a 30 cm wide layer of concrete in the center, forming a pipe around the bucket. This is your base mold, and it will be filled with quick-setting concrete. Pour it over until at least 5cm is covering the bucket, then stir to remove any bubbles. Let it cure according to the manufacturer's instructions.
  2 Make a ball. Take a glass ball for a lamp, spray the inside with non-stick spray, and then fill it with concrete up to the top. Wrap the end of the PVC pipe and push the wrapped end into the center of the ball so that it is firmly pressed against the glass. Wrap it where the concrete hardens.
  3 Break the forms. Break both pieces out of their shapes, use a flexible saw to cut off the excess pipe.
  4 Make a tank. Dig a shallow hole large enough to accommodate a plastic garden pool. Fill it partially with river stones, set the pump at 380-590 liters per hour and cover it with a layer of stones.
 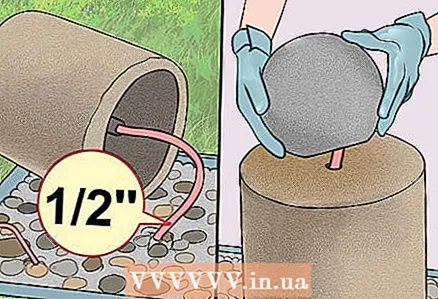 5 Insert pipes. Run 1/2-inch vinyl tubing from the pump and, leaving the base aside, up through the PVC tubing. Put the base in place, then pass the tube through the ball.
  6 Cut the tube and secure the ball. Cut off the excess tubing that is protruding from the balloon, then remove it and trim the tubing so that it almost reaches the edge of the balloon. Put the ball back in place and this time secure it with silicone glue.
 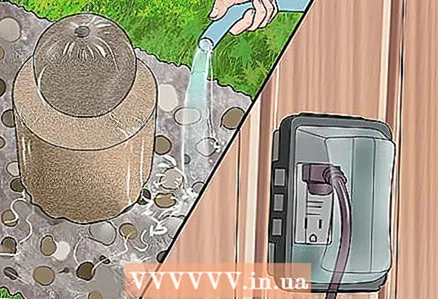 7 Add water and turn on the pump. Pour water into your pool and start pumping. Ta-dam! Your garden fountain is ready!
Method 2 of 3: Flowerpot Fountain
 1 Prepare the base. Take a large flower pot and drill a hole with a ceramic drill just large enough to insert the power cord. Use silicone or sugra to seal the hole as you pull the cord. Make sure it is safe and waterproof. Cover the entire interior with a waterproof sealant to protect the pot.
  2 Cut and attach the tube. You will need a 2.5 / 5 cm rubber tube cut 2.5 cm or slightly higher than your pot.
  3 Place the next pot. You will need to find another flower pot, but a little smaller this time.Its hole should be the size of the base of the first one, and reach about 2/3 of the first pot in height. Use a file to groove the edge of the pot, then drill a hole in the center of the bottom large enough to slide a 2.5 / 5cm rubber tube through. Place this pot inside the first one upside down while pulling the tube through the hole.
  4 Continue installing the pots. Set up another large pot using the bottom as a base. You will also have to drill a hole in it for the tube. Continue placing the pots in the same way until it looks like 3 nested pots. Don't forget the pipe hole in the bottom and the grooves on the rim of the two inverted pots.
  5 Add water and turn on the pump. Ta-dam! Your garden fountain is ready!
Method 3 of 3: Watering can fountain
 1 Get your materials ready. You will need a bucket with a drain pipe, a watering can, and a large metal barrel. You will also need a pump, 2.5 / 5 cm tubing, a wooden wedge, something to drill or punch through metal, and silicone or sugra.
  2 Make a base. Punch a 2.5 / 5cm hole in the side of the metal barrel and run the tubes through it. Attach them to the pump and then seal the hole with suction and / or silicone so that it does not leak water.
 - This hole should be punched very close to the bottom of the barrel.
 3 Make a connection. Make a similar 2.5 / 5cm hole in the side of the bucket, pull the end of the tubing through it so that the tubing ends in the bucket, and seal the hole in the same way you did the barrel.
  4 Arrange containers. Place containers on steps, slats, or boxes so that the water from the bucket drain tube flows into the watering can and from the watering can pours into the barrel. To pour from the watering can, you need to put a wedge under it.
  5 Add water and turn on the pump. TA-dah! Your garden fountain is ready! You can insert the chain as many buckets and watering cans as you like.
Tips
- In the summer months, heat and sun can cause water to evaporate quickly. Check the water level in your fountain regularly.
- If you decide to make a sunny garden, there are special kits for this.
- Place an old nylon stocking over the pump to protect it from dirt.
Warnings
- Do not allow the pump to dry out as this may damage it.
- Don't use chlorine. Fountain pumps are not designed to handle high chlorine concentrations.


