Author:
Clyde Lopez
Date Of Creation:
23 June 2021
Update Date:
1 July 2024
Content
- Steps
- Method 1 of 3: Skype on Windows 10
- Method 2 of 3: Skype Classic on macOS and Windows 8.1
- Method 3 of 3: Skype for the web
This article will show you how to make a user an administrator in a Skype group chat. To give a user administrator rights, you yourself must have them.
Steps
Method 1 of 3: Skype on Windows 10
 1 Start Skype. To do this, open the Start menu (Windows logo in the lower left corner of the screen) and select Skype from the list of applications.
 - If you are not automatically signed in to your account, enter your credentials and click Sign In.
 2 Select a group chat under the Recent tab in the left panel.
- If there will not be a single group correspondence, find it using the search bar at the top of the program.
 3 Click on the list of group members at the top of the chat window. This will display a list of users in the group.
  4 Click on the user you want to make an administrator to open their profile.
 5 Find his username under the word "Skype" on the right side of the profile window. Since you will soon have to enter this username, write it down if the name is difficult to remember.
  6 Return to the group chat. This can be done by clicking on the arrow in the upper left corner of the profile window.
  7 Enter / setrole username> MASTER. Replace “username>” with the username of the new administrator.
  8 Click on ↵ Enter. The selected user will now become the group administrator.
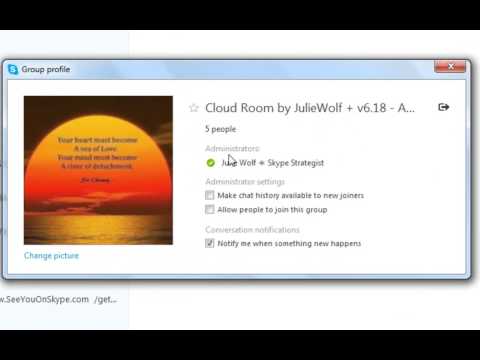
 - To display a list of all administrators, click on the group name at the top of the conversation.
- To add an administrator, repeat the entire process with a different group member.
Method 2 of 3: Skype Classic on macOS and Windows 8.1
 1 Start Skype. It's a blue icon with a white S. On Windows, this application can be found in the Start menu. On a Mac, in the Dock at the bottom of the screen or in the Applications folder.
 - If you are not automatically signed in, enter your credentials and click Sign In.
 2 Click the Recent tab in the left pane.
 3 Select a group chat. Group chats are indicated in the panel on the left.
  4 Click on the list of chat participants at the top of the chat window, immediately below the group name and the number of participants. This will display a list of group members.
 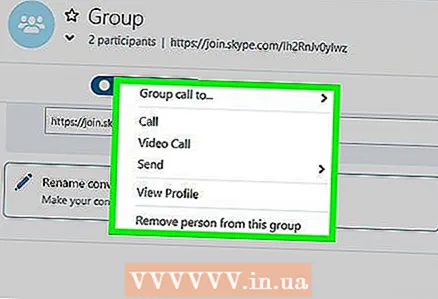 5 Right-click the user you want to be an administrator. If your mouse does not have a right button, hold down the Ctrl key and left-click.
 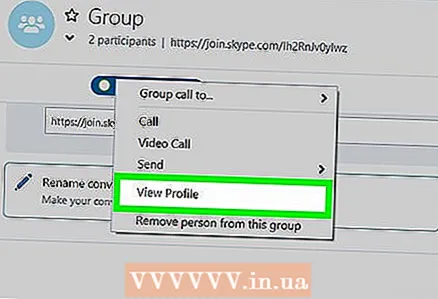 6 Click on Open Profile.
 7 Right-click on the Skype username. It is listed next to the word Skype.
  8 Select Copy. The user's login will be copied to the clipboard.
  9 Close the profile window. This can be done by clicking on the "X" in the upper right corner of the profile window. After that, you will be returned to the group chat.
  10 Enter / setrole username> MASTER. Replace “username>” with the username of the new administrator.
 - Enter / setrole and press the space bar once.
- Click on Ctrl+V (Windows) or ⌘ Cmd+V (macOS) to insert your username, then press the space bar once.
- Enter MASTER.
 11 Click on ↵ Enter (Windows) or ⏎ Return (macOS). The selected user will become the group administrator.
 - To display a list of administrators, click on the group name at the top of the conversation.
- To add an administrator, repeat the entire process with a different group member.
Method 3 of 3: Skype for the web
 1 Enter https://web.skype.com into the address bar of the browser. You can use any modern web browser to access Skype, such as Safari, Chrome, or Firefox.
 - If you are on the login screen, log into your account. Enter your Skype username, click Next, and then enter your password. Click Sign In.
 2 Select a group. The group can be found in the left pane of Skype. If the group is not here, click on the Search Skype field and enter a name for the group. The group can then be selected from the search results.
  3 Click on the group name at the top of the group window. This will display a list of the current members of the group.
  4 Click on the name of the person you want to add. A menu will then appear.
  5 Click on Open Profile.
 6 Copy the username. It is listed under the phrase "Login in Skype" approximately in the middle of the profile window. To do this, highlight its name with the mouse or touch panel, then press Ctrl+C (Windows) or ⌘ Cmd+C (macOS) to copy it.
  7 Enter / setrole username> MASTER. Replace “username>” with the username of the new administrator.
 - Enter / setrole and press the space bar once.
- Click on Ctrl+V (Windows) or ⌘ Cmd+V (macOS) to insert your username, then press the space bar once.
- Enter MASTER.
 8 Click on ↵ Enter (Windows) or ⏎ Return (macOS). The selected user will become the group administrator.
 - To display a list of administrators, click on the group name at the top of the chat window.
- To add an administrator, repeat the entire process with a different group member.


