Author:
Eric Farmer
Date Of Creation:
11 March 2021
Update Date:
1 July 2024
Content
- Steps
- Method 1 of 3: Braided 3-strand bracelet
- Method 2 of 3: Braided four-strand bracelet
- Method 3 of 3: Other Braided Bracelets
- Tips
- Warnings
- What do you need
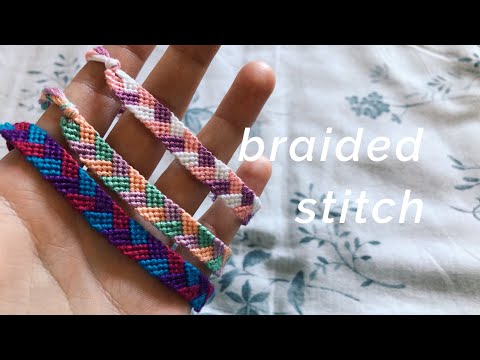
Woven bracelets can add a twist to any outfit and are fun and easy to make. They are a great alternative to the more expensive woven bracelets available in stores. You can make a variety of braided bracelets using a different number of strands or adding beads or other decorative elements to them. If you want to know how you can make braided bracelets, follow the steps below.
Steps
Method 1 of 3: Braided 3-strand bracelet
 1 Tie together three strands of yarn of different colors. Tie a knot at their ends from above, stepping back about 2.5 cm from the edge. Find three different colors that go well with each other. For example, red, white and yellow. If you take two very similar colors, for example, dark blue and purple, then the colors will merge.
 - You should measure out the strands long enough to wrap around your wrist at least twice. Longer strands will make the bracelet easier to weave. You can cut off the excess after weaving the bracelet.
- You can also use colored threads instead of yarn to weave the bracelet.
 2 Cross the right strand over the center strand. Now the center strand will become the right strand. So, in our case, the red strand on the right becomes the center strand, and the white center strand becomes the right strand.
 - You can fix the initial end of the bracelet weaving by clamping it between the fingers of your free hand, glue it with tape, or even pin it to any surface.
 3 Cross the left strand over the center strand. Now the left yellow strand becomes the center strand and the red center strand becomes the left one. Weave the bracelet as if you were braiding your hair.
 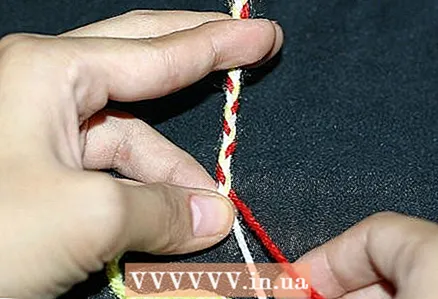 4 Repeat steps 2-3 until you have braided the entire bracelet.The bracelet should wrap comfortably around your wrist. When you decide on the length of the bracelet, tie a knot and leave behind 2.5 cm of thread so that you can then tie the ends of the bracelet.
Method 2 of 3: Braided four-strand bracelet
 1 Select threads. For a braided four-strand bracelet, it is best to take two strands of the same color and two strands of a different color. But you can also use 4 different colors or even one color. Find a color combination that you like, such as blue and purple.
 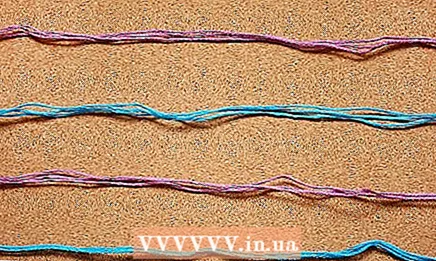 2 Measure out the thread sections. In our case, you will need to fold two strands of three strands of blue and two strands of three strands of purple. Measure the strings from wrist to elbow. This length will be comfortable for braiding. In addition, it will be enough to tie the ends of the finished bracelet.
  3 Secure the strands at one end. You can tape them to the table or pin them to the fabric. You should tie the strands so that two strands of the same color are in the middle, and two strands of a different color are on the sides. In our case, the two blue spinners are in the center, and the purple ones are on the sides.
  4 Cross the side strands onto the center strands. Cross the left purple strand with the left cyan strand and the right purple strand with the right cyan strand. The purple strands should also be superimposed on each other. Now the side strands are blue, and the center strands are purple.
  5 Cross the side strands over the center strands again. Cross the left blue strand with the left purple, and cross the right blue strand with the right purple. These two strands should also cross over each other.
  6 Repeat steps 4-5 until you finish weaving the bracelet. Continue crossing the side strands with the center strands, alternating colors until you have braided the entire length of the bracelet. Wrap it around your wrist to determine where it should end. It may be slightly longer than the girth of your wrist.
 - When you tie your bracelet, you should be able to put it on and off freely, unless you want to constantly tie and untie it when you need to put it on or take it off.
- 7 Tie the ends of the bracelet. When you finish weaving the bracelet, tie a large knot in the right place and cut off the ends, leaving about 2.5 cm behind which you can knit the bracelet.
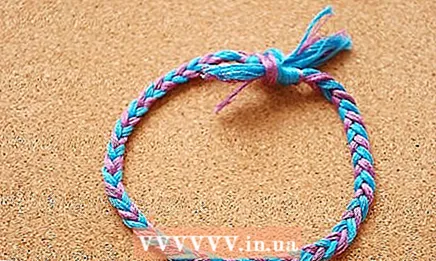 8 Enjoy your new bracelet. Wrap it around your wrist and start showing it off to others.
Method 3 of 3: Other Braided Bracelets
 1 Make a braided beaded bracelet. This fun catchy bracelet will require you to weave a cotton thread and add beads to it.
  2 Make a knotted braided bracelet. To get such a bracelet, you will need to wrap the third strand with two strands.
 - 3 Make a braided paper bracelet. To make this bracelet, simply braid three wide strips of paper instead of strands.
- 4 Make a braided bracelet with an insert. To make such a bracelet, start weaving it with three strands, and then add two more strands to the work.
Tips
- Secure your work to the table with tape or a heavy object.
Warnings
- Don't run with scissors.
What do you need
- Yarn
- Scissors
- Scotch


