Author:
Christy White
Date Of Creation:
3 May 2021
Update Date:
1 July 2024

Content
- To step
- Part 1 of 3: Buy wallpaper
- Part 2 of 3: Prepare the walls
- Part 3 of 3: Wallpapering
- Tips
- Necessities
Wallpaper has been used to brighten and complete living spaces since the 16th century and is still a great way to bring a little more life to a room. Wallpaper comes in all kinds of colors, styles and textures and can make children's rooms just that little bit lighter, but also provide peace in your living room. You can easily wallpaper a room in a weekend and in this article you will learn how to buy wallpaper, how to prepare a wall and how to work quickly and neatly when wallpapering.
To step
Part 1 of 3: Buy wallpaper
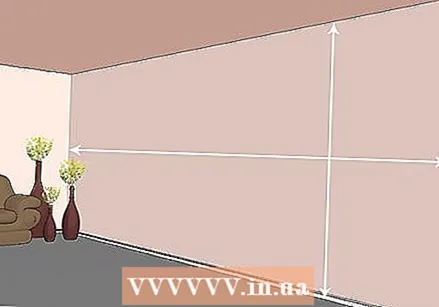 Determine how much wallpaper you need for the room. Use a tape measure to measure the height and width of all the walls in the room.
 - If the walls are square, you can add the heights of the walls and then multiply them by the total width of the walls.
- Check how much wallpaper is on each roll in the store and divide the number of meters you need by this number to find out how many rolls you need. Always buy a little more than you need; when wallpapering you will also have to ensure that patterns match.
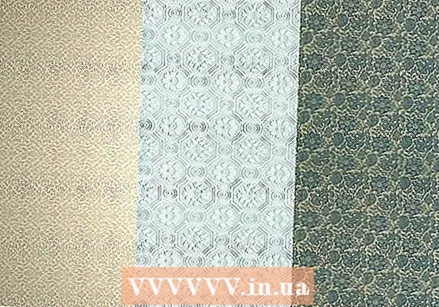 Choose the right texture for the room. Wallpaper is made of different materials and when choosing the texture you have to take all kinds of things into account. Consider, for example, what function the room has and how well you can handle wallpaper. One wallpaper is easier to hang than the other and as a beginner it is better to go for slightly easier wallpaper.
 - Vinyl wallpaper is the most common and is easy to hang and remove. The back of the wallpaper consists of a light type of canvas that is water resistant and suitable for all kinds of rooms. You can also use it for the bedroom, but also the bathroom or kitchen. This type of wallpaper is often pretreated with glue, making it easy to hang.
- Embossed wallpaper has a certain structure and pattern, which makes it easy to disguise unevenness in walls. You can also paint it and the wallpaper is pretreated with glue, so you can hang it up easily and enjoy it for years to come.
- Textile wallpaper is more difficult to hang because you will have to lubricate it with glue yourself. This takes more time, but also gives you more control over the end product. Flocked wallpaper has an extra layer, giving the paper a more luxurious look that resembles leather or velvet, for example. This wallpaper looks nice, but is difficult to keep clean.
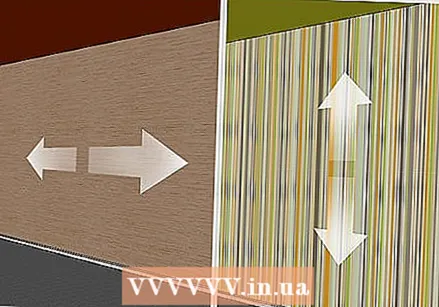 Choose the right pattern for the room. Although it takes a little longer to hang, wallpaper with a certain pattern can give the room something unique. If you want to buy wallpaper with a specific pattern, make sure that the patterns from different roles match. Wallpaper with a pattern can also make the room look bigger.
 - Use horizontal patterns if you want to make the room appear wider. If you have a long, but not that wide room, it is better to use horizontal patterns. In rooms that are slightly skewed, wallpaper with a pattern can emphasize this imperfection.
- Use vertical patterns to make the room appear higher. If you have low ceilings, choose wallpaper with a vertical pattern to make the room appear higher.
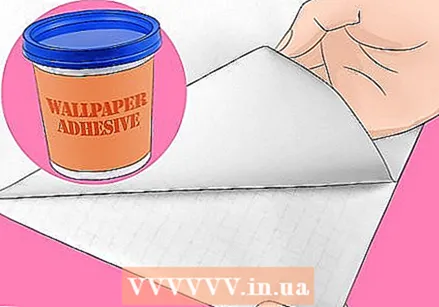 Choose between normal and pre-glued wallpaper. In general, pre-glued wallpaper is a wise choice because it is easier to hang. You simply roll out the wallpaper, cut it to the right size, remove the layer of paper on the back and stick it to the wall. Wallpaper that is not pre-glued requires a little more effort.
 - Pre-glued wallpaper works like a sticker, as it were. You remove the paper layer on the back and can attach the wallpaper to the wall. Some variants of this wallpaper have to be moistened with water before you can hang it.
- Dry wallpaper is slightly more complicated to hang because you have to glue the wallpaper yourself. This type of wallpaper is often more beautiful and is therefore slightly more expensive, but you will spend more time attaching the paper and you will probably not be able to do this on your own.
Part 2 of 3: Prepare the walls
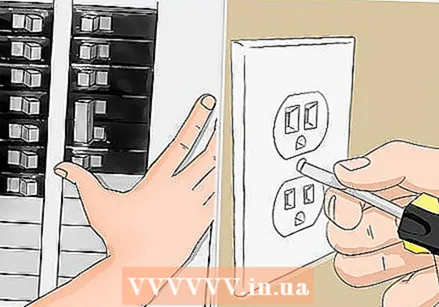 Turn off the electricity and remove power strips with a screwdriver. To protect both the wiring and yourself, it is best to remove it so that you do not have to wallpaper around it. Cover the wires with pieces of tape to make sure that they do not come into contact with wallpaper glue, for example.
 - You need water to make the wallpaper glue, so it is necessary to switch off the electricity. This will prevent you from accidentally being electrically powered or damaging the power strips or wiring.
 If necessary, remove the old wallpaper. Start pulling the current wallpaper off the walls to see what type of wall covering you are dealing with. Pre-glued wallpaper is a lot easier to remove than dry wallpaper. Be careful and remove as much of the current wallpaper as possible.
 - Keep in mind that removing the old wallpaper often takes quite some time. In some cases this takes longer than applying new wallpaper. So don't think you'll be done in a few hours; then the final time will probably disappoint you.
- Old wallpaper is often more difficult to remove and in some cases it is best to use a belt sander for this. Make sure that you do not sand away layers of the wall yourself.
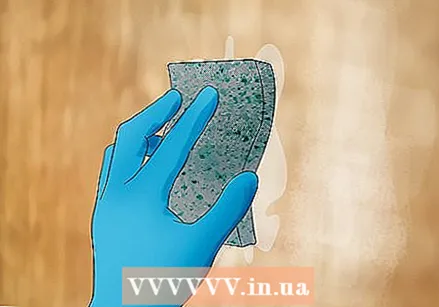 Clean the walls well. Use a normal cleaning agent for this, let the walls dry thoroughly and then check that there is no mold on the walls. It is extremely important to remove mold first and then hang up new wallpaper. If you don't do this, the fungus will also penetrate into your new wallpaper. Remove mold with a mixture of 2 cups (0.5 liters) of bleach and 4 liters of water.
 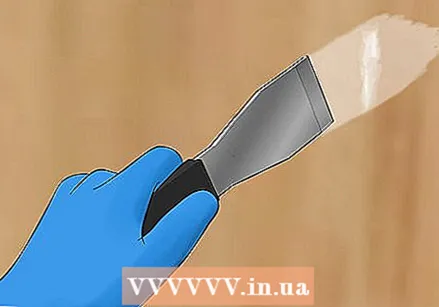 Make sure the wall is nice and flat. Now that you have the chance, it is best to make sure that the wall is nice and flat before you start wallpapering. Remove any bumps or other imperfections with a putty knife or sandpaper. Fill in holes with filler and give it plenty of time to dry.
 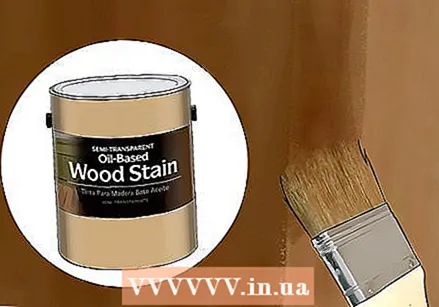 Treat the walls with paint or glue. Coat the walls with a special pre-treating paint or an extra layer of wallpaper glue. Some walls absorb the glue, as it were, so that wallpaper that is applied to an untreated wall will quickly come down again. You can prevent this by treating the wall and giving the wallpaper a solid adhesive layer.
Part 3 of 3: Wallpapering
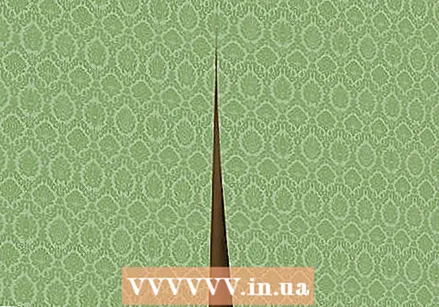
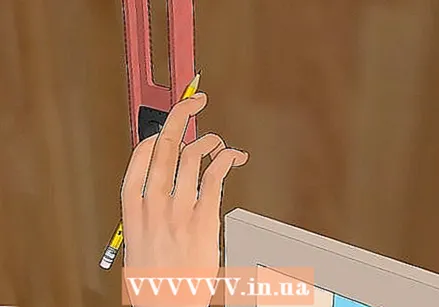 Draw exactly what you plan to do on the wall. Measure a distance from the door of the room that is 5 centimeters shorter than the width of the wallpaper. Mark this spot with a pencil. Use a spirit level to draw a vertical line from the ceiling to the floor where your pencil mark is. This line is your starting point for wallpapering.
 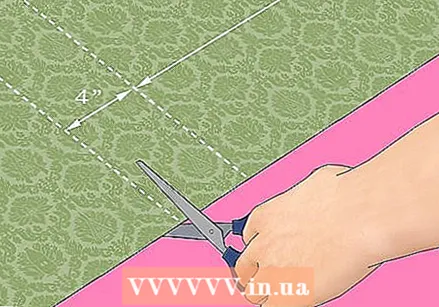 Always cut a strip of wallpaper about 10 centimeters longer than the wall is high. Coat the back of the paper with wallpaper glue or, if using pre-glued wallpaper, follow the seller's instructions. You can cut your wallpaper to size, but scissors make wallpapering a lot easier.
 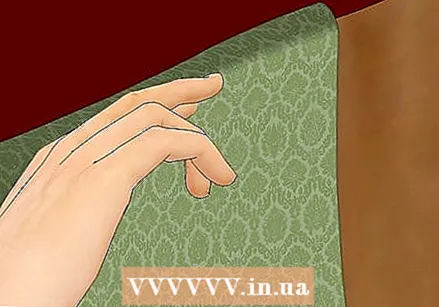 Stick the strip of wallpaper along the line you drew on the wall. Start at the ceiling and let about 5 centimeters of wallpaper protrude above the wall. Press the paper firmly against the wall to attach it here.
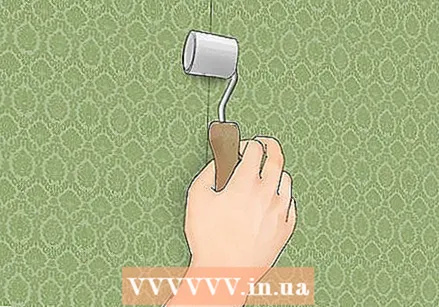
 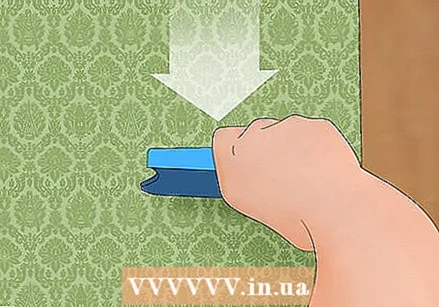 Use a wallpaper brush to press the paper flat against the wall. To properly wallpaper a room, you will have to get wrinkles and bumps out of the wallpaper as well as possible. Place your brush in the center of the paper and move it outward to push out any air from under the wallpaper.
 - If there is a fold or crease in the paper, put a sheet of paper under the wallpaper and carefully slide it to the crease. Now slowly pull it to the side to pull the wrinkle away, as it were.
 Continue wallpapering in this way and make sure that the patterns match up. First hold the wallpaper next to the strip that is already attached to the wall and then cut it to the right size.
 - Cut the strips at the top and bottom of each strip of wallpaper. Be careful not to tear the wallpaper and rather do not use scissors, but a Stanley knife to cut the wallpaper exactly at the transition from the wall to the ceiling.
 Use a wallpaper roller to press the edges of the wallpaper even more. When you wallpaper a room, you want to make sure you have used enough glue so that the wallpaper doesn't come back down in no time. To prevent this, it is wise to press the edges even more by using a wallpaper roller. However, do not press too hard, as you are not supposed to press the glue under the wallpaper.
 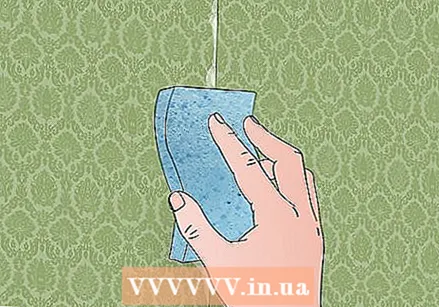 Clean the edges. Leave the wallpaper alone for 15 minutes, then use a wet sponge to remove any excess glue. Then check the edges of the wallpaper again to remove any last blobs of glue.
Tips
- If it is the first time that you wallpaper, choose wallpaper with a pattern that connects easily.
Necessities
- Wallpaper
- Screwdriver
- Tape
- Filler
- Putty knife
- Fine sandpaper
- Water
- Turned out
- Cleaning agent
- Stain remover / primer
- Paintbrush
- Measuring tape
- Calculator
- Pencil
- Level
- Wallpaper glue
- Wallpaper brush
- Creasing knife
- Wallpaper roller
- Sponge


