Author:
Carl Weaver
Date Of Creation:
23 February 2021
Update Date:
1 July 2024
Content
- Method 2 of 3: Shoebox piggy bank
- Method 3 of 3: Gift Box Wedding Piggy Bank
- What do you need
- Piggy bank from food container
- Piggy bank from a shoe box
- Wedding piggy bank
- Empty the contents of the container.
- Wash and wipe it from the inside.
 2 Take the lid of the container and place it on the cutting board with the inside facing up. Make sure the lid is firmly in place against the cutting board.
 - Find the largest coin (five rubles). Use a coin to determine the size of the slot on the lid and mark it with a permanent marker or regular felt-tip pen.
3 Make a coin slot in the lid. Take a craft knife and cut a coin slot along the mark you made earlier. - Be very careful when using a DIY knife, as it is a very sharp cutting tool. If the project is done by children, do this step for them.
4 Check for the correct slot size. Check the size of the resulting slot by inserting the same coin through it. - If the notch is small, carefully use a DIY knife to enlarge it.
5 Measure the container. Take a measuring tape and measure the container so you can wrap it with a piece of cloth or paper of the right size. - Measure the perimeter (or circumference) of the container. Write down your measurement by adding a couple of centimeters of overlap allowance.
- Measure the height of the container and write it down.
 6 Choose the paper or fabric you will use to cover the container. Then your regular food container will turn into an attractive and completely unique piggy bank.
 - Pick or cut a piece of cloth or paper large enough to wrap around the container.
- Place the paper or cloth face down on your work surface.
7 Draw a rectangle on the fabric or paper using the measurements you took from the container. Take a ruler and use it to draw a rectangle of the appropriate length and height. - Do not forget that the length of the rectangle must be equal to the perimeter of the container, including the allowance.
8 Cut out a rectangle. When your rectangle is drawn on fabric or paper, cut it out along the lines. - Then wrap the cut-out piece of fabric around the container to make sure it is sized correctly again. If it turns out to be too large, trim it off a little. If it is too small, cut a new larger rectangle out of paper or fabric.
9 Decorate the rectangle with decorative lettering and designs of your choice. Before sticking a paper or cloth rectangle onto a container, place it face up in front of you and write some writing or drawing on it. - Spreading fabric or paper on a countertop makes it much easier to write and draw on it than if it is already glued to the container.
10 Cover the container with a prepared rectangle made of cloth or paper. When you finish painting and decorating the rectangle with drawings, turn it over with the wrong side up. - Lubricate the wrong side with a thin layer of glue.
- Slowly and carefully wrap the cloth or paper around the container, straightening any wrinkles as you go.
- If you did everything correctly, then the edges of the rectangle should overlap perfectly. If this does not happen and the plastic container itself is visible between the edges of the material, seal the protruding strip of plastic with tape, colored paper or some other suitable decoration.
 11 Complete your piggy bank with decorative elements. When the piggy bank is covered with paper or cloth, you can add some decorations if you wish.
 - At this stage, you can attach buttons, ribbons, beads, and so on to the piggy bank. If the selected decorative elements are too heavy, ordinary glue will not fix them. In this case, use hot glue.
12 Close the container with a lid. Now you need to return the cover with a slot for coins to its rightful place. - When all the glue is dry, your piggy bank is ready to use.
Method 2 of 3: Shoebox piggy bank
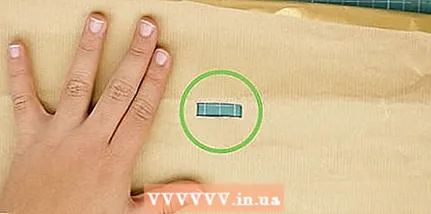
- 1 Draw a coin slot on the box. Take the lid of the shoe box and, using the largest coin (five rubles), draw the outlines of a rectangle that the coin can pass through.
- Depending on your personal preference, you might want to paint the slot not on the lid, but on one of the long sides of the box.
- 2 Cut a slit. Take a craft knife (the jagged edges will remain from the scissors) and cut out the rectangle you have drawn.
- If the project is done by a child, do this part of the work for him.
- 3 Measure the box. You will need to know the parameters of the box in order to cut out pieces of fabric or paper of a suitable size for pasting the piggy bank.
- Take a ruler and measure the length, width, and height of the box and its lid. Record your measurements.
- Use a ruler to measure the length and width of the top side of the box lid. Then measure the height of the lid, double it, and add it to the length and width measurements. Write down the numbers you received.
- 4 Cut out pieces of fabric or paper to cover the box. Lay fabric or paper face down on a flat surface. Take a ruler and draw the outlines of all four sides of the box and its lid on the material according to the available measurements.
- Cut out the rectangles. If necessary, you can label each detail to avoid confusion and to know exactly which side of the box it belongs to.
 5 Paste the lid over the box and re-cut the sealed coin slot in it. When the lid of the box is covered with cloth or paper, flip it upside down and place it on a flat surface.
 - Using a craft knife, cut out the piece of paper or fabric covering the slot.
- If the project is carried out by a child, do this operation for him.
- 6 Decorate the material with which you are going to paste over the box. Before pasting the box, decorate the previously cut fabric or paper blanks.
- You can put any inscriptions and drawings on the material.
- You can also use ribbons, buttons, rhinestones and other decorative materials to decorate. If the slot of the piggy bank is uneven, just cover it with tape to hide the flaws.
- Wait until the glue is completely dry, securing all the decorations in place, and only then proceed to the next step.
- 7 Cover the box with prepared cloth or paper. Lightly coat the back of each prepared piece of paper or fabric with a thin layer of glue.
- Place each piece on the corresponding side of the box and spread it out.
- When you paste over the lid of the box, the allowance made is folded over the sides of the lid so that they also appear to be pasted over.
- Wait for the glue to dry. Put the lid on the box and start using the piggy bank!
Method 3 of 3: Gift Box Wedding Piggy Bank
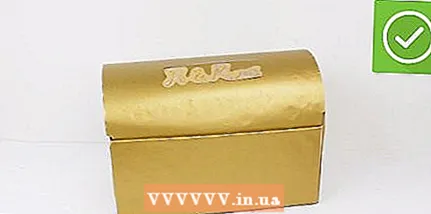
- 1 Find the right gift boxes. Gift boxes are a better material for making a piggy bank, so they can be used to make a wedding piggy bank - a box into which wedding guests will put cash gifts, cards and gift cards for the newlyweds. The design of the wedding piggy bank looks like a tied wedding cake or a stack of gifts.
- Choose three gift boxes (or as many as you like). The boxes can be round or square. It depends on your desire or on the theme of the wedding banquet.
- The size of the boxes should gradually decrease from large to small so that the boxes can be stacked in a pyramid.
- 2 Make a slot either on the side or lid of the top box, or on the side of the middle box. In this case, the choice of the box is made at your personal discretion. The slot on the top box is more visible, while the slot on the larger middle box can be made larger.
- The specific location of the slot depends on the chosen method of decorating the future piggy bank, as well as on where it will look more appropriate.
- Use a ruler and marker to draw the outline of a rectangular slot on the side or lid of the top box, or on the side of the middle box.The rectangle should be elongated, but wide and long enough for envelopes to fit easily into a slot of this size.
- Carefully cut a rectangle along the lines you marked. To do this, you need a craft knife. It is better to give preference to this particular tool, since the scissors will leave behind the jagged edges of the cuts.
- 3 Measure the boxes. Use a ruler and measure the length, width and height of each gift box.
- Write down all your measurements.
- 4 Cut rectangles out of fabric or decorative paper to glue the sides of the boxes. Place the paper or cloth face down on a flat surface and take your measurement sheet.
- Draw rectangles on the material with the same parameters as the sides of the boxes. Sign them if necessary to avoid confusion. Cut out the details.
- 5 Cover the boxes with cloth or paper. Apply a thin layer of glue to the back of each cutout and glue the corresponding sides of the box.
- When the glue is dry, take a knife and cut off the fabric or paper that has sealed it from the slot in one of the boxes. If the cut is uneven, tape over the edges.
- 6 Decorate your wedding piggy bank. To add the finishing touches to your piggy bank, decorate the boxes with ribbons, lace, tulle and other decorative elements.
- Place a simple phrase under the slot, such as "Thank you!" or "Ekaterina and Roman, 2016".
 7 Complete the final assembly of the piggy bank. Place the largest box in the base, the middle box on top, and the smallest box on top.
 - Glue the boxes together with glue.
- You can also tie the entire stack of boxes with a wide, elegant ribbon and tie a bow on top to make the piggy bank look like a stack of gifts.
- Place the wedding piggy bank on the table where guests will put their gifts. Those who will give monetary gifts to the newlyweds will be able to lower them directly into the piggy bank through the slot.
What do you need
Piggy bank from food container
- Clean empty food container with lid
- Large coin (five rubles)
- Tape measure
- Ruler
- Pencil or marker
- DIY knife
- Glue
- Decorative paper or fabric
- Decorations (buttons, ribbons, rhinestones and so on)
Piggy bank from a shoe box
- Shoe box
- Big coin (five rubles)
- Ruler
- Pencil or marker
- Scissors
- Glue
- Decorative paper or fabric
- Decorations (buttons, ribbons, rhinestones and so on)
Wedding piggy bank
- Round or square gift boxes in several sizes
- Decorative paper or fabric
- Pencil or marker
- DIY knife
- Ruler
- Glue
- Additional decorations (ribbons, tulle, and so on)


