
Content
Sharpening the claws is necessary and natural for cats. At the same time, the claws are cleaned and sharpened. The cat will do this regardless of the value of the environment in your home. If you want to distract her attention from the furniture, it is important to provide her with a scratching post. Every time a cat is not there to sharpen its claws, just take it and place it on the scratching post so that it understands its purpose.
If you have a large house, first and second floors, and your cat spends time in different rooms of the house, it's a good idea to have a few scratching posts and place them strategically around the house. In order to save the budget, it is really not difficult to make your own cat scratching post for much less money compared to purchased ones. Moreover, you can make a scratching post from old unnecessary materials.
Steps
 1 Decide on the size of the scratching post before starting work. The base must be stable, if the scratching post constantly falls, the cat may decide that it is not suitable for her. The scratching post shown in the photo is 71 cm high, and the base is 45x30 cm. The scratching post should be at least the length of a cat plus a few centimeters to take into account the ability to stretch.
 - All wooden parts will be hidden, but as a precaution, you can lightly sand them with sandpaper. Sometimes you will find large chips that need to be removed.
 2 For a post, take a 12x12 cm bar or two 6x12 cm bars fastened together. Cut the timber to the required length and set aside for a while.
 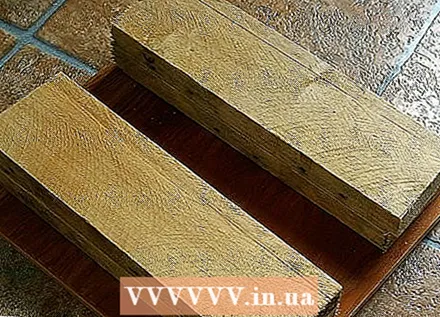 3 Make a base. There are 2 layers at the base of this model. The first layer is made of three boards with a cross section of 6x15 cm and a length of 30 cm, lying side by side. Cut two 6x15cm pieces of board across the width of the first base layer (45cm).
 - Place the two cut-out pieces of board on top of the first base layer, perpendicular to it and parallel to each other.
- Fasten the top and bottom layers of the base with wood screws. You will have a heavy, solid foundation.
 4 Cover the base with the material of your choice that the cat will tear at (something like carpet). You can buy a cheap rug for this. Natural rope (sisal) is also fine, but it will take time to be carefully tightly wound and glued securely. It is ideal to use a furniture gun for making scratching posts, but you can also take nails and buttons with flat heads.
 - Nails or buttons must be driven flush with the upholstery material. Avoid leaving anything sticking out, as this can catch the cat's claw. Pull out what has not been properly seated and re-hammer.
- When using a furniture gun, press it firmly against the surface so that the staples enter the material all the way.
- If you decide to use natural rope, use non-toxic glue. Sometimes the cat may just start licking the rope.
 5Place a pre-prepared block between the planks of the second layer of the base and screw with self-tapping screws
  6 Cover the log with claw-grinding material and secure it in the same way as described for the upholstery of the base.
 7 Attach a favorite cat toy, or something dangling and seductive to the top of the scratching post, to get the cat interested in the new scratching post. In the above photo, you can see a bright dangling rope that the cat must attack.
 - If you want to double your cat's pleasure, attach old brush heads to the scratching post at cat's eye level. They are ideal for scratching your cat. For even more enjoyment, rub the catnip thoroughly over the fabric. Your cat will love it!
Method 1 of 1: Alternative Method
 1 Make sure the scratching board is completely dry. If you start working with a wet bar, then later it will dry out and shrink, and the rope will not hold tight to it.
  2 Wear work gloves. Nail the end of the rope onto the top of the block (use at least 4 nails).
  3 Wrap the rope tightly around the bar all the way to the bottom. The tension should be as much as possible, there should be no gaps between the winding loops. When you get to the end, nail the rope again (use at least 4 nails).
  4 Nail the base to the wrapped block with nails. Make sure there are no sharp nails sticking out anywhere and the base won't splinter.
  5 Provide a ready-made scratching post for the cat's delight!
Tips
- Old materials can be found everywhere! Ask neighbors or friends (those who do not have pets at home). You can ask the carpet dealers if they have any unnecessary scraps.
- You can pick up unnecessary materials at any construction site! Just ask permission first, and always be careful when visiting construction sites.
- Rubbing the scratching post with catnip makes it more attractive to the cat.
- Even cats with removed claws feel the need to "scratch" objects, so they will love the scratching post too.
Warnings
- Wear safety goggles and gloves. Accidents happen when you don't expect them, but they can be prevented.
- It's great to use an old rug, just make sure it comes from a pet-free home. The odor of an unfamiliar animal can scare a cat away from the scratching post, or worse, it can make it mark.
- Make sure paper clips, screws, and other fasteners are not sticking out. The likelihood that the cat will get hurt by them is small, but it is better to take precautions, and besides, you want your work to be done perfectly clean.
- When adding a dangling play element to the scratching post, make sure it is not too long or tangled. A cat can be in danger if it gets confused and there is no one to help it free.
What do you need
- A beam with a section of 12x12 cm or two fastened beams with a section of 6x12 cm
- Boards with a section of 6x15 cm or similar.
- Wood screws
- Paper clips, buttons, nails or similar
- A hammer
- Saw
- Screwdriver
- Durable carpet
- Protective glasses
- Work gloves
Alternative method
- Column 75 cm long and 10 cm in diameter
- Packing of unoiled natural rope (1 cm diameter)
- A piece of thick plywood 40x40 cm
- Nails 1.5 cm long (minimum 8 pcs.).
- Four long nails for securing the post to the base


