Author:
Mark Sanchez
Date Of Creation:
8 January 2021
Update Date:
2 July 2024

Content
- Method 2 of 4: Select Photos
- Method 3 of 4: Positioning Photos
- Method 4 of 4: Create an Electronic Collage
- What do you need
- Photo collages are most often created for the holidays or as gifts. For example, you can create it to celebrate Mother's Day, Anniversary, Bachelorette Party, Children's Party, Graduation, Birthday, or Christmas. Many collages created for these occasions include photographs and decorations that are themed for those holidays.
- Photo collages can also be made to remind you of a memorable occasion, such as a vacation or family reunion. In these cases, the choice of photographs should be limited only by the scope of the event.
- You can also make a collage as an art project. In this case, there are fewer restrictions, but you still have to follow the same line if you want to submit your work for an art competition.
 2 Choose a topic. Usually a topic is tied to a specific event, but if there is no such event when creating your work, then you should spend more energy on creating a thematically related collage.
 - Photo collages are a great way to preserve and show memorable moments for people. You can choose a theme that shows similar memories to your friends or family.
- A photo collage can reflect both your life and the life of another person.
- From the perspective of an artist or photojournalist, a photo collage can be used to showcase something significant - a place or an event.For example, an artist can create a collage of photographs that illustrate the beauty of a natural habitat. On the other hand, a photojournalist can create a collage that illustrates the harsh conditions of people living in poverty.
 3 Get creative when it comes to form and design. You can choose a simple rectangular design or change the shapes for more artistic ones.
 - For a fun collage, you can choose an unpretentious shape like a heart or an asterisk.
- For more serious work, choose a complex shape, arrange the photos in the form of an oval face. For added impact, each photo can be tinted slightly to match the colors better with your chosen design.
 4 Think about where you will present your collage. Depending on the location of the collage, you should think about its size and shape.
 - If you want to hang the collage in your office or other similar place, try to keep the collage small and simple.
- For a collage that will hang in the center of an event, choose a modest design, but make it larger so the photos can be easily seen.
- If the collage is going to be used as a model for an art project or photojournalism, you should make it large in size and interesting in design.
Method 2 of 4: Select Photos
 1 Think about how many photos you need. The number of photos is usually determined by the purpose, size and design of your collage.
 - A small, personal collage created for decorative purposes should be small and include no more than 10 images.
- A large collage with a simple design can contain anywhere from one to two dozen photographs.
- A large collage with a complex design will require more photos. The more complex the collage you create, the more photos you will need.
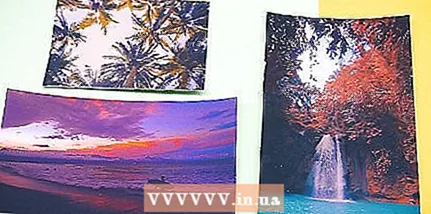
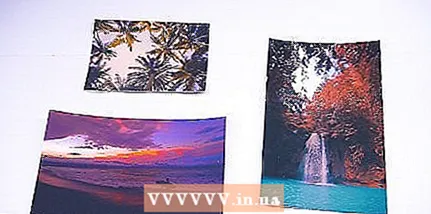
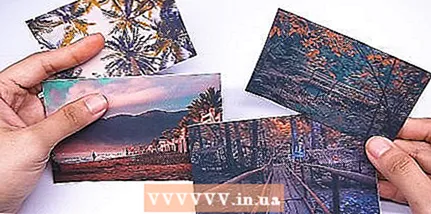
- 2 Select photos that are relevant to your topic. This step seems simple and straightforward, but it assumes that all the photos you select will be fully consistent with the theme. Choose only the photos that suit you, not just the ones that you like.
- This process is usually straightforward when the topic chosen is related to a particular vacation or love relationship.
- This can be a difficult process when the chosen topic is abstract, such as the beauty of nature or humans. When you are dealing with an abstract theme, you need to understand whether each photo fits the theme, and whether each photo fits the theme enough to blend in with other images.
 3 Limit your choice of image quality. A good photo collage should contain only high quality pictures. Filter out any photos that appear blurry, as well as those that have red-eye or major imperfections.
 - Note that some of the flaws can be corrected on the computer. If you have a photo that you really want to include in a collage, but there are small defects in it, try removing them on your computer to determine if the photo can be saved.
 4 Consider the size and shape of your photos. Since most photographs can be enlarged or reduced, this usually presents a small problem. You should consider what can happen to the photo quality after resizing.
 - A large, detailed photograph can lose a few details if you reduce it too much.
- Small photos may become blurry if enlarged.
- The shape and position of the photographs can also play a role in the selection. Many collages contain both horizontal and vertical photographs, but you must choose the optimal balance between the position of the images.
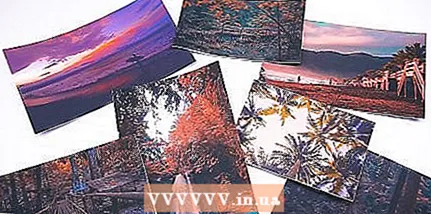
 5 Select spare photos. Choose more photos than you need. From the selected photographs, select the ones that you will use and those that you leave just in case.
 - When you arrange all the photos, you may notice that some of the photos do not fit the topic or do not fit into the big picture. Replace them with spare shots.
Method 3 of 4: Positioning Photos
- 1 Arrange photos before gluing. Before sticking photos, arrange them against your background. If you start glueing your photos thoughtlessly, you can make a mistake that can be difficult to fix.
- If you're worried about your photos flying around, find a way to temporarily pin them. Take a piece of double-sided tape or double-fold regular tape to secure the images.
 2 Choose a suitable background. If the arrangement of the photos allows you to choose a background, make sure it matches the theme.
 - Plain colors are usually suitable for any theme and occasion, but you need to make sure these colors work together. You can use holiday or seasonal colors for seasonal collages. On the other hand, if a certain color is present in most photographs, you can choose a background color that is the same shade.
- 3 If necessary, replace the photographs with spare ones. If you understand that the selected photo is not suitable for this collage, replace it with another one from the spare list.
- There are many reasons why a photo may not work: size, content, color, or general appearance.
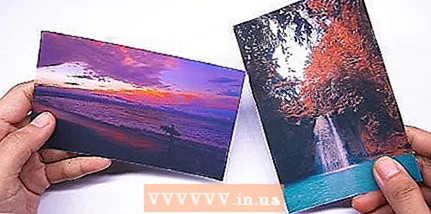
- 4 Cut, crop and resize photos as needed. You don't have to use the photos as they are. Together, cut them out to fit your collage.
- Cut out the parts of the photos that are not suitable for your collage. You can also resize the photos to fit better in the collage.
- You can cut out photos in different shapes: oval, heart, circle, or star.
- 5 Take a look at the general view before approving the design. Step back and take a look at the finished collage before you paste the photos.
- Pay attention to the details. Ask yourself if they fit your original vision. See what parts can be improved.
- Consider taking a photo of your collage. This will allow you to see it in a new light and from a new angle. Plus, it will also allow you to see how things were arranged in case your work was disrupted before you glue everything together.
- 6 Glue the photos in their places. Spread a thin layer of glue on the back of each photo and then gently glue them onto the collage.
- Do not use a lot of glue, as this can create wrinkles, bubbles and bumps.
- Start gluing the photos to the bottom of the collage and then work your way up to the top.
- After the glue is dry, check each photo. If any image seems to be poorly glued, add some glue to the back of the photo.
- Apply sealant as needed. You can use an art sealant or make a paste with one part glue and four parts water. Mix well and apply the sealant all over the collage using a sponge.
- 7 Add decorative elements. You can add themed decorations to the finished collage to develop the theme. Potential decorations:
- Edge
- Stickers
- Stamps
- Autographs of those shown in the photo
- Seashells or other small trinkets
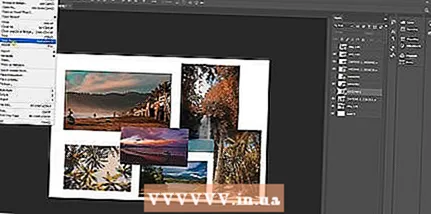
Method 4 of 4: Create an Electronic Collage
 1 Choose between your current photo editor and dedicated collage software. There are pros and cons to both options, so think carefully before making your final decision.
 - Basic photo editing software is often sufficient if you plan on creating simple collages, but it may not provide the right set of tools needed to create more complex collages.
- If you use software that you already own, you can save on costs.You can find some programs for free, but additional quality add-ons to them can be quite expensive.
- Making a collage with basic photo editing software can be a time consuming process.
- Collage software often comes with templates and tools that make collage creation easier.
 2 Read the manual for your software. Each program you can use has its own tools, so you will need to look for usage guides to learn how to use them effectively.
 - Start by looking for help files in the training material for the program.
- If you don't find anything in the files, search the Internet. Training can be in text form, in pictures and in video. Search until you find the best for yourself.
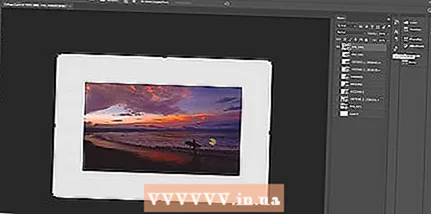
- 3 Rotate, cut and resize photos as you wish. Regardless of the software you choose to use, you must know how to accomplish these three basic tasks.
- Knowing how to rotate photos will allow you to rotate and flip images as needed to fit your collage.
- If you know how to resize photos, then you can properly resize photos.
- If you know how to crop photos, you can cut off unnecessary parts or parts that interfere with the balance of the collage.
 4 Save different versions of the collage at different stages. Many programs allow you to undo your changes if you decide later that you don't like them. But just in case, it helps to preserve your collage every time you feel satisfied with the progress. This way, you can revert to an earlier version if you decide that you don't like the latest changes made to your collage.
 - Saving will also help you avoid losing your job.
 5 Print your collage on high quality paper. The quality of your collage is highly dependent on the quality of the paper you are printing it on. Standard printer paper is too light and will give a bad effect. Consider using cardboard or photo paper.
 - You should also use a good printer to maintain color depth and saturation.
What do you need
- Photos
- Scotch
- Scissors
- Background paper
- Glue
- Cardboard or photo paper
- Good printer
- Photo Editing Software


