Author:
Roger Morrison
Date Of Creation:
1 September 2021
Update Date:
1 July 2024

Content
- To step
- Part 1 of 3: Making a color wheel
- Part 2 of 3: Using the Newton wheel
- Part 3 of 3: Understanding the theory behind it
- Tips
- Warnings
- Necessities
We can thank Isaac Newton for giving the modern world more insight into the nature of light and the rainbow. In one experiment, he used two prisms to split a beam of white light into its colored components, then reassemble them into a beam of white light. An easier way to show how the different colors come together to form white light is with the Newton disc. This disc can be made by making a color wheel and spinning it very quickly.
To step
Part 1 of 3: Making a color wheel
 Gather the materials you will need for the project. You will need a standard sheet of printer paper, an equal size piece of cardboard, glue, tape, scissors, hole punch, ruler, HB pencil and something to color with. Choose the last thing you prefer. For example, you can choose to color your disc with crayons, markers, colored pencils or paint. You need all the colors of the rainbow: red, orange, yellow, green, blue, indigo and violet.
 - Alternatively, you could choose to search online for a color wheel that you can print. Search for "color wheel" or "printable color wheel" with your browser.
 Cut the sheet of paper and cardstock into even-sized circles. For this you can make something round with a pencil, use a compass, or print an image of a circle. Although it does not matter what size circle you use, it is best to use a circle that easily fits in a standard sheet of A4. The larger the circle, the more difficult it will be to create the disk's effects.
  Glue the paper to the cardboard. If you printed a color wheel, make sure to glue it colored side up. Let the glue dry completely before moving on to the next step.
  Divide the circle into seven equal triangles. Use the ruler and pencil to draw the lines on the circle. Think about this step as if you were "splitting a cake." You make a color wheel.
 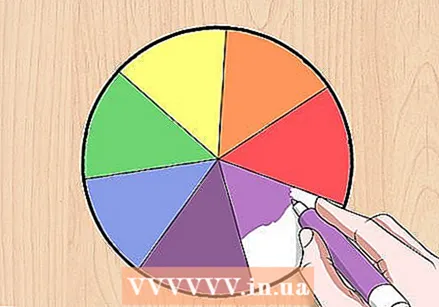 Give each of the seven segments a different color. Start at the top of the circle and work clockwise. Color the segments in this order: red, orange, yellow, green, blue, indigo, and violet.
Part 2 of 3: Using the Newton wheel
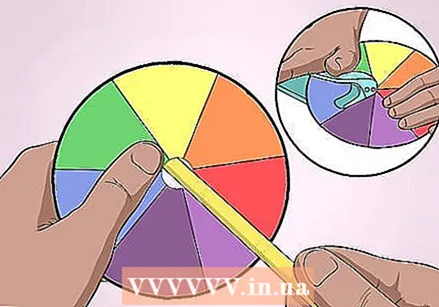 Attach the disk to the pencil. You have to punch a hole in the center of the disc. Slide the disk onto the pencil. This gives you a way to hold the disc and spin it quickly.
 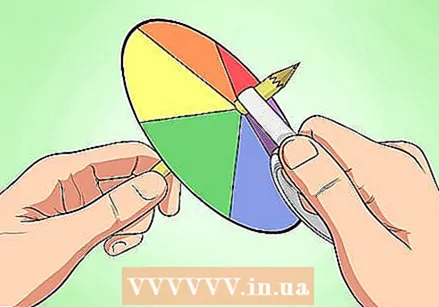 Hold the disc in place. Put tape around the pencil an inch above and below the disk. This will keep the pencil's wheel from wobbling as it spins. This way you can make the disc spin faster without it flying off the pencil.
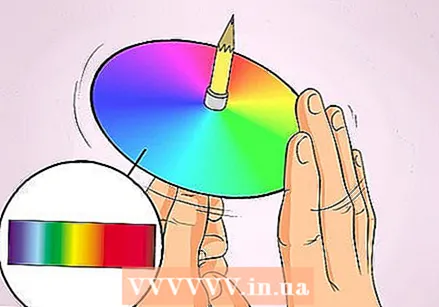
 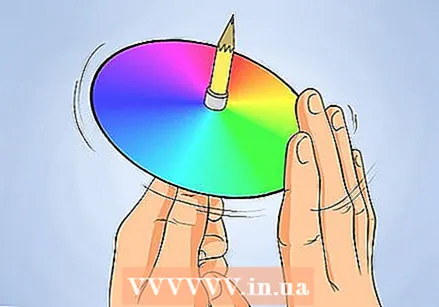 Rotate the disk around the pencil. In the beginning you will see the colors spinning quickly. When you make the disc spin faster, the colors merge and turn white together. If you don't see this, try spinning the disk even faster.
 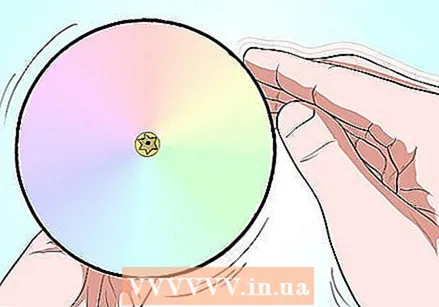 Adjust your technique. If you can still see most of the colors, try spinning the wheel faster. Be aware that you may not see a perfect white wheel. You try to make the wheel spin faster than your eyes can process the individual colors.
Part 3 of 3: Understanding the theory behind it
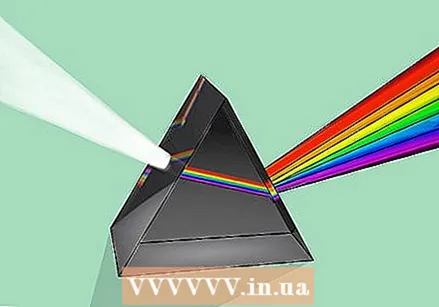 Look at a prism. A prism is used to separate visible light. It separates the light by different frequencies, each of which has a different color. By guiding white light through a prism, all the colors of the rainbow (the visible light spectrum) will be visible.
 - If you don't have access to a prism, water can also separate light. This is what shows a rainbow.
 Study the visible spectrum of the light. Visible light is the small range of electromagnetic energy that the human eye can detect and translate into an image. When the whole spectrum is present, the light appears white in color. When certain frequencies are absorbed, reflected or otherwise absent, the eye sees different colors, for example red or green.
 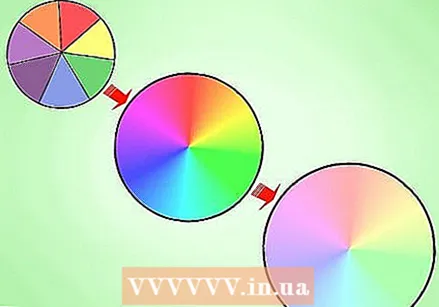 Think about color combinations. The frequencies that make up the visible spectrum are present on your color wheel. This is why spinning the wheel quickly fades the colors together, making them appear white. The light of all colors hits your eye almost at the same time. This translates the eye into white light.
Tips
- This experiment is a fun introduction to optics for children.
Warnings
- You may have to rotate the disk fairly quickly for this to work properly.
Necessities
- Paper
- Cardboard
- Glue
- Adhesive tape / tape
- Scissors
- Hole puncher
- Compass and ruler
- Pencil
- Colors, such as chalk, colored pencils, markers or paint


