Author:
Janice Evans
Date Of Creation:
3 July 2021
Update Date:
1 July 2024

Content
- Steps
- Method 1 of 6: Photoshop: The Fast Way
- Method 2 of 6: Photoshop: Detailed Method 1
- Method 3 of 6: Photoshop: Detailed Method 2
- Method 4 of 6: Paint Shop Pro: The Fast Way
- Method 5 of 6: Paint Shop Pro: The Detailed Method
- Method 6 of 6: GIMP: The Fast Way
- Tips
- Warnings
- What do you need
Perhaps you took a photo of a group of people and now, you would like to tag one person? Or perhaps you thought that you took the perfect photo, only that something is interfering with the background?
To learn how to add background blur in Adobe Photoshop, Paint Shop Pro, or GIMP, try one of the methods below.
Steps
 1 Try one of the graphics editing applications such as Adobe Photoshop, Paint Shop Pro, or GIMP.
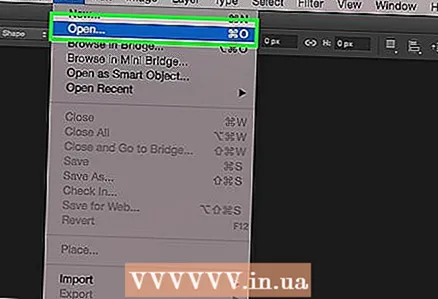 2 Open the image. To add blur to the background, choose an image with a good resolution.
  3 Use “Save As” to work with a copy of the selected image.Never change original image.
 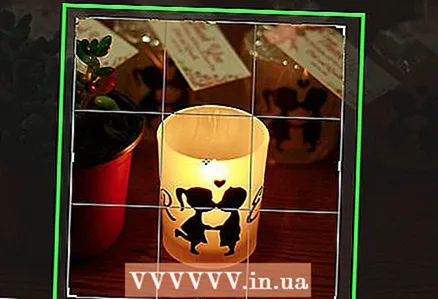 4 Determine which areas you want to bring in focus (foreground) and which areas you want to blur (background).
- Zoom in to view it closely on your monitor.
Method 1 of 6: Photoshop: The Fast Way
 1 Choose Layers> Duplicate Layer. This will put a second identical layer on top of your original image.
 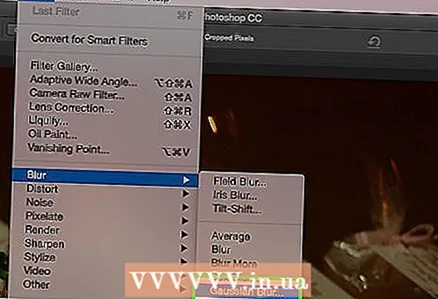 2 Choose Filter> Blur> Gaussian Blur. This will completely blur the image; from now on, you will work in the “reverse direction”.
 - Try different blur radii to achieve the desired effect in the background. The larger the radius, the stronger the blur, so if you want a small effect, then make a small radius. For example, if you want to make the background soft, then try a radius of 10. If you want a barely blurred background, then choose a radius of .5 or 1.
- Make sure you work with the top layer when adding the blur.
 3 Erase the blur from the target you want. Since the original layer is under the blurred layer, using the Elastic tool will reveal a clean image.
 - Select the “Eraser” utility from the toolbar on the left.
- Select the desired elastic size.For large volumes, use a large elastic; for detail work and edges, use a smaller, more precise elastic.
- Adjust the opacity of the elastic. For larger areas, you can use a high opacity; for edges, a lower opacity will create a softer effect. Reusing a low opacity elastic in the same place will duplicate the effect.
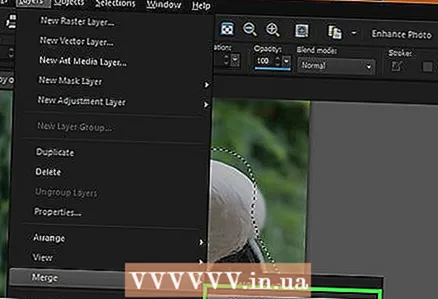
 4 When you're happy with everything, use Layer> Flatten Image. This will fold your layers into one.
Method 2 of 6: Photoshop: Detailed Method 1
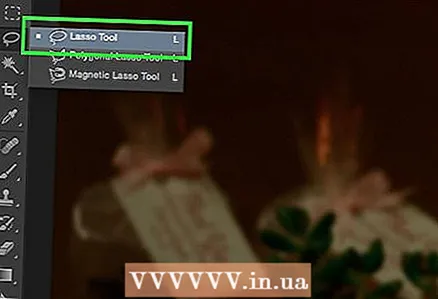 1 Select the Lasso Tool from the Toolbox. You will be choosing the part of the image that you want to exclude from your blurry background. Use the sampling type that suits you best. For example:
 - If part of your image has straight edges, then right-click on the lasso and select Polygon, which will create straight lines between the points you specify.
- If you see sharp, clean edges between the part of the image you want to select and the rest of the image, then use the Magnetic Lasso, it will select the edges on its own.
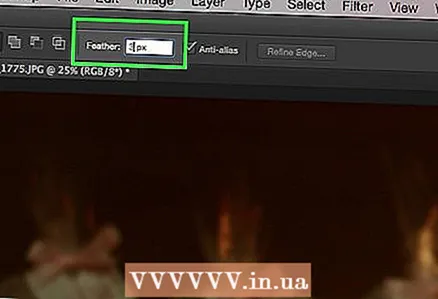 2 Expand the pen 1 to 3 pixels. Feathering your edges will soften them.
  3 Zoom in on your subject so that you can clearly see the edges. This will help with accurate sampling using the manual method.
  4 Click or move the lasso tool around the edges of your object. Make sure you are “short-circuiting your selection”. You will see that the selection is complete when a dotted line appears around your object.
 - Make sure to work with the top coat when using the lasso.
- To add to an already made selection, hold down the Shift key and keep selecting. This is a great way to modify a selection made, or to select two separate objects.
- To remove part of the selected selection, hold down the Alt key and select the area you want to remove.
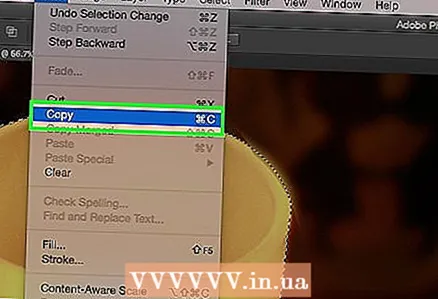 5 Copy the foreground selection by pressing Ctrl-C.
 6 Insert a foreground selection over the existing image. This will create a new layer on top of the original image.
 - More often than not, the copied image will appear on top of the original, which means you won't see the change. Look at the Layers tab (usually in the lower right corner) to see a new layer.
- If you don't see the Layers tab in Photoshop, go to Window and select Layers in the dropdown list.
- If necessary, use the Move tool, which looks like a cursor arrow, to move the inserted image over the corresponding part of the original so that they match.
 7 Select the layer that includes the original image. Located in the Layers tab.
  8 Go to Filter> Blur> Blur More. This will blur your background, leaving the duplicated image intact.
 - Reissue the command Blur More until you achieve the desired result. In Photoshop, the keyboard shortcut Ctrl F will repeat the last command.
- Also, you can use Gaussian Blur and try different radius of blur to create the desired background effect. The larger the radius, the stronger the blur, so if you want a small effect, then make a small radius. For example, if you want to make the background soft, then try a radius of 10. If you want a barely blurred background, then choose a radius of .5 or 1.
 9 Make sure the foreground subject is not too sharp. If so, then the easiest way to fix this situation is to look at the tab History and remove a few commands Blur More... Also, changing the combination of your layers can lead to good results. To do this:
 - Try changing the transparency of the foreground object to Opacity... It's in the toolbar Layers... A good level of transparency is 50%; move the cursor slowly to achieve the desired effect.
- Try changing how the layers fit together by changing their settings, also found in the toolbar Layers'... For example try Darken, instead of Normal, for an artistic sketch effect.
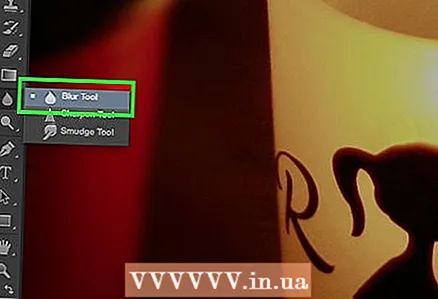 10 Use the Blur tool to soften the edges of the foreground object. It should be in the same toolbar as the Lasso tool.
 - Set the strength of the blur tool to around 33%.
- Set the size of your brush to a comfortable level, between 5 and 15 pixels. If you don't see the option to change the size of the brush, select Brushes from the menu window Window in Photoshop.
- Use the blur tool to trace around the edges of the foreground image, especially if you notice jaggedness. Thus, it will help create a smooth transition from the foreground image to the background.
 11 When you're happy with the results, use Layer> Flatten Image. This will merge your layers into one.
Method 3 of 6: Photoshop: Detailed Method 2
 1 Choose Layers> Duplicate Layer. This will put a second identical layer on top of your original image.
  2 Select the Lasso Tool from the Toolbox. You will be choosing the part of the image that you want to exclude from your blurry background. Use the sampling type that suits you best. For example:
 - If part of your image has straight edges, then right-click on the lasso and select Polygon, which will create straight lines between the points you specify.
- If you see sharp, clean edges between the part of the image you want to select and the rest of the image, then use the Magnetic Lasso, it will select the edges on its own.
 3 Expand the pen 1 to 3 pixels. Feathering your edges will soften them.
 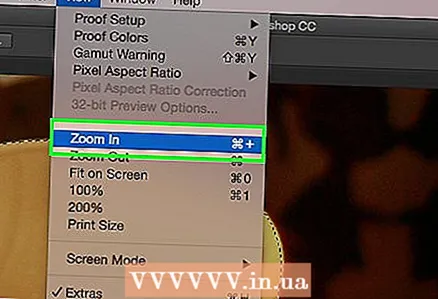 4 Zoom in on your subject so that you can clearly see the edges. This will help with accurate sampling using the manual method.
  5 Click or move the lasso tool around the edges of your object. Make sure you are “short-circuiting your selection”. You will see that the selection is complete when a dotted line appears around your object.
 - Make sure to work with the top layer when using the lasso.
- To add to an already made selection, hold down the Shift key and keep selecting. This is a great way to modify a selection made, or to select two separate objects.
- To remove part of the selected selection, hold down the Alt key and select the area you want to remove.
- Don't worry about getting a perfect sample right at the start; you will improve it later.
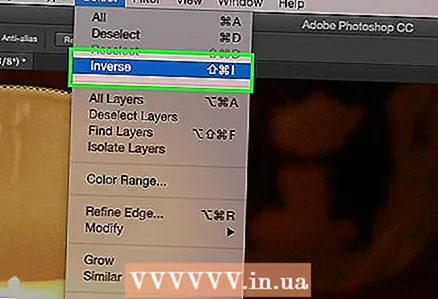
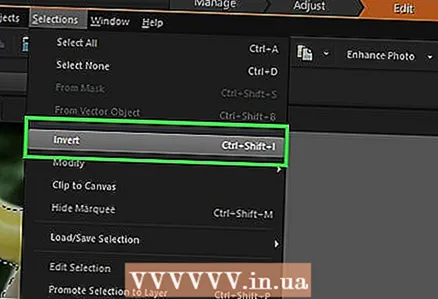
 6 Click Select> Inverse. This way, you choose a background instead of your subject.
  7 Click Filter> Blur> Gaussian Blur. This will add a blur to your background image.
 - Try different blur radii to achieve the desired effect in the background. The larger the radius, the stronger the blur, so if you want a small effect, then make a small radius. For example, if you want to make the background soft, then try a radius of 10. If you want a barely blurred background, then choose a radius of .5 or 1.
 8 Click Select> Inverse. This way you will select the object instead of the background image.
  9 Click on Layer> Add Layer Mask> Hide Selection. This object in your photo will disappear from the top layer, revealing the image that was underneath.
  10 Use the Brush tool to modify your selection. It may seem like a mistake to “paint” your photo, but in reality, you are changing the size and shape of the “hole” between the top and bottom layers. In other words, it is a good method of fitting a lasso sample.
 - Use black to hide most of the top layer. For example, if the blur is covering your subject in some places, then use black paint to hide some of the blurred areas of the top layer.
- Use white to show most of the top layer. For example, if the blur is far from the edges of your subject, then simply fill in the gaps with a white brush.
- Use shades of gray. Especially for the edges, it is important to maintain a softness that will hide the mistakes made (if any).
 11 When you're happy with the results, use Layer> Flatten Image. This will merge your layers into one.
Method 4 of 6: Paint Shop Pro: The Fast Way
 1 Choose Layers> Duplicate. This will put a second identical layer on top of your original image.
 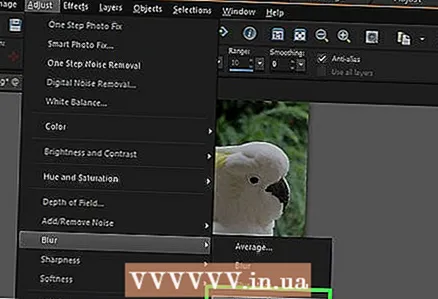 2 Choose Filter> Blur> Gaussian Blur. This will completely blur the image; from now on, you will work in the “reverse direction”.
 - Try different blur radii to achieve the desired effect in the background. The larger the radius, the stronger the blur, so if you want a small effect, then make a small radius. For example, if you want to make the background soft, then try a radius of 10. If you want a barely blurred background, then choose a radius of .5 or 1.
- Make sure to work with the top layer while adding the blur.
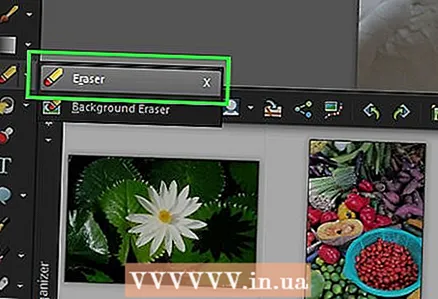 3 Bring your subject into focus. Since the original image is under the blurred image, using an elastic will reveal the untouched image.
 - Select the “Eraser” tool from the toolbar on the left.
- Select the desired elastic size. For large volumes, use a large elastic; for detail work and edges, use a smaller, more precise elastic.
- Adjust the opacity of the elastic. For larger areas, you can use a high opacity; for the edges, a lower opacity will create a softer effect. Reusing a low opacity elastic in the same place will duplicate the effect.
 4 When you're happy with the result, click on Layers> Merge> Merge All. This will merge your layers into one.
Method 5 of 6: Paint Shop Pro: The Detailed Method
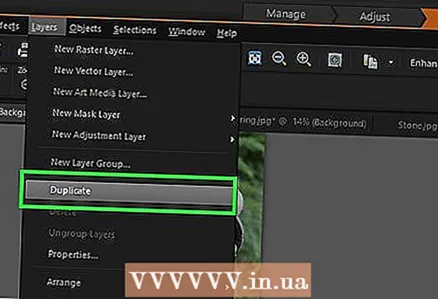 1 Choose Layers> Duplicate. This will put a second identical layer on top of your original image.
  2 Select Manual Sampling (which looks like a lasso) from the toolbar. You will be choosing the part of the image that you want to exclude from your blurry background. Use the sampling type that suits you best. For example:
 - If part of your image has straight edges, then right-click on the lasso and select Point-to-Pointwhich will create straight lines between the points you specify.
- If you see sharp, clean edges between the part of the image you want to select and the rest of the image, then use the option Smart Edge, she will choose the edges herself.
 3 Expand the pen 1 to 3 pixels. Feathering your edges will soften them.
 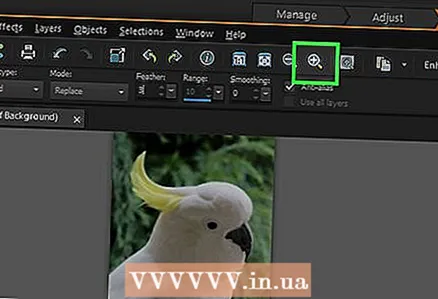 4 Zoom in on your subject so that you can clearly see the edges. This will help with accurate sampling using the manual method.
 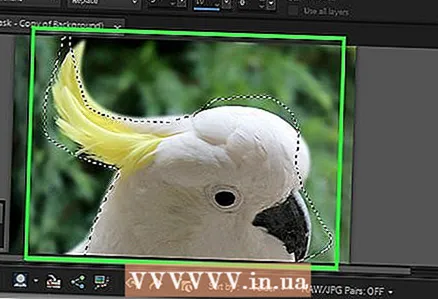 5 Click or move the manual selection tool around the edges of your object. Make sure you are “short-circuiting your selection”. You will see that the selection is complete when a dotted line appears around your object.
 - Make sure to work with the top layer when working with manual sampling.
- To add a selection to an already made selection, hold down the Shift key and keep selecting. This is a great way to modify a selection made, or to select two separate objects.
- To remove part of the selected selection, hold down the button Control and select the area you want to remove.
- Don't worry about getting a perfect sample right at the start; you will improve it later.
 6 Click Select> Inverse. This way, you choose a background instead of your subject.
  7 Click Filter> Blur> Gaussian Blur. This will add a blur to your background image.
 - Try different blur radii to achieve the desired effect in the background. The larger the radius, the stronger the blur, so if you want a small effect, then make a small radius. For example, if you want to make the background soft, then try a radius of 10. If you want a barely blurred background, then choose a radius of .5 or 1.
 8 Click Select> Inverse. This way you will choose your object instead of the background image.
 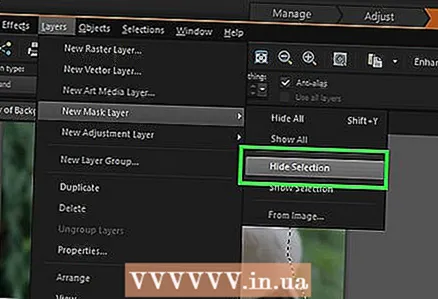 9 Click Masks> New> Hide Selection. This object in your photo will disappear from the top layer, revealing the image that was underneath.
  10 Use the Brush tool to modify your selection. It may seem like a mistake to “paint” your photo, but in reality, you are changing the size and shape of the “hole” between the top and bottom layers. In other words, it is a good method of fitting a lasso sample.
 - Use black to hide most of your top layer. For example, if the blur is covering your subject in some places, then use black paint to hide some of the blurred areas of the top layer.
- Use white to show most of your top layer. For example, if the blur is far from the edges of your subject, then simply fill in the gaps with a white brush.
- Use shades of gray. Especially for the edges, it is important to maintain a softness that will hide the mistakes made (if any).
 11 When you're happy with the result, click on Layers> Merge> Merge All. This will merge your layers into one.
Method 6 of 6: GIMP: The Fast Way
 1 Select Manual Sampling (which looks like a lasso) from the toolbar. You will select the part of the image that you want to exclude from the blurred background.
 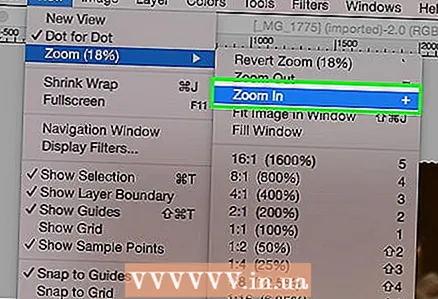 2 Zoom in on your subject so that you can clearly see the edges. This will help with accurate sampling using the manual method.
  3 Click or move the manual selection tool around the edges of your object. Make sure you are “short-circuiting your selection”. You will see that the selection is complete when a dotted line appears around your object.
  4 Press Select> Feather to soften your selection. You can start from 1 to 3 pixels. The higher the number, the softer the edges will be.
  5 Click Select> Invert. This way, you choose a background instead of your subject.
 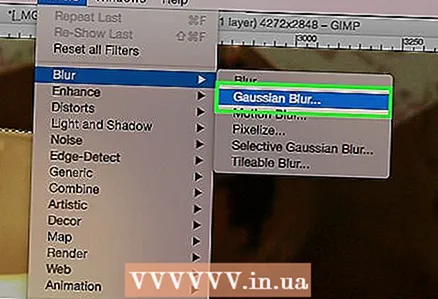 6 Click Filter> Blur> Gaussian Blur. This will add a blur to the background image.
 - Try different blur radii to achieve the desired effect in the background. The larger the radius, the stronger the blur, so if you want a small effect, then make a small radius. For example, if you want to make the background soft, then try a radius of 10. If you want a barely blurred background, then choose a radius of .5 or 1.
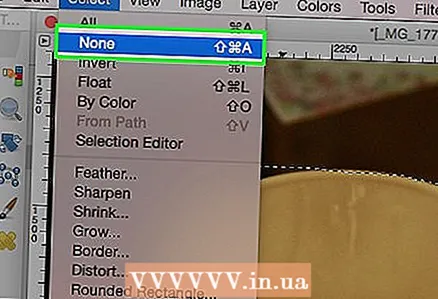 7 Press Select> None to “drop” your selection.
Tips
- The more mega pixels your camera captures, the better the image resolution will be. Enhancing low-resolution images is challenging.
- Be careful when selecting your subject; otherwise, it will be uneven.
- Digital editing to blur your background - does not discriminate distance to objects, and blurs the background with equal strength. If you are using Photoshop CS2, then you have the 'smart blur' option available in the filters section, under the blur. The filter distinguishes the distance to objects and uses different blur strength. Also, the filter settings can be changed, in other words, gradually adding the effect will be the best solution to achieve your goal.
- This technology gives an artificial look to your images. If you want a more natural look then use smart blur. For example, if the grass next to the child looks sharper, then the blurring of that part will be subtle and more natural.
- Some digital programs have a feature called zoom blur that allows you to select a point in your image and blur it according to its position.
- Before you start modifying your photo, make a copy, then convert that copy to 16 million colors if it hasn't already been converted to this mode. The algorithms in these computer programs perform better at 16 million colors than at other settings.
Warnings
- Make sure not to overwrite your original file! Once you overwrite your photo, you cannot get it back unless you have other copies.
- Make sure to save your work often! If your computer freezes while working on an image, then you will lose all the results of your progress.
What do you need
- Adobe Photoshop, Paint Shop Pro, or GIMP
- High resolution digital photography
- Graphics Tablet - Recommended for accurate sampling


