Author:
William Ramirez
Date Of Creation:
23 September 2021
Update Date:
21 June 2024

Content
This article will show you how to host a Word document on your site. On Google Sites, you can add a Word document image directly to a page, or for a WordPress site or hosted site, you upload the Word document and then link to it in the body of the web page.
Steps
Method 1 of 3: Google Sites
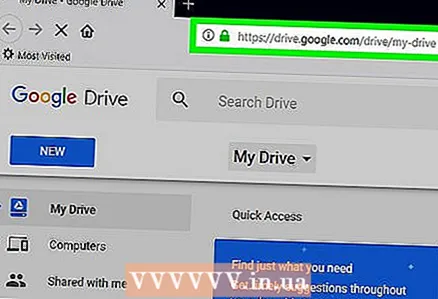 1 Open Google Drive. Go to https://drive.google.com/ in a web browser. The contents of your Google account will open if you are already logged in.
 - If you are not already signed in to your account, please enter your email address and password first.
- You may need to click Go to Google Drive first.
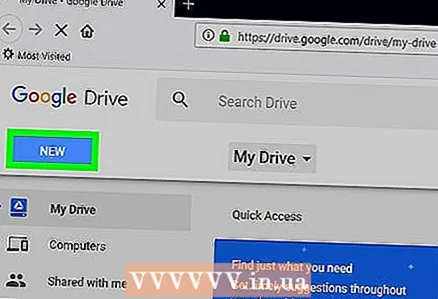 2 Click on Create. It's a blue button in the upper-left corner of the page. A menu will open.
 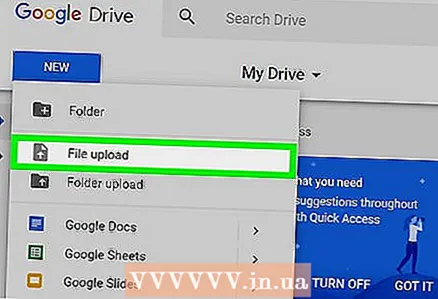 3 Click on Upload file. This option is on the menu. A window will open.
 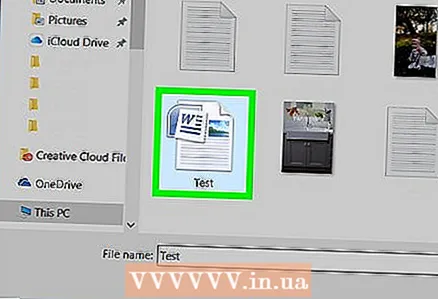 4 Select a Word document. Double click on the desired Word document. It will upload to Google Drive.
 - It will take no more than a few seconds to load a Word document.
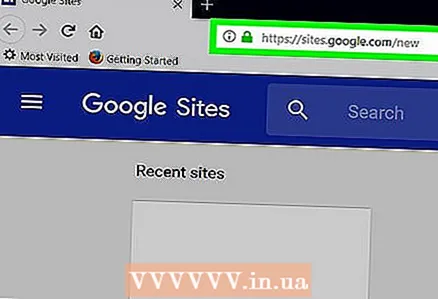 5 Open Google Sites. Go to https://sites.google.com/new in a web browser.
 - If you are not already signed in to your Google account, enter your email address and password.
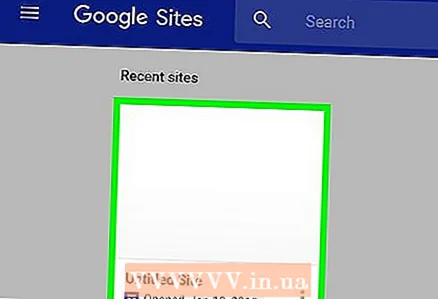 6 Select a site. Click on the site where you want to host the Word document.
  7 Go to the desired page. Scroll down to find the page where you want to place your Word document.
 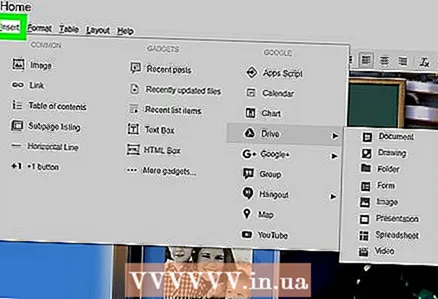 8 Click on the tab Insert. It's in the upper-right side of the window.
 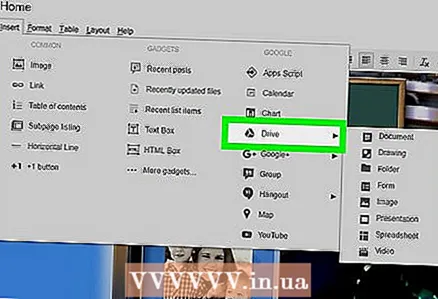 9 Click on Object on Disk. It's in the upper-right side of the page.
  10 Select a document. In the right column, click on the required document.
 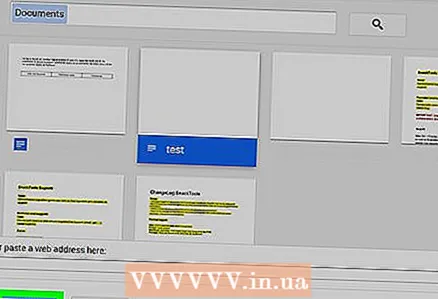 11 Click on Insert. It's in the bottom right corner of the page. The Word document will be hosted on your site.
 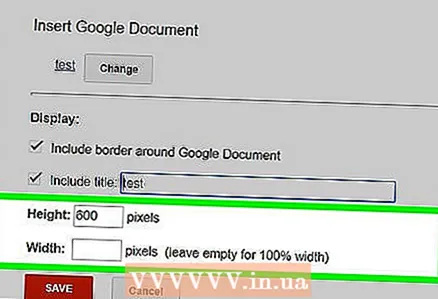 12 Resize the document. Click and drag the top or bottom border of the document to resize vertically, or click and drag one of the side borders to change the overall size of the document.
  13 Click on Publish. It's a purple button in the top-right corner of the page. The site is updated and the Word document appears on it.
Method 2 of 3: WordPress
 1 Open WordPress. Go to https://ru.wordpress.com/ in a web browser. A document image cannot be added to a WordPress site, but you can insert a link that will load the document if you click on it.
 - If you are not already signed in to your WordPress account, click Sign In in the upper right corner of the page, and then enter your email address and password.
 2 Click on My site. It's in the upper left corner of your WordPress page. Your site page will open.
  3 Click on View site. It's in the upper-left side of the page.
  4 Click on Go to the site. It's in the upper-right side of the page. You will be taken to your site.
  5 Go to the desired page. Click on the tab of the page where you want to insert the link to the Word document; these tabs are located at the top of the page.
  6 Click on Edit. You will find this option at the bottom right of the page.
  7 Choose a place for the link. On the page, click where the link to the Word document will be.
  8 Click on + Add. It's a button on the left side of the page. A menu will open.
 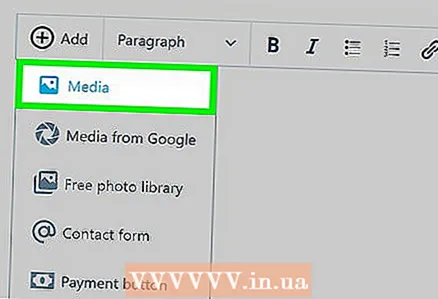 9 Click on Media. It's an option at the top of the menu.A page with all your website's stored media will open.
 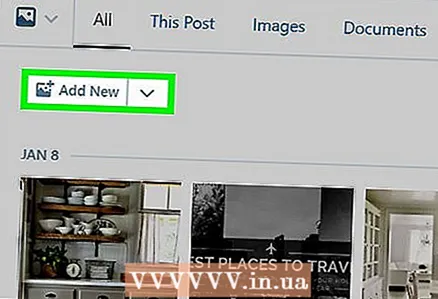 10 Click on Add new. It's in the upper-left side of the page that opens.
  11 Select a Word document. Click on the desired Word document and then click on "Open" in the lower right corner of the window. The Word document is uploaded to the WordPress repository.
  12 Select the uploaded document. To do this, click on it.
  13 Click on Insert. It's in the lower-right side of the window. A link to the Word document is added.
 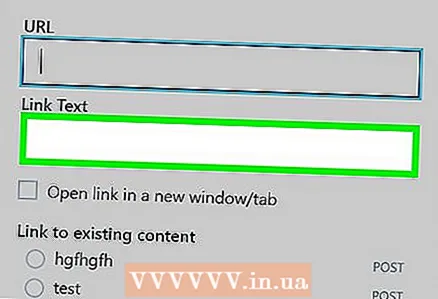 14 Change the link text. By default, the link text is the name of the document; to change the link text, select the link, click the pencil icon next to the link, change the text in the Link Text field, and click Save.
  15 Click on Refresh. It's a blue button in the top right corner of the page. The site will be updated and a link will appear on it - click on it to download the Word document.
Method 3 of 3: Hosted Site
 1 Upload your Word document to the root folder of your website. If you host your website, there is a folder that stores the items (such as images) that are displayed on the site. Download your Microsoft Word document to this folder.
 - This step depends on the software you are using to host your website.
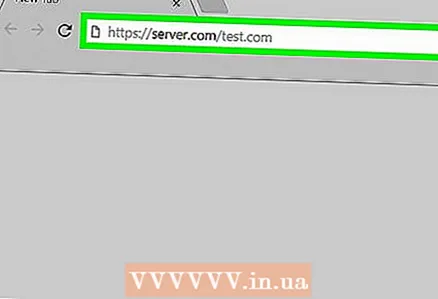 2 Copy the address of the Word document. Again, this step depends on the software you are using to host your site, but usually the address appears in the address bar at the top of the page. Click and drag your mouse over the address to select it, and then click Ctrl+C (Windows) or ⌘ Command+C (Mac).
  3 Open your website code. Open a text or HTML document that stores your website code.
  4 Choose a place for the link. Click where the link to the document will be.
  5 Create an HREF tag. Enter a href = in a text editor.
  6 Paste in the address of the Word document. Click on Ctrl+V (Windows) or ⌘ Command+V (Mac).
 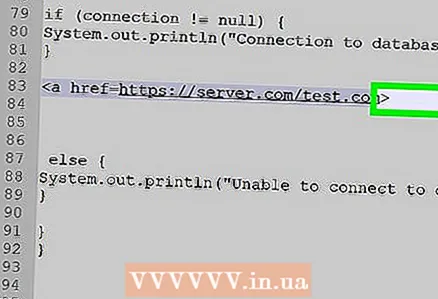 7 Close the HREF tag. To do this, enter >... You should get the line a href =the address>.
 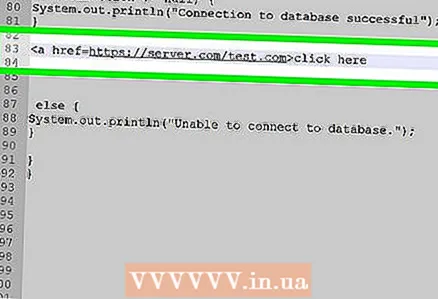 8 Enter your link text. Users will click on this text to open the document. Enter the text immediately after the closing HREF tag.
 - For example, if you want people to click on the "Click here" link, you should get the string a href =the address> Click here.
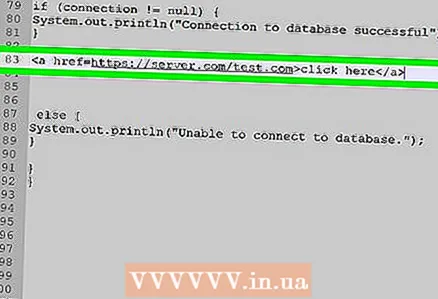 9 Add a closing link tag. To the right of the link text, enter / a> and press ↵ Enter... The link is ready.
 - The line should look like this: a href =the address> Click here / a>
 10 Refresh the site. Now click on the added link to download the Word document.


