Author:
Sara Rhodes
Date Of Creation:
17 February 2021
Update Date:
1 July 2024

Content
Have you ever thought about creating a pond in your backyard that would surely enhance the look of your place of residence? If so, please, here you will find a detailed sequence of the process of building a pond.
Steps
 1 Decide on a place for the pond. If you are going to use filters or a pump, make sure you can supply electricity. Don't place your pond under trees, it will take extra effort.
 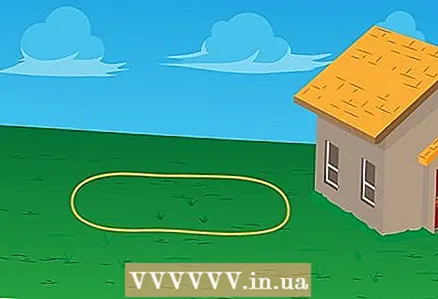 2 Draw a contour, the outline of your future pond. A rope, extension cord, or garden hose is the best choice for this task. If you use rigid markings, then you limit yourself in choosing the shape of the pond, you will have to dig exactly according to the shape. And when using a flexible layout line, you can change the shape until you are finally satisfied. Also make sure to leave enough space around the pond for further landscaping. Once you decide on the markings, walk along the contour line with a spray of paint.
  3 Dig a pond. Once you get permission from the local authorities, you can start digging. You can dig the pond with either a shovel or an excavator. Your pond should have several different depth levels so that it can be easily planted with vegetation. These levels will be something like shelves for plants. In order to make these shelves, carefully sharpen the edges with a shovel. The edges should be about 7-12 cm above the desired water level. The pond should be at least 60 cm deep.
  4 Set aside a separate area for the skimmer. If you are going to use a skimmer, then dig a special place for it. Once the water level is determined, set the height for the skimmer. For the best, efficient skimmer performance, mount it opposite the filter. The best skimmer height is when the water level is 2.5 cm below the neck of the skimmer.
  5 Dig a place for the filter. In this article, the Aquafalls biological filter is taken as an example, which was specially designed to work with a skimmer. The front of the filter folds forward 2.5 cm and should be flush on all sides.
  6 Installation of protective film and liner. Check freshly dug areas for sharp objects that could pierce the protective film. It is easy enough to install this film - just unfold it and spread it over the pond. If there are more than one section, make sure to wrap it up with some margin. Make sure that the screen protector fits properly in all corners and bends. Do not cut off any excess until you fill the pond with water. Install the pond outline liners (liners) in the same way as for the liner. Make sure to place a sufficient amount of the liner around the perimeter of the entire shore.
  7 Adding stones. The stones provide a breeding ground for essential bacteria, they also protect the liners from damage and add natural beauty. Start placing stones from vertical walls. For vertical sections, you will need rather large stones, 15-30 cm in diameter. You can also use very large stones as coordinators. Once you are done with the vertical section, fill in the horizontal sections with small pebbles (2-5 cm). When you're done with the rocks, you can fill the pond with water.
  8 Installation of a skimmer. Make sure the skimmer pit has a flat bottom and is appropriately dug. Check the water level relative to the skimmer - remember the water level should be 2.5 cm below the top of the skimmer neck. All types of skimmers have slight differences between themselves, so when installing, carefully follow the instructions that come with the kit. You can only sprinkle the skimmer about 15 cm with soil until you have connected all the plumbing. Attaching the liner to the skimmer is easier with two people. Place a large layer of silicone on the faceplate of the hole and around the mounting holes. One person holds the liner against the skimmer in tension, and the other at this time makes holes in it with something sharp (a nail), then all this is bolted. Once everything is tightened, the excess liner around the skimmer can be trimmed off.Then install the pump in the skimmer, screw in the pump valve and make all plumbing connections (hoses, fittings).
  9 Installing the filter. The filter is installed according to the same principle as the skimmer. It should protrude forward by about 2.5 cm and be exactly the same level on all sides. With the help of another person, attach the silicone insert to the filter. Place a large layer of silicone on the faceplate of the hole and around the mounting holes. One person holds the liner tightly against the filter, and the other at this time makes holes in it with something sharp (a nail), after which all this is bolted. As soon as everything is tightened, the excess liner can be cut off. Then you can make plumbing connections, after which you can sprinkle them with soil. Place the cleaning plates in the filter housing and cover with the lid. Over time, to hide the filter, the top can be covered with stones or plants. It is reasonable to place the filter for the waterfall between two large boulders, and place the rest of the stones for the waterfall in the middle, a level below, after which, in order for the water to run over the stones, and not under them, fill everything with special foam for artificial waterfalls.
  10 Final touches. Your pond is ready, it remains to fill with water. Now you can use different special accessories and start landscaping around it. Trim off any strongly protruding pieces of the liner and protective film. Always leave 5-6 cm of the liner, then these places can be sprinkled with small stones. Once the water reaches the desired level, plug in the pump and leave it running. At the very beginning, the water will be cloudy, but after a couple of days it will all pass. Follow the instructions for maintaining the pH in the pond and for adding bacteria. Let the pond settle for a few days before starting fish or planting plants.
Tips
- Instead of a protective film, alternatively, several layers of wet sand can be used.
- In the future, the earth dug from the pit can be useful for creating an elevation under the stream of the waterfall and for covering the plumbing connecting hoses. For best results during the excavation stage, you can borrow or rent a laser level.
- Drainage. Try to lift the soil around the pond to keep the water from flowing out. When draining the pond, make sure not to drain towards the house.
- To ensure that the protective film and liner are enough for you, make accurate measurements of the length, width and depth of the pond. Multiply the depth by three, and then add this number to the length and width.
Warnings
Use a flexible liner designed specifically for pools and ponds. Otherwise, if you use any other, then, over time, under the influence of ultraviolet rays, it can fall apart and may even be toxic to fish.
- Do not break up the pond when the ground is too wet or frozen.


