Author:
Florence Bailey
Date Of Creation:
24 March 2021
Update Date:
1 July 2024

Content
- Steps
- Part 1 of 2: Part One: Preparing the Wall
- Part 2 of 2: Part Two: Hanging up the mirror
- We hang on a cord (rope)
- We use the fastening bar
- Tips
- Warnings
- What do you need
Mirrors, with their inexplicable tendency to create the illusion of an open space, are a wonderful addition to almost every room. However, the weight of large mirrors requires reinforcement and the installation process takes longer than hanging photographs. Fear not, in this article we've outlined a few simple tips for hanging a large mirror.
Steps
Part 1 of 2: Part One: Preparing the Wall
 1 Choose where you want to hang the mirror. Choose a free piece of wall of sufficient size. It is best to hang the mirror high enough so that people can look into their eyes, although there are situations in which you can deviate from this rule, for example, if you want to hang a mirror over the fireplace.
  2 Free up space in front of the section of the wall where you will hang the mirror. Make sure you have the space you need to work without cramping. The presence of a work space will prevent accidents related to touching furniture and falling. Take care of this, especially if your mirror is not cheap.
 - Wash the wall if it is dusty. Large mirrors are heavy enough that you probably won't be taking it off often to clean the wall behind it, so take a chance.
- Set the mirror aside to avoid damaging it when you move the furniture.
 3 Find the edges of the beams in the walls. This is a very important part of the process. The load-bearing beams are located behind the inner wall cladding. You have to screw in the screws or drive the nails on which the mirror will hang, exactly into these beams, otherwise the mirror will have no support and it will fall, damaging the inner wall cladding. You can use the beam finder, which you can buy at almost any tool store. Mark the outer edges of the beams with a pencil and use them to guide you when you hang the mirror.
 - If you are confident in your abilities or are unable to use the beam finder, you can find beams “by touch”.Tap the wall with two fingers and listen for the sound depending on where you are knocking. When you get between the beams, the sound is more sonorous, with an echo. If you hit the beam, then the sound will be dull and short. This method, of course, is nowhere near as accurate as with an instrument.
 4 Using a tape measure, mark the center of each beam. Stretch a tape measure between each pair of pencil marks, find the center of the beams and mark it. The center of the beam is the strongest, so try to hit it.
Part 2 of 2: Part Two: Hanging up the mirror
We hang on a cord (rope)
 1 Measure out the middle of the mirror. Measure the length and width of the mirror. Connect the dots in pairs to find the center of the mirror. It is important to find the center of the mirror in order to correctly place the fasteners to support the mirror.
 - It is best to also mark the center of each side of the mirror on the back.
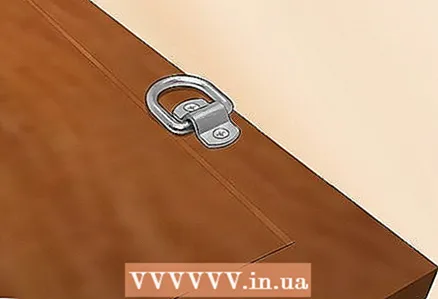 2 Install the D-rings on the back of the mirror. Mark 2 dots about 15cm from the edges of the mirror. Install D-rings. A rope or wire will pass through them, keeping the mirror in balance.
 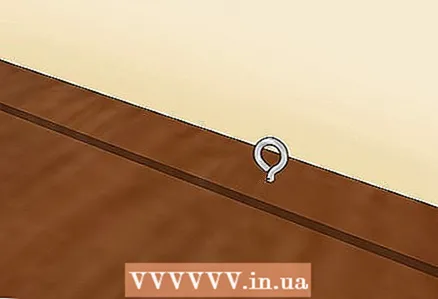 3 Screw in the hooks to support the bottom of the mirror. Mark 2 points at the same distance from the center of the mirror and screw the hooks there.
  4 Unwind a sufficient amount of the cord. Fold it in half and pull it through one hook, then through the D-rings, down again to the second hook. Do not pull on the cord too much, let it hang a little loosely.
  5 Reinforce the cord if necessary. Cut some medium length copper wire. Wrap the cord on which the mirror will hang with wire and press with pliers from one end, and attach the other to the hook. Repeat with all four ends of the cord.
  6 Pass the remaining cord through the last hook. Cut and tie the cord tightly. Press the edges with pliers and wire, if necessary.
  7 Raise the mirror carefully to the desired height. With your free hand (or rather, invite a friend to help) mark the wall where the center of the upper edge of the mirror is. Put the mirror back down carefully.
  8 Use a level and draw a line on the wall. You need a line parallel to the floor, along which you will determine the position of the mirror. Place the level against the wall under the mark you just made, make sure the bubble is between the two horizontal stripes, and draw a line around the edge of the level.
 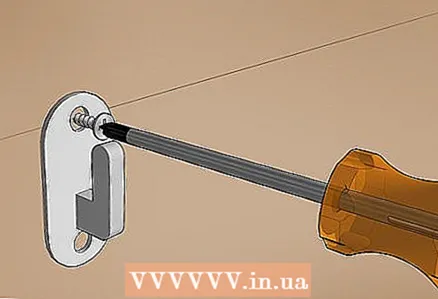 9 Draw a line through the centers of the two beams. Find the two beams in the area where the mirror will hang. The greater the distance between them, the better, but it should not be wider than the mirror. From the centers of the beams, draw straight lines to a horizontal line. Mark points at a distance of 10-12cm from the top line and in the center of the beams.
 - At these points you will install fasteners, so make sure with a level that these points lie on the same horizontal line.
 10 Install the fasteners at the two marked positions. Screw two heavy-duty self-tapping screws into the wall, or first drill the narrow holes with a drill and then screw in. Leave enough space for the cord.
 - Before installing self-tapping screws or screws that will hold the mirror, make sure they can support more than the weight of your mirror. Note that the effective load on the screws increases if you lift the mirror away from the wall, for example for cleaning.
- Not all fasteners are created equal. Seek professional advice or manufacturer's instructions if you are not sure how to install them correctly.
- Alternatively, you can opt for durable nails.
 11 Raise the mirror to the required level. Hang the cord from the mirror over the fasteners. Make sure the cord is securely on both screws and slowly release the mirror.
  12 Align the mirror. Use a horizontal line on the wall and / or a level to accurately position the mirror. When finished, erase the lines from the wall with an eraser.
 - Some sites recommend special products for removing pencil marks from walls, such as melamine sponges.
We use the fastening bar
 1 Prepare the wall as described above. This method uses a bracket to mount the mirror instead of a cord. However, you still need to find the beams in the walls, so follow the instructions from the first part of the article.
  2 Buy or make a mounting strip. They are made of wood (sometimes metal) and should be wide enough and shaped to hang one block on top of another. You can buy them at any hardware store. If you buy, take a closer look at the weight markings, you need ones that can support more than the weight of the mirror. However, if you have a suitable piece of wood and minimal knowledge of how to work with it, you can easily make the plank yourself. Follow these tips:
 - Saw off a sturdy piece of board that is about 2cm thick and slightly shorter than the width of your mirror.
- Saw the board at a 30-45 degree angle all the way around the middle. You now have 2 planks that can be hung one behind the other.
 3 Attach one of the slats to the top of the mirror. Use glue or suitable self-tapping screws. The sawn-off side of the board should be facing downward and look like a “hook” that will catch on the “ledge” of the board attached to the wall.
  4 If necessary, attach a “gasket” to the bottom of the mirror. When the mirror is suspended from the bar, it is held only by the upper part, while the lower part can "sag" against the wall, damaging the mirror or pulling the bar out of the wall. Therefore, you need to attach a board equal to the width of the bar to the bottom of the mirror for an emphasis.
 - If you plan to make a mirror with your own hands, you can get rid of the need for a “spacer” by integrating a hanging bar into the top of the mirror.
 5 Mark the position of the second plank on the wall. A plank attached to a wall (usually the larger of the two) must hold well in the wall to provide the necessary support. Use a level and draw two vertical lines down the centers of the beams and then one horizontal line between them at the desired height. Mark the intersections of the lines - these are where you will attach the plank to the wall.
  6 Attach the plank to the wall. Use heavy-duty self-tapping screws (designed for a weight greater than the weight of the mirror) to secure the plank to the wall. Screw them into the centers of the beams. The plank should be positioned so that its longer part is farther from the wall, creating a “hook” for the first plank to catch.
 - If you are using purchased trims, refer to the instructions for details, but the general procedure is the same.
 7 Hang a mirror. Raise the mirror and hook the planks. They have to fit very well together. Release the mirror gradually, letting it hang from the slats.
 - Note, if you used glue to fasten the strip to the mirror, then you must wait until the glue is completely dry. Even if you are sure that the glue has dried, hang the mirror very carefully. If possible, ask someone to insure you.
Tips
- Better to have an assistant to hang the mirror.
- Many home accessories stores have wall hanging kits that contain everything you need to hang a mirror. When choosing, take a closer look at the weight category of the set.
Warnings
- Make sure to use the correct mount for your mirror. Weak fittings may not support the weight of the mirror and it will fall, damaging the wall.
What do you need
- Level meter
- Scotch
- Screwdriver
- A hammer
- Pencil
- Awl
- Cord
- Side cutters
- Pliers
- Roulette
- Device for finding beams
- Wire
- D-rings
- Screw hooks
- Reliable self-tapping screws


