Author:
Clyde Lopez
Date Of Creation:
17 June 2021
Update Date:
1 July 2024
Content
- Steps
- Part 1 of 4: Data Entry
- Part 2 of 4: Extracting Data
- Part 3 of 4: Choosing a Graph Type
- Part 4 of 4: Modifying the Histogram
- What do you need
Creation of pie charts, bar charts and other graphs is one of the main functions of Microsoft Excel. Such graphics can be inserted into Word, PowerPoint or other programs. In Microsoft Excel 2007, the Chart Wizard user interface has changed. This article will show you how to build a bar chart in Excel and modify it for a report or presentation.
Steps
Part 1 of 4: Data Entry
 1 Open Microsoft Excel.
 2 Open an existing table by clicking Open from the File menu. Create a new table by clicking New from the File menu.
 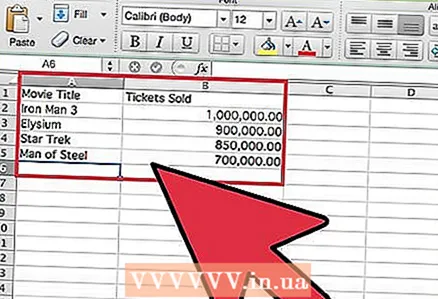 3 Enter data with one independent variable. A histogram is a graph based on one variable.
 - Add column headings. For example, if you want to graph ticket sales for each of the top 10 movies of the summer, enter “Movie Title” in the first cell of the first column and “Number of Tickets Sold” in the first cell of the second column.
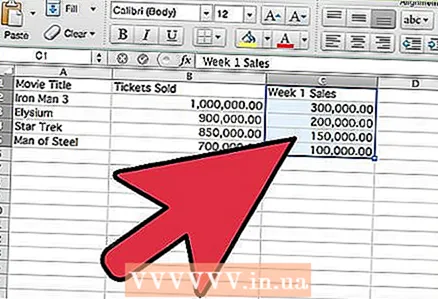 4 Add a second row of data in the third column. You can build a clustered or stacked bar chart that displays two series of data that depend on a single variable.
 - Add a column heading for the second data series. Make sure the data is in the same format as the first data row, for example, in dollars.
Part 2 of 4: Extracting Data
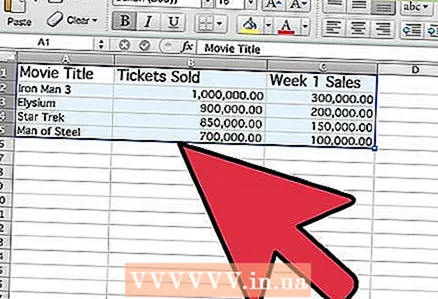 1 Select all entered data, including the column headings. Microsoft Excel uses data in columns to plot it along the X and Y axes.
  2 Go to the "Insert" tab and find the "Chart" group.
- If you are using an older version of Microsoft Excel, you need to click Insert - Bar Chart.
Part 3 of 4: Choosing a Graph Type
 1 Select the type of chart you want to plot. In the Chart group, click Bar to build a horizontal bar chart. Alternatively, click "Histogram" to build a vertical histogram.
 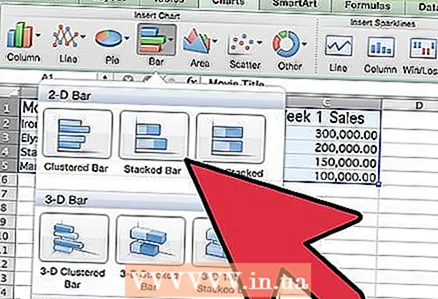 2 Select the type of histogram. You can choose from flat, volume, cylindrical, conical, or pyramidal histograms.
 - You can also select a clustered or stacked bar chart to display the second row of data.
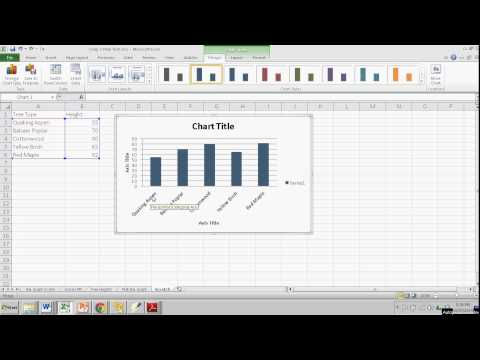
 3 The graph will appear in the middle of the Excel sheet.
Part 4 of 4: Modifying the Histogram
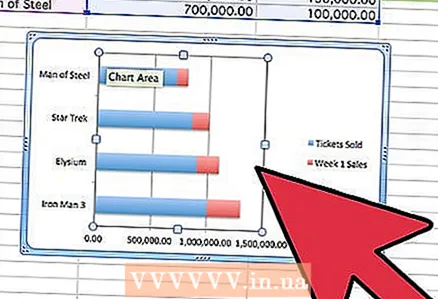 1 Double click on the plot area of the histogram.
 2 Change the options for fill, shadow, volume, and more.
 3 Double-click around the plot area of the histogram. Select text options.
 - On the Design tab, click on Add Chart Element where you can add chart and axis titles.
 4 Save the table with the plotted histogram.
 5 Right-click on the outline of the histogram and select Copy. Now you can insert the histogram into other programs to use it in reports and presentations.
What do you need
- Data
- Independent variable
- Excel spreadsheet


