Author:
Janice Evans
Date Of Creation:
25 July 2021
Update Date:
1 July 2024
Content
- Steps
- Part 1 of 4: Preparing the soil
- Part 2 of 4: Buying turf
- Part 3 of 4: Laying the turf
- Part 4 of 4: Maintaining Your Lawn
- What do you need
If you've always wanted a lush, emerald green lawn, but your clearing is full of weeds with bare patches of soil, then the answer is turf. When you buy turf, you are essentially paying someone else to do the hard work to grow healthy, dense grass from seeds. All you have to do is make sure the soil provides the right conditions for turf to grow and you will have the perfect lawn you dreamed of. Read on to learn how to prepare the soil, select and lay sod, and care for your grass so it grows for years.
Steps
Part 1 of 4: Preparing the soil
 1 Check the composition of your soil. If you have had problems growing healthy grass in the past, the problem is likely related to the composition of your soil. If it contains a lot of densely compressed clay, the roots of the grass are unable to receive the oxygen necessary for growth. If it contains too much sand, it will not retain water and nutrients near the roots. Grass grows best in loamy, fertile soil that is water permeable, and you will need to modify the soil to match this description. You can take a soil sample from a local nursery and ask a specialist to help you determine its composition, or you can do it yourself by digging a hole in your yard and filling it with water. See what happens:
 - Sandy soil will let water through in a split second. This means you have to work with 5 cm of extra compost or reinforce the topsoil to retain nutrients around the grass roots.
- Clay soil holds water and passes it very slowly. Plan to work with 5cm of extra organic matter, such as peat, compost manure, leaf compost, or yard waste, so the grass roots won't choke.
 2 Check soil pH. Soil alkalinity also greatly affects grass growth. The ideal pH is between 6.0 and 6.5. To find out if your soil pH is within this range, use a soil test kit from your garden store and send it to your local laboratory for testing with your local service. Wait 2 weeks for results.
 - If the soil has a pH of 6 or less, it is too acidic. This can be changed by adding lime. Talk to an expert at your garden center to determine exactly how much lime you need to add, or contact a turf specialist.
- If the soil has a pH of 6.5 or higher, it is too alkaline for the grass. This can be changed by adding sulfur or gypsum. To find out exactly how much you need to add, talk to a professional about it.
 3 Clear out the trash from the yard. Remove lawn decorations, large sticks and rocks, and anything else you might encounter along the way. Also remove bricks and building materials. Remove all objects larger than 7 cm in diameter so that the cultivator does not bump into objects when you are working in the yard.
  4 Flatten the tiered areas. If you have a moat, uneven mound, or large pit in your yard, it will be difficult to neatly distribute the lawn. Smooth out unevenness by creating a flat surface and helping to eliminate drainage problems. This is not necessary, but it is a good idea if you want the perfect lawn.
 - Use the hinged blade to loosen a large area. They are quite expensive to buy, but you can rent one from a home and garden supply store.
- For small areas, you can do rough weeding by hand.Use hand tools like garden hoes or rakes to break up the soil and soften edges and slopes around holes and ditches.
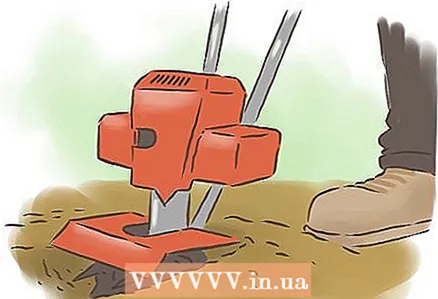 5 Plow the soil to a depth of at least 15 cm. Rent, rent or buy a cultivator to loosen the top 15 cm of soil in your yard. Tilling the soil softens it so that the roots of the grass you put in can breathe and germinate. Loosen the soil using the same method you used to mow the lawn, loosening row by row in the sectors.
 - Tilling the soil not only prepares it for the grass you plan to plant it with, but it also helps in weed control by weeding out weeds that should have germinated.
- If the soil is particularly compact and filled with clay, loosen to a depth of 20 cm rather than 15 cm to ensure that the roots of the grass have enough room to grow without compaction.
 6 Spread 5 cm of soil or compost and other additives over the top of the soil. Use good quality potting soil or compost to provide a soft layer for the sod to decompose. If you determine that the soil needs additional compost, organic matter, lime or sulfur to achieve the required conditions, distribute it right away. Loosen the soil again to mix compost, soil, and other additives.
 - You can spread the soil, compost and additives manually or with a rented spreading machine.
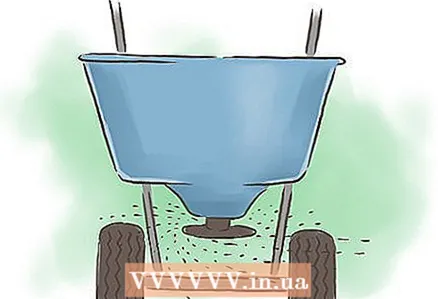 7 Use a fertilizer spreader. This last step will ensure that the turf you distribute receives all the nutrients it needs to start healthy growth. Spread it out evenly and mix with soil according to package directions.
Part 2 of 4: Buying turf
 1 Measure your lawn. Use a tape measure to measure the total area you plan to turf. It would be helpful to sketch a lawn and note the length and width values in different areas. You need accurate measurements when it comes time to buy turf. Too little turf will make the lawn sparse, making it look unhealthy and growing as it should. Too much turf can be expensive, as it usually costs around 300 rubles. for 1 square meter.
 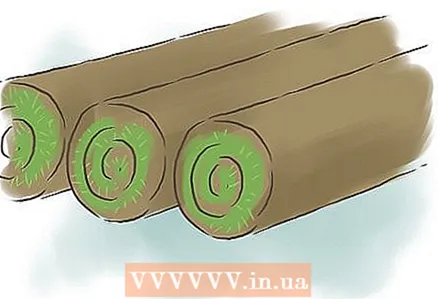 2 Buy turf from your local lawn firm. Select a company in your area that has already been used by other people with successful results. The firm should provide you with several different options for the types of grass suitable for your area. Resist the temptation to order from afar just because they showcase beautiful grass on their site; chances are that the grass will not be suitable for your climate. Pick a good firm and talk to your sales representative to make smart choices about what kind of grass to grow.
 - It is best to choose a herb that is native to your area. This way, you can be sure that it will germinate well in your climate. Cold season herbs (grasses that grow fastest in spring and fall) such as bluegrass, perennial ryegrass, reed grass, and fine fescue grow best in the northern United States, where winters are cold and summers are hot. Hot Season Herbs (grasses that grow in very hot weather) such as Bermuda grass (pig), eremochloe, Augustine grass, baya grass, and zoisia grass grow best in the southern states and subtropical regions.
- When deciding which herb to choose, also consider its application. Do you plan to frequently walk on the lawn and also exercise or host lawn parties? Or do you just want to admire the lawn from the window? There are varieties that are tough, soft, some require a lot of care and some are more colorful than others. Tell your sales representative what you are looking for.
- Ask the representative if they can cut and deliver the turf the same day.Sod that has been lying for several days waiting for delivery will not be as fresh and of good quality.
 3 Schedule a delivery time so that you can stack the turf the same day. It is very important to lay the lawn on the day it is delivered. Waiting too long will dry out the sod and may also damage the roots. Give the turf a chance to grow healthy by putting it down as soon as it arrives. It will be delivered to you in long rolls and the entire installation process will take only one day.
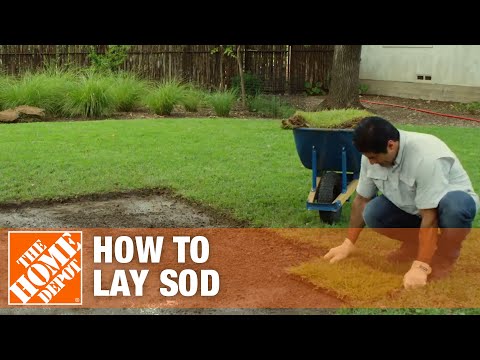
Part 3 of 4: Laying the turf
 1 Water the soil. In order for the sod to start sprouting immediately, it is best to start with freshly watered soil. It shouldn't be wet; just use a sprinkler to slightly moisten the soil before starting work.
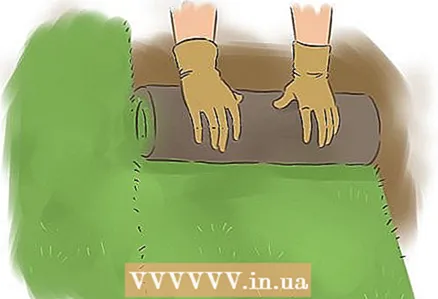
 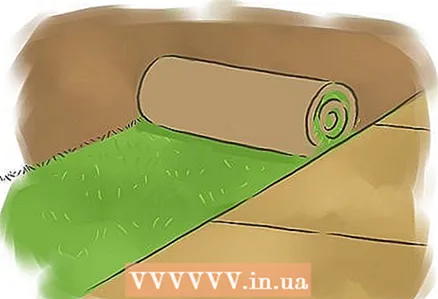 2 Start by laying the turf along the long edge. Unroll the first piece of turf next to the road or outside. Flatten it so that the edge of the turf is exactly aligned with the edge of the yard without leaving any extra soil. Carefully unfold the entire piece of turf so that the first long edge is covered. This will provide a sturdy edge around which you will lay the rest of your lawn.
 - Starting in the middle, it will be difficult to lay the lawn in a logical order, leaving no gaps or short ends.
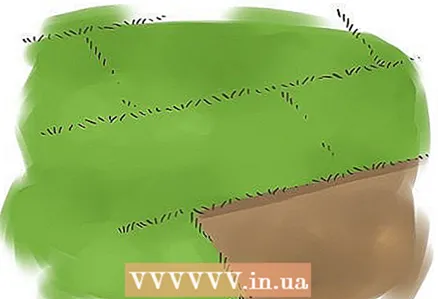 3 Lay the lawn in a brick pattern. Cut the second strip of lawn in half lengthwise and lay it in close proximity to the first. Stick to staggered brickwork when laying the lawn. Laying your lawn this way will make the seams less visible later. Make sure the edges of the turf are stacked close to each other without overlap. Leave no gaps at the seams; these edges will tend to dry out and leave brown spots in your yard. Continue laying the lawn in this way until the entire yard is covered and no seams are visible anywhere.
 - Use a garden knife to cut shorter pieces of lawn to fill in gaps or around corners.
- However, keep the pieces of lawn as large as possible. Don't cut them into small pieces unless you need to, as the smaller pieces dry faster before they start sprouting.
- Avoid walking or crawling on your knees on the lawn while laying, as this can lead to air pockets and depressions.
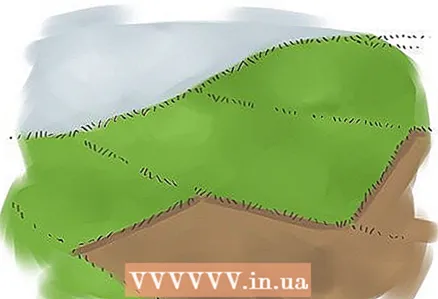 4 Lawn the hill from top to bottom. Laying your lawn horizontally across the hill, rather than vertically along the hill, will prevent erosion. When the roots of the grass are firm, they will hold the ground down in place. If you lay them vertically, especially on steep hills, there may be problems with the lawn strips sliding down instead of staying in place on the hill.
 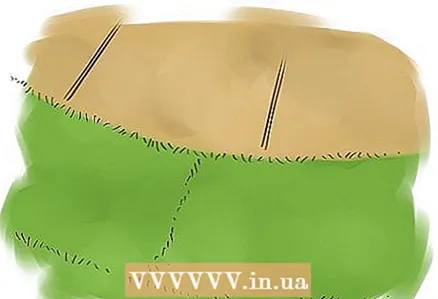 5 Form a lawn around the curved lines. Since the lawn needs to be held in large chunks whenever possible, you can spread the lawn around curves by reshaping it rather than cutting it into pieces. Cover the bend with a large piece of lawn and pinch in several places so that the shape of the piece wraps neatly around the bend. Use a knife to chop off the overhangs you plucked off and set aside two small triangular pieces. You have now actually made two darts in the lawn that will allow it to take on a semicircular shape. Pull the cut edges of the dart together so that they lie next to each other and there is no gap left.
  6 Carve out a lawn to put around trees and other obstacles. If you encounter a tree or other obstacle, you need to lay a lawn around, drape it around the object, and carefully cut it to fit the base of the object. Save the trims so you can use them later if you have any small gaps to fill.
 - If you are laying a lawn around a tree, do not lay it directly at the base of the tree. Laying it on the roots can damage the tree. Instead, cut the circle so that the edge of the lawn is a few tens of centimeters from the tree.
- If you have a lot of trees and other objects to get around, you will need to purchase a lawn cutter to make the job a little easier. Shaping a lawn using only a garden knife can be time-consuming.
Part 4 of 4: Maintaining Your Lawn
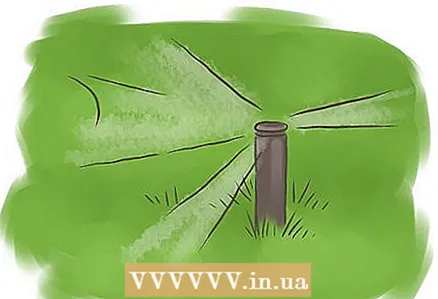
 1 Water thoroughly for the first 2 weeks. Keeping the grass moist for the first few weeks is essential. During this time, the roots of the grass harden and begin to grow. Without a lot of water, this process will slow down or stop, and the lawn will wither before it begins to grow. After the first two weeks, water the grass several times a week to keep it from drying out.
 - Use a sprinkler system to ensure even watering of the grass.
- Don't wait for the grass to look brown to water. Test the soil by dipping your finger into the ground. If you can feel wet soil at a depth of a few centimeters, that's fine. If the soil becomes dry at the surface or at a depth of 3-5 cm, then it is time to water.
- Grass grown in the shade should be watered less frequently as it lasts longer.
 2 When the grass is about 8 cm tall, cut it down to 5 cm. Mowing your lawn helps keep it healthy. Do not cut shorter than 5 cm, as you get too close to the roots. You can collect the trimmings, but leaving them on the lawn is really beneficial for the condition of the lawn, as they act as a free fertilizer.
  3 Fertilize the lawn again after a month. Use the same growth fertilizer after a month has passed. This is necessary in order to replenish nutrients that may have been washed away within a month by careful watering. After the first month, you only need to fertilize the grass once or twice a season to replenish the nutrients for years to come.
 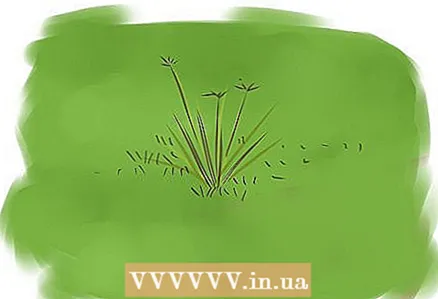 4 Monitor your lawn by keeping weeds free. Continuously watering, mowing and fertilizing your lawn will help you grow thick and healthy grass, and this is also the best way to keep weeds free. Weeds tend to multiply when the grass grows unevenly. This is a natural way to cover bare areas of land. If you make sure there are no bare spots initially, you don't have to worry about weeds.
 - If you notice an area where the lawn looks dead, replace it as soon as possible. Tear off the old lawn, enrich the soil with compost and add fresh turf, making sure the seams are in close proximity to healthy grass on both sides. This will prevent weeds from growing where the lawn is dead.
What do you need
- Soil tester
- Baking powder
- Compost and other soil additives such as lime, organic matter or sand
- Growth fertilization
- Turf rolls
- Turf cutter or garden knife
- Spray


