Author:
Florence Bailey
Date Of Creation:
28 March 2021
Update Date:
1 July 2024
Content
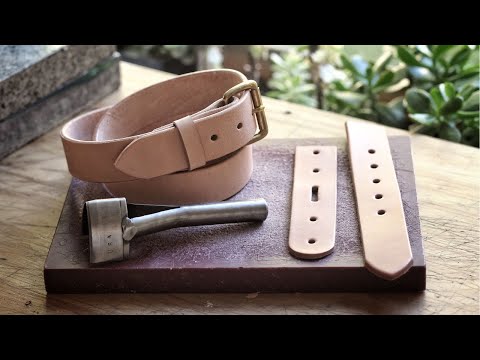
1 Determine your desired dimensions. The belt should be long enough to be tied around your waist in a knot or bow, depending on your preference. Most have waist and waist measurements 2 yards (1.8 m) long. This length will provide enough fabric to create the bow. Width is just a matter of preference, but you need to multiply the desired width by two to make the front and back, and you must add an extra 1/2 inch (13 mm) for the seam allowance. 2 Cut the fabric and pairing for your belt. You need to cut one large rectangular piece of fabric for your belt using the measurements you left off. You also need to cut an evenly large piece of the thin low-melting fillet using the same measurements.
  3 Place the pairing on the fabric. The shiny side of the mate is the side that's covered in glue and should be the right side of your fabric. A pairing should be applied to the back or "wrong" side of your belt and pinned at that location. 4 Install the cover cloth. The cover fabric should be a piece of heat-tolerant material such as an old cotton pillowcase. Place a cloth over your belt and connect them using a spray bottle with water.
 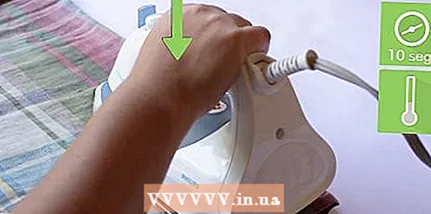 5 Press the fabric down with a warm iron. The iron should be heated at the lowest temperature. Do not move the covering fabric with the iron. Instead, press it against the fabric in one place, starting near the edge of the waistband, for about 10 seconds. Use the iron to create steam, which will melt the fabrics. 6 Glue the rest of the fillet to the rest of the fabric. After you have connected each piece together, take the iron and move it directly next to the place of the pieces you just connected. Continue until the entire length of the belt is connected to the mate. Move and dampen the cover cloth as needed. 7 Slowly remove the covering fabric. After the fabric is cool enough to touch, remove the covering fabric and try to connect everything by gently pulling on the edge of the mating and the edges of the fabric. If the two pieces stick together, you succeed. If not, repeat the pairing steps or try a different pairing type.
  8 Fold the fabric in half. The length of the belt should remain the same, but the width should be half that. The underside or wrong side must be facing outward, the "right" or outside side must be connected. Pin and smooth the folds there. 9 Cut the ends at an angle. Temporarily fold it in half so that the ends meet together. Pin in this place. With a constant longitudinal fold at the top and open end at the bottom, cut a short diagonal line starting at the top corner where the two ends meet. Cut through all layers of fabric and cut to original length. At the same time, when cutting off the ends, make sure that their faces will be symmetrical. 10 Sew the raw edges together. Leave 1/4 inch (6 mm) for seam allowance. Start at the top corner and sew along the edge, across the base and along the opposite side to secure the belt. When sewing, you should leave a hole along the bottom of the waistband about 4 inches (10cm) long so you can turn the waistband right-side out. 11 Cut off the corners. Cut off excess seams from all four corners of your waistband, and it will be easier for you to bring it back in the right direction. 12 Turn the fabric right side out. This can be done with your fingers, gently pushing and pulling the fabric through the hole in the lower left of your belt, or you can pull the fabric through the hole with a pen cap, a blunt pencil, or a wooden dowel. 13 Tighten the belt again. After the belt has been turned right-side out, grab the iron and gently press the folds into place. Otherwise, the seam will be visible when you wear the belt. 14 Close the hole. You can use either a blind hem or a hand-step stitch to seal the hole. Alternatively, you can sew all over the edge to seal the hole and give your belt a more even look.
 What do you need
- 2 yards (1.8m) fabric
- 2 yards (1.8m) fusible
- Measuring pen
- Iron
- Covering fabric
- Spray
- Safety pins
- Sewing machine
- Sewing needle
- A thread
- Scissors
- Pen


