Author:
Frank Hunt
Date Of Creation:
11 March 2021
Update Date:
1 July 2024
Content
You can make more plants from plants you already have in your garden! It is very easy and a great way to get more plants, especially if they are rare or expensive.
To step
 Choose the plants you want to take cuttings. An herb such as rosemary or lavender, a flower such as the rose, or any other plant. Note, however, that you cannot propagate all plants; a good garden guide can tell you whether a plant can be propagated by taking cuttings. If you can't find it, just try it and see if it takes cuttings or not.
 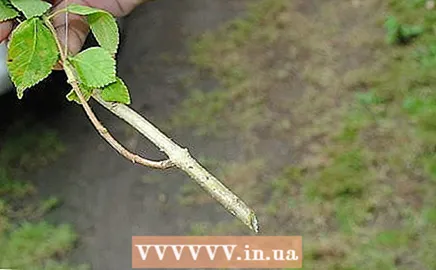 Use sharp pruning shears to cut off shoots from the plant. Choose fairly new but mature shoots from the parent plant. See how long the cutting should be. In general, you should cut about 8-10 cm from perennials and 15-30 cm from shrubs. Because the size differs per plant, you will have to try something out. When cutting, cut at an angle of 30 degrees (unless different advice applies to a particular plant) so that there is a tip on the cutting.
 - Small cuttings are better for small plants and shrubs, while large cuttings up to two meters long and 5-10 cm thick are good for larger trees such as poplars and mulberries.
- When in doubt, make the cuttings 10-20 cm long.
 Remove half to two thirds of the leaves from the bottom of the cutting. Make sure to leave the bottom two leaves in place, and pull the top two leaves off as well. Remove flower buds, as they withdraw all the nutrients from the plant it needs to grow new roots.
 - It is best to cut the plant about 1/2 - 1 cm below a knot (a knot has two small twigs or two leaves), as roots often grow around and under a knot.
 Take care of the cutting. If you take good care of the cutting, it will root better because it will then get the nutrients to do so. Place the cutting in a mixture of water with a little liquid seaweed-based plant food for 3-4 hours. If possible, place the cutting under fluorescent light. Then, just before planting, dip the bottom of the cutting in rooting hormone.
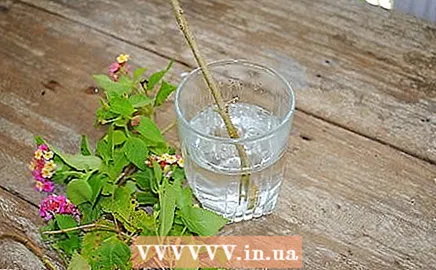
  Prepare the rooting medium. Grow the cutting in sand, soil, potting soil or plain water. Some cuttings take root more easily in water than in potting soil - again, you will have to experiment or find information about your particular plant. Sand is kind of a compromise, but you have to treat it like water when it comes to adding plant food.
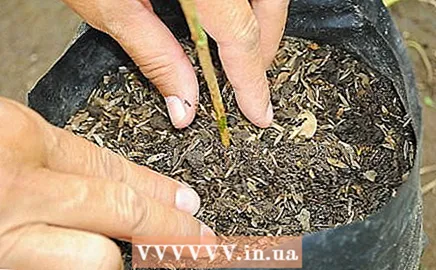
 - Make a hole with a pencil where the cutting fits. The cutting should be about 2.5 - 5 cm deep in the medium, although this depends on the length of the cutting.
- Do not place the cuttings in direct sunlight.
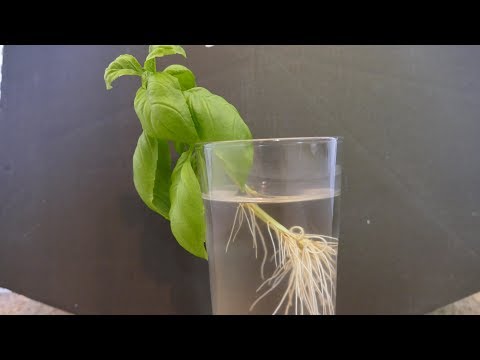
- If you are using water as a medium, add a tiny amount of plant food to it. Also make sure that the plant does not straight away sunlight, because UV rays are too strong for the roots. Besides the fact that it sometimes works better, the advantage of water is that you can see what is happening. This is not only fun (also for children), but you know exactly when the plant is ready without having to guess whether the roots are long enough. Once the roots start to grow it is amazing how quickly this goes, sometimes you can see a difference within a few hours.
- If you are using garden soil, place the cutting in a moist plant bed that is rich in organic matter, with a pH of around 5.5-6.0 (or put the cutting in a pot with good potting soil). Place the cuttings far enough apart so that the distance between two cuttings is equal to the length of the cutting.
- If you have a cuttings from a coniferous tree, insert it directly into moist soil in the garden. Simply water the cutting and after a year or two you will have a mature plant.
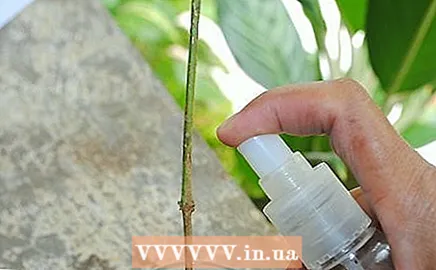 Water the cutting a lot when it is just planted. Then keep the cutting moist, but do not water too much (you can also spray it). The success rate is between zero (some plants cannot be taken from cuttings) and 90%. Don't get discouraged if it doesn't work out; don't be surprised if the cutting seems to wither in the first few days - this is normal.
 - If you cover the cutting loosely with a plastic bag (which can still contain air), the moisture will be retained better.
- Trees are the hardest to take cuttings, while cacti and succulents are the easiest. It works almost 100% of the time on plants with moisture-retaining leaves, such as lavender and geranium.
 Transplant the cuttings to their final location when you are sure they have enough roots. For large cuttings such as from a willow or poplar, cut a point at the bottom and stick it three-quarters into the ground, so that only a little bit sticks out. It is better to do this immediately where you want the tree; you don't need to do anything else except keep away weeds and animals that eat your plants (rabbits, deer, etc.).
 - To check how the roots are doing, you can gently pull on the cutting. When you feel resistance, the roots begin to form. Don't be too rough, because then you will destroy the cutting.
Tips
- Climbers that root easily:
- Bittersweet
- Oriental Virginia creeper
- Callistemon
- Honeysuckle
- Virginia creeper
- Blue rain
- Perennials that do well as cuttings include:
- Mugwort
- Broken heart
- Catmint
- Chrysanthemum
- Dahlia
- Carnation
- Lilac
- Border flower
- Soapwort
- Tortoise flower
- Speedwell
- Periwinkle
- Trees that root easily on a cutting are for example:
- Amber tree
- Birch
- Trumpet tree
- Maple
- Cherry
- Ginkgo Biloba
- Golden Rain
- Wig tree
- Willow
- You can also smear a little bit of honey on the bottom of the cutting instead of rooting hormone.
- A cutting grows best in a place where there is no sun in the hottest part of the day, and out of the wind.
- To make it work better, you can put a transparent plastic bag around the pot and tie it at the top. Then the cutting remains warm and moist. Occasionally spray the leaves with a plant spray, because one third of the moisture is absorbed by plants through the leaves.
- A cutting grows best in low stress times, such as early spring or early fall. Then the cutting has enough time to make roots before it gets too cold or too hot.
- Commercially available root hormone, such as Cutting Edge, can be purchased from most growers or online. These give the cutting an excellent boost.
- Remove cuttings that do not take root after two to four weeks. You can clearly see when the cutting is dead. If there are still some green parts on the cutting after this period, they will likely grow into a healthy plant.
- Buy a large bag of potting compost and good plant food, then the cuttings will succeed sooner.
- Some cuttings are more successful if you have a heated greenhouse with a sprinkler system. Without these means it is usually not possible to take cuttings with such plants.
Warnings
- Watch out for invasive species; It is preferable not to propagate plants that are seen as a pest in the Netherlands.
- Some plants simply don't develop roots on a cutting. If you have tried it a few times, you will know better which plants will work and which will not.
- Do not water the cuttings too much, or they will die because the underside will rot. Honey prevents rot, but even then you should not over wet the soil.
- Always be careful when working with garden soil or potting soil, as it can contain germs that you can inhale or transfer to your mouth with your hands. Wash your hands thoroughly and wear a mask if you suffer from reduced immunity or respiratory illness.
Necessities
- Pruning shears (make sure they are clean)
- Root hormone
- Plant food based on seaweed
- Water
- Suitable pots or a garden
- Plant medium of your choice (soil, sand, water, potting soil, etc.)


