Author:
Joan Hall
Date Of Creation:
4 July 2021
Update Date:
23 June 2024

Content
Cubase is a music editing and mixing software. In this program you can also use midi sequencers and add various effects. Of course, the best way to understand this program is to try it out yourself, but it doesn't hurt to read this article first to understand its basics.
Steps
 1 Download the program from the Steinberg website and install it.
 2 Run the program. You will see a window consisting of four main elements:
 - Audio tracks: they will be located at the very top. These are stereo or mono channels to which analog audio can be recorded: sound clips, riffs, loops, etc. Cubase allows you to add pre-recorded tracks, or record your own using a microphone or external sound card.
- Midi tracks: These are located under the audio tracks and differ from the latter in that they are digital recordings of music made using virtual instruments such as virtual keys or a drum machine. Some sounds can be recorded with external midi instruments, or you can use a special program that will convert the audio to midi. Although, due to the fact that they have been digitized, the quality of midi tracks will generally be worse than that of audio tracks, midi tracks offer more possibilities for editing the music, even after it has been recorded.
- Locators: Locators will be located at the top of the screen, on the right and left. They allow you to set the beat for your song, ranging from 4 to 8 measures. They will also help you make a loop. With the right mouse button, you set the right locator, and with the left mouse button, the left one.
- Transport panel: This panel contains all the main recording control buttons: play, stop, or record. The panel will also help you increase or decrease the speed of your composition.
 3 Import the files into Cubase by clicking on an empty audio track and selecting the desired file from the menu. After the sound file is imported, you will see its graphic image. You can right-click on it to open a menu of tools that will allow you to edit audio. You will be able to erase, trim, or move parts of this audio file. You can also adjust its volume, creating a fade in or fade out of the sound.
  4 Double-click between the left and right locators on any MIDI channel to create an empty midi segment. Now double click in it to bring up the midi sequencer window. It will help you select midi instruments, as well as arrange notes that will then be played by the computer. You can do this using the keys on the left. If you will be recording drums, you can select a separate sound for each drum or cymbal.
  5 Go to Panels and then click on Mixer. Use it to control the volume of your tracks. You can mix several audio channels at the same time or each channel separately.
 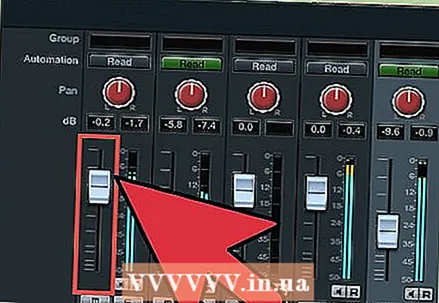 6 Click on the buttons above the mixer volume faders to open the effects panel. Now you can add various effects or use the equalizer to enhance the sound, for example adding treble or bass.
Tips
- You can play notes directly on the keyboard in the midi sequencer to hear how they sound. This is especially useful when searching for the desired drum sound.
Warnings
- When saving the file, use the extension of the program, as other extensions may distort your file, cut some frequencies, etc.


