Author:
Helen Garcia
Date Of Creation:
22 April 2021
Update Date:
1 July 2024

Content
- Steps
- Method 1 of 7: Hair Health
- Method 2 of 7: Preparing the Essentials
- Method 3 of 7: Lightening your hair
- Method 4 of 7: Toning your hair
- Method 5 of 7: Treating White Hair
- Method 6 of 7: Brightening the roots
- Method 7 of 7: Correcting errors
- Tips
- Warnings
- What do you need
If you want a bold and pretty hairstyle, try dyeing your hair white. Stripping hair of its natural pigment can cause it to dry out, but with the right approach, the effects can be minimized. Learn how to use brightening and toning products and be proud of your flawless white hair.
Steps
Method 1 of 7: Hair Health
 1 Check the condition of your hair before dyeing it. If you want a white color, your hair should initially be as healthy as possible. A few weeks before coloring, start avoiding anything that can damage your hair, especially chemicals and heat.
 - If your hair appears dry and lifeless, it will need to be repaired first. This can be done with deep conditioning products or avoiding hair dryers and styling (this applies to styling tools and cosmetics).
 2 Do not use chemicals on your hair. Healthy hair that has not been previously dyed, permed or straightened is best lightened.
 - Generally, hairdressers recommend waiting at least two weeks after chemical treatment. This period can be shortened or extended depending on the condition of your hair.
- If after dyeing your hair looks healthy and feels nice to the touch, desaturate it after two weeks and you should be fine.
 3 Apply coconut oil to hair at least three hours before bleaching. Rub the oil into your palms to warm it up, then massage it into your hair and scalp. It is not necessary to wash off the oil before painting.
 - You can even leave the oil on your head overnight the night before you dye it.
- It is believed that the oil improves the color quality, but there is no confirmation of this fact.
- Coconut oil is made up of tiny molecules that can penetrate the hair and moisturize it from the inside out.
 4 Use non-aggressive moisturizing shampoos and conditioners. Buy products that will moisturize your hair without weighing it down or stripping it of its natural layer of oil. If you are on a budget, look for salon hair cosmetics in outlets and promotions.
 - Buy cosmetics with low pH, oils (argan, avocado, olive), glycerin, glyceryl stearate, propylene glycol, sodium lactate, sodium pyrrolidone carbonate and alcohols that start with the letter "c".
- Avoid products with strong odors, alcohols with the prefix "prop", sulfates and any products that promise to add volume to your hair.
 5 Choose your styling products carefully. Think about what tools you will use.For example, products that add volume or lift the hair will dry it out as well.
 - As with shampoos and conditioners, only apply products that will moisturize your hair.
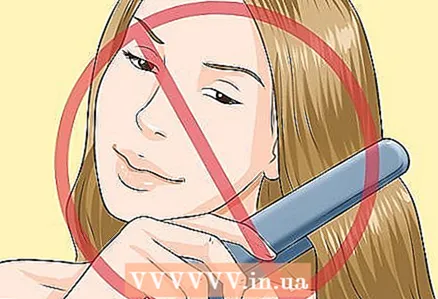 6 Avoid heat exposure to hair. Do not dry them with a hairdryer, do not use an iron or curling iron. Heat damages and weakens hair follicles. After washing your hair, do not rub your hair with a towel - it is better to gently squeeze the water out of your hair.
 - If you can't do without styling, try straightening or curling your hair without using heat. Look online for ways to do this, and you have a variety of options.
Method 2 of 7: Preparing the Essentials
 1 Go to a cosmetics store. Paints that are sold in regular stores are usually inferior to those that can be bought in the salon. In professional cosmetics stores, you can find quality products and tools.
 - There are popular shops in all countries. Look for such a store in your city.
 2 Buy a bleaching powder. It is sold in bags and jars. If you want to dye your hair more than once, it is better to buy a jar - it will cost less.
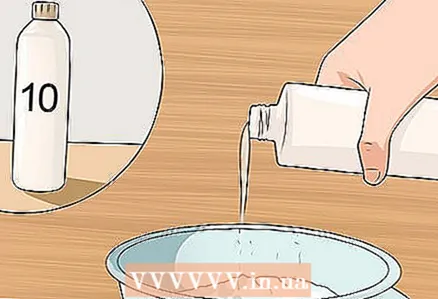
  3 Buy a developer. The developer in the form of a cream will interact with the brightening powder and lighten the hair. It can have different intensities (it is denoted by numbers from 10 to 40). The stronger the product, the faster the hair lightens and the more dangerous it is for the hairstyle.
 - Many hairdressers recommend using a developer with a value of 10 or 20. Hair will lighten longer, but these products are more gentle.
- If you have fine, brittle hair, use the weakest developer. If the hair is dark and coarse, a developer with a value of 30-40 is required.
- It is best to use a product with a value of 20, so if in doubt, buy one.
 4 Buy a toner. It will turn your hair from yellow to white. Toners come in a variety of shades, including blue, gray, and burgundy.
 - When choosing a toner, consider your skin tone and hair color. If you have golden hair, you should choose a tint color that is opposite the gold on the color wheel (that is, a blue or lilac shade of ash).
- Some tinting agents must be mixed with a developer before applying to the hair, others are sold ready-to-use. Both are effective.
 5 Buy a product to remove reds and golds. These products are sold in small packages and are added to lightening powder to muffle unnecessary shades. It is not necessary to use this remedy, but many people find it works wonders.
 - It all depends on your hair. For people with dark hair and reddish, orange or pink shades, this product is suitable, and the hair will turn out to be perfectly white.
- Unless you have ash hair that you want to go white, it is best to play it safe and buy this corrector, as it will cost you cheap anyway.
 6 Buy an adequate amount of bleaching powder. If you have long hair, you will need at least two packs of powder, developer and concealer, if not more.
 - If you don’t know how much you need, it’s better to buy with a margin. You can leave the packs unopened until the next time you need to touch up the roots.
 7 Buy a toning shampoo and conditioner. Look for products that have been specifically formulated for very light hair. Usually, such products have a rich burgundy or burgundy blue color.
 - If you don't have a lot of money, at least buy a quality shampoo. It is more beneficial for the hair and will protect it from dryness.
 8 Buy painting tools. You will need a coloring brush, a plastic mixing container, a plastic spoon, hair clips, towels, and plastic wrap or a transparent shower cap.
 - Do not use metal tools as they may react with the brightening agent.
- Use old towels. You can take towels that you will not mind ruining.
Method 3 of 7: Lightening your hair
 1 Do a preliminary test. Before lightening your hair, do a skin test and a hair test. A skin test will let you know if you are allergic to any component of the dye, and a hair test will determine how long you need to keep the composition on your head.
 - For a skin test, take a small amount of the tinting mixture and apply it to the skin behind the ear. Leave it on for half an hour, wipe it off and try not to touch or wet the area for two days. If everything goes well after that, start painting.
- To test on hair, prepare a small amount of lightening compound and apply to a section of hair. Check the color every 5-10 minutes until it is the shade you want. Time the hair color for that color so you know how long to keep the color on your hair.
- It's also important to pay attention to how your hair feels after you wash off the dye and conditioner. If your hair appears to be very dry, try a less strong developer or color your hair in several stages (over several weeks, not at a time).
- If you want to limit yourself to just one text, do a skin test, as allergies can have serious consequences.
 2 Prepare yourself. Wear clothes that you don't mind getting dirty. Place a towel over your shoulders and keep a few more towels nearby in case the mixture gets where it shouldn't be. Wear gloves to protect your hands.
  3 Place the bleaching powder in a bowl. Transfer the desired amount with a plastic spoon. The powder is usually sold with instructions for use.
 - If there are no instructions, the ratio between powder and developer should be approximately 1: 1. You can first pour in a spoonful of powder, then squeeze out the developer and stir.
 4 Mix developer and bleach powder. Take the right amount of developer and mix everything with a plastic spoon. You should have the consistency of a thick cream.
 - The ratio of powder to developer should be approximately 1: 1 (spoon of powder to spoon of developer), unless otherwise indicated in the instructions.
 5 Add a reddish and gold remover to the mixture. Once the bleaching powder and developer are mixed, add the reddish and gold remover as directed.
  6 Apply the mixture to dry, messy hair. Using a brush, apply the color to the hair from the ends up, leaving about 2.5 centimeters at the roots. The roots will lighten faster than all other hairs as they are closer to the warm scalp. Tackle the roots as you work your hair down the length.
 - Hairpins can be useful for separating strands, unless you have short hair.
- Start at the back of your head and work your way forward.
- Dye your hair no earlier than a day after shampooing. The dirtier your hair, the better, as the natural oil in your hair will help protect your hair and scalp from caustic substances in the dye.
 7 Make sure the mixture is evenly distributed throughout your hair. After dyeing all of your hair, including the roots, check to see if everything is covered in dye.
 - You can massage your head and look for dry areas. If you find areas like this, dab some paint on them and rub in.
- Examine the back of the head with a mirror.
 8 Cover your head with plastic wrap. You can use a transparent shower cap.
 - When the paint starts to work, you will feel itchy and tingling sensations. This is fine.
- If it hurts, peel off the tape and wash off the paint.If your hair is still dark, try lightening it again after two weeks with a lighter product (assuming it is in good condition).
- Do not heat your hair as the heat can cause hair to fall out.
 9 Check your hair from time to time. After 15 minutes, examine a section of hair to see how much the hair has lightened. Use a towel to wipe off the lightening compound to make the color more visible.
 - If your hair is still dark, apply the color to this section, put the film back on your head and leave it on for 10 minutes.
- Check your hair every 10 minutes until it is completely blonde.
 10 Do not leave color on hair for more than 50 minutes. If you do this, your hair will begin to break and fall out. Bleach can split your hair, so be careful.
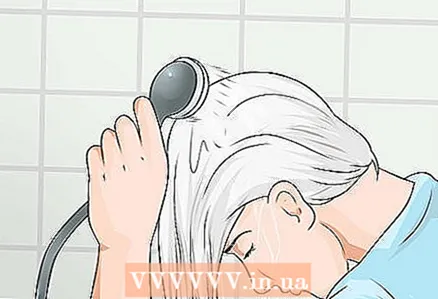
  11 Rinse off the clarifier. Remove the plastic wrap and place your head under cool water to rinse off any paint. Wash your hair, apply conditioner and rinse as usual, then blot your hair with a clean towel.
 - The hair should turn yellow. If the color turned out to be bright yellow, proceed to toning.
- If your hair turns orange or remains dark, you need to lighten it again before toning. This is best done in two weeks. Remember that if the roots are lighter than the rest of your hair, you will not need to re-color them. Treat only the areas that you would like to lighten.
- You may need to extend the staining process for several weeks. If you have thick and coarse hair, you may need up to five colors.
Method 4 of 7: Toning your hair
 1 Prepare for toning. When the hair is lightened, it can be tinted. As with dyeing, you will need to wear old clothing and gloves. Prepare towels and check if your hair is dry.
 - You can tint your hair immediately after dyeing (it is important to thoroughly rinse off the dye). To keep the color white, try toning your hair every few weeks.
 2 Mix the toner. If it's already ready to use, skip this step. Take a clean plastic container and mix the tinting agent and developer according to the instructions.
 - Typically, the ratio of developer to tinting agent is 2: 1.
 3 Apply the toner to damp hair. Spread it out with a brush in the same way as paint (from the tips to the roots, first at the back, then in front).
 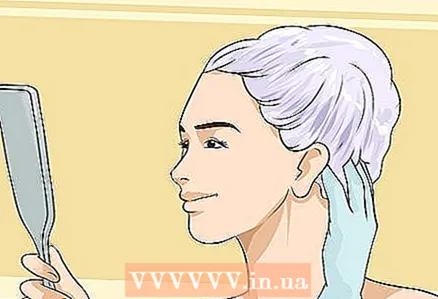 4 Make sure the product is evenly distributed. Run your hands through your hair and check to see if all the hair is saturated with the toner.
 - Use a mirror to examine the hair from the back.
 5 Wrap your head in plastic or wear a hat. Leave the toner on your hair for the time indicated in the instructions. Depending on the concentration of the product and the color of your hair, this can take up to 10 minutes.
  6 Check your hair every 10 minutes. The tinting agent may work faster or slower than you expect, depending on the type of product and the color of the hair that came out after dyeing.
 - Check your hair color every 10 minutes to keep your hair from turning blue. With a towel, wipe a small amount of the tinting from the strand and see what the color has become. If the desired color has not yet been achieved, reapply the product to the strand and hide it under the film.
 7 Rinse off the tinting agent. Rinse your hair under cool water so that nothing remains on your hair. Wash your hair with shampoo and conditioner as usual, and wring out the water from your hair with a clean towel.
 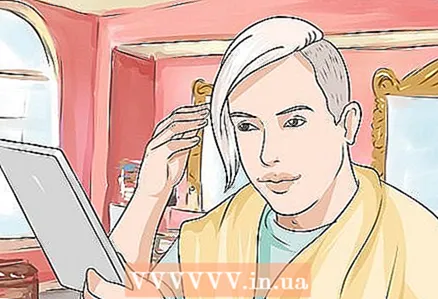 8 Examine your hair. Let them dry on their own or blow dry at the lowest power. Now that the hair is dyed and toned, it should be flawless white.
 - If you missed a section, wait a couple of days and repeat everything from the beginning on a separate section.
Method 5 of 7: Treating White Hair
 1 Be gentle with your hair. White hair is very brittle and dry even in its best condition. Take care of your hair, do not wash it if it seems very dry. Don't brush them too often, straighten them, or curl them.
 - Try to dry your hair naturally. If you really need to use a hairdryer, dry your hair on the coldest setting.
- Avoid heat exposure and other influences on the natural structure of the hair, as this will make the hair brittle. It is possible that all your hair will break off, and you will be left with a short untidy "hedgehog".
- If you really need to straighten your hair, do it with a hair dryer and a comb. It's better than straightening them with an iron.
- Comb your hair with a wide-toothed comb.
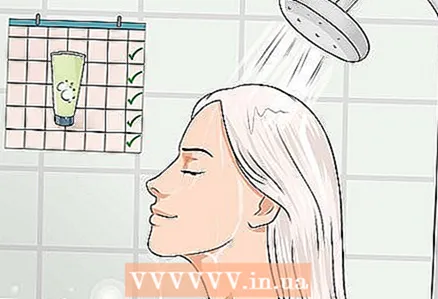 2 Wash your hair less often. Many experts recommend that you wash your hair only once a week after dyeing. The shampoo washes away natural oils from the hair, and bleached hair desperately needs this oil.
 - If you exercise regularly, sweat, or use a lot of hair products, wash your hair twice a week. Dry shampoo can be used once.
- Dry your hair by patting dry with a towel. Do not towel dry too quickly, as this can damage your hair further.
 3 Know which means to use. Buy products formulated for bleached and damaged hair (at least burgundy toning shampoo and nourishing conditioner). Avoid products that add volume to your hair as they will dry out your hair.
 - Sebum will make your hair look softer and smoother. You can use extra virgin coconut oil to help fight frizz by moisturizing it.
 4 Do masks at least once a week.Buy a good mask from a salon or beauty supply store. Do not buy masks from pharmacies or supermarkets, as they can only envelop your hair, making it sticky and depriving it of volume.
  5 Apply toner to your hair regularly. This must be done all the time to keep the hair white. Try using toner once a week or every two weeks. Toning shampoo will allow you to do this less often.
Method 6 of 7: Brightening the roots
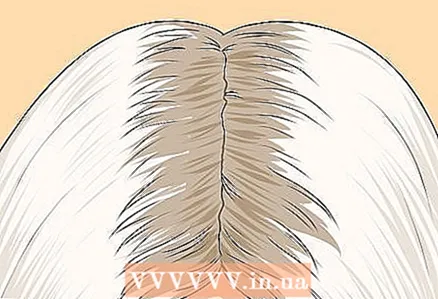 1 Try not to grow roots too long. It is best to dye your hair until the roots are two centimeters deep. This will make the color more uniform.
 - If the roots grow longer, it will be difficult to paint over them so that the transition is not visible.
 2 Mix the paint. The process is no different from the initial staining. Mix the brightening powder with the developer in a 1: 1 ratio, then add the anti-reddish and golden color remover as directed.
  3 Apply the mixture to dry, dirty roots. Use a brush to paint over the roots. Dye can run into dyed hair, but it is important to keep these areas not too large.
 - If you have thick or long hair, use barrettes to separate it into sections. Parting short hair may also be helpful to better see the roots.
- Part your hair with the sharp end of the comb. Apply the mixture to the roots, turn the hair over with the sharp end of the comb, then paint over the strand on the other side and move on to the next.
 4 Check the condition of the roots. After 15 minutes, check what the color has become so that the roots do not turn out too light. Then check the color every 10 minutes.
  5 Rinse hair dye. Rinse off the mixture under cool water, then wash your hair with shampoo and conditioner as usual. Squeeze out the water with a clean towel.
  6 Apply toner to your hair. As with normal tinting, prepare the product and apply it to the roots with a brush.
 - If the rest of your hair also needs to be tinted, apply the product first to the yellow ends, then distribute it all over the hair.
- Monitor the color every 10 minutes so it doesn't turn blue, gray, or burgundy.
 7 Rinse off the product from your hair. Rinse your hair under cool water, then wash it with shampoo and conditioner. Squeeze out the water with a towel and, if possible, let them dry naturally.
Method 7 of 7: Correcting errors
 1 Don't worry if the paint runs out faster than you can finish the entire head. There is nothing wrong with that.
 - If you run out of mixture, but not the substances themselves, quickly mix them up and apply to hair. It only takes a few minutes to make the paint.
- If you run out of substances, complete the dyeing process on hair that has already been dyed (that is, leave the dye until the hair lightens or until 50 minutes have passed), and then buy the necessary substances as soon as possible and dye the remaining hair.
 2 Remove paint stains from clothing. It is best to dye your hair in clothes that you do not mind, and cover with towels. If paint accidentally gets on an item that is dear to you, you can try to wash the stain in the following way:
 - Dip a cotton ball in rubbing alcohol (you can use gin or vodka).
- Rub the stain. This will move the paint from the garment to the stain.
- Rub until the paint is all over the stain.
- Rinse under cold water.
- If all else fails, try bleaching the whole thing, and then paint it in any color with a special paint.
 3 Be patient. If you did everything right, but after 50 minutes your hair has not turned light, do not panic. This often happens to people who have dark hair or whose hair cannot be dyed. You may need to repeat the staining several times to get the desired color.
 - If you have to color your hair several times, do it no more than once every two weeks.
- Pay attention to the condition of the hair after each coloring. If they get very dry, take a break from staining. Hair must be relatively healthy before dyeing, otherwise it will start to break or fall out.
 4 Get rid of dark streaks in your hair. After several root tints, stripes of different shades of yellow may appear.
 - You can apply a small amount of paint on them and leave for a few minutes to make the color more or less similar to the base color.
- The streaks will become less visible after toning.
Tips
- White hair is not for those who are not ready to waste time grooming. Bleached hair needs care. Think seriously if you are ready for this before you paint them.
- If you are not ready for serious grooming or are worried about the quality of your hair, it is better to dye your hair in the salon.
- Perhaps, the first time, it is best to entrust the staining to a professional in order to understand how it is done. You can also learn something from the master, and then you only need to tint the tips.
- If you want to dye your hair, wait at least two weeks after dyeing.
- If, after lightening, you want to dye your hair a different color, you will need to use a special product that will replace the natural hair pigment. Only then can you add color.
- If you're unsure which shade of platinum would look best with your skin tone, try on different wigs. Remember that in some stores they charge money for fitting, and in some it can only be done with the help of a consultant. Look for such a store in your city and go there for a fitting.
- If you want to continue using hot styling tools, apply heat shield to your hair first. These products come in the form of a spray, cream, and mousse. You can buy them at a salon or cosmetics store.
Warnings
- Working without gloves can cause the dye to itch, discolor and dry the skin if it gets into cuts on the skin.
- Do not bleach your hair after washing. The shampoo washes away the protective coating from the scalp, so coloring will be much more harmful to the skin and hair. Wait at least a day.
- If you decide to dye your already dry and weak hair, you will only exacerbate the problem. Do not use hot styling tools or shampoo your hair too often before dyeing.
- Be patient. If you try to lighten your hair too quickly, your hair will start to break and fall out. In addition, chemical burns are possible.
- Chlorinated water can give your hair a green tint. If you want to swim in the pool, apply conditioner to your hair beforehand and put on a cap.
What do you need
- Brightening powder
- Developer
- Remover for red and golden tones
- Hair toner
- Toning shampoo
- Coloring brush
- Plastic container or bowl
- Gloves
- Towels
- Polyethylene film


