Author:
Bobbie Johnson
Date Of Creation:
8 April 2021
Update Date:
1 July 2024
Content
- Steps
- Method 1 of 3: Recovery
- Method 2 of 3: Format and Install
- Method 3 of 3: Install without disk
- Tips
When system files become corrupted, your Windows becomes unusable. Perhaps all programs start to run slowly, and you want to return to the previous performance. Fortunately, restoring and reinstalling Windows XP is easy enough. Follow this guide to learn how to make them, regardless of the version of Windows XP you are using.
Steps
Method 1 of 3: Recovery
 1 Insert the Windows XP disc. If you do not have such a disc, contact your computer vendor, or download the .iso file from the Internet to burn it to a blank disc. Be careful with viruses and remember that you will still need to enter an activation code.
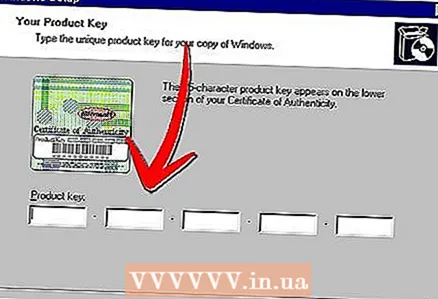
 - 2 Write down your activation code. It is important to do this before you begin the installation. This is a 25-digit code that you need to enter in order to install Windows. It can usually be found in two places:
- Comes with your Windows XP disc, usually on the back.
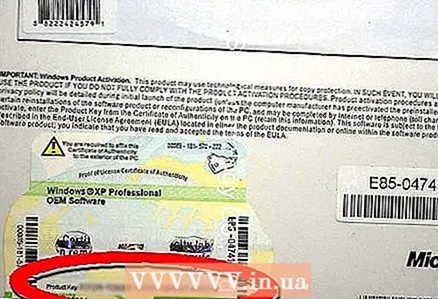
- Supplied with your computer. If this is a home computer, then the code is located on the back of the system unit. On laptops, it is located on the bottom of the lid.
- Comes with your Windows XP disc, usually on the back.
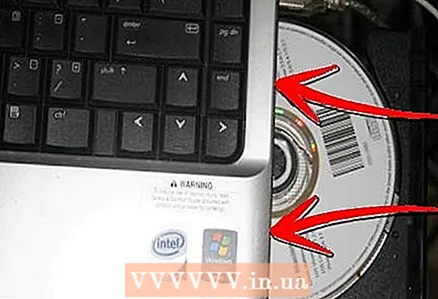
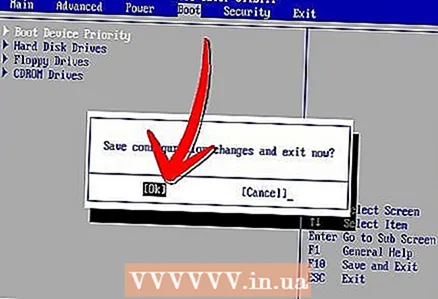
 3 Reboot your computer. Make sure the Windows XP disc is inserted. Your computer must be configured to boot from CD. To do this, you need to go to the BIOS settings menu.
 - To do this, press the "Setup-button" when the manufacturer's logo appears during boot. This button is different for different computers, but most often it is F2, F10, F12, or Del. Your button will be displayed on the same screen as the manufacturer's logo.

- While in BIOS, open the Boot tab. Set the CD as 1st Boot Device. Depending on your BIOS and its settings, this item may be called DVD, Optical Drive, or CD / DVD drive.

- Save settings and exit BIOS. Your computer will restart.
- To do this, press the "Setup-button" when the manufacturer's logo appears during boot. This button is different for different computers, but most often it is F2, F10, F12, or Del. Your button will be displayed on the same screen as the manufacturer's logo.
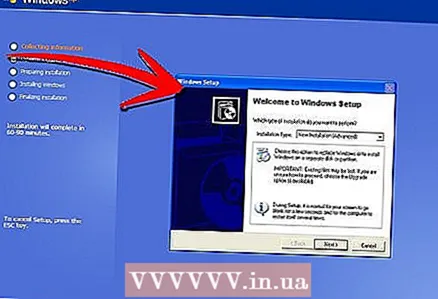
 4 Start the installation. After the manufacturer's logo disappears, you will see the phrase Press any key to boot from CD. Press any key on your keyboard to start the installation process. If you don't press anything, the computer will boot from the hard drive as usual.
 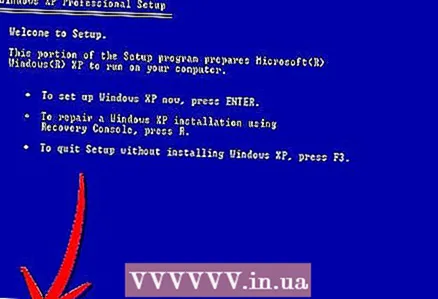 5 Wait for the drivers to load. To begin the installation process, Windows must download the required drivers. Then you will see a welcome window. Press Enter to start installation. Do not launch the Recovery Console.
 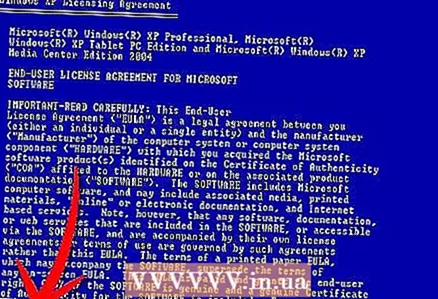 6 Read the agreement. Then press F8 to agree and continue. The program will display a list of Windows that are available for installation. Most users will only see one option.
 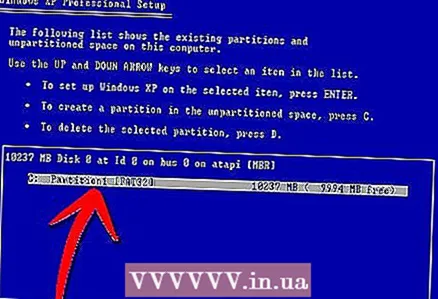 7 Select the installation option. If you only have one, it will be selected by default. Press R to start the recovery process. Windows will start copying the files and later will automatically restart the computer. After that, the recovery process itself will begin directly.
 - You will need to confirm the date and time as well as other basic settings. The default settings will be fine in most cases.
- You will need to confirm the date and time as well as other basic settings. The default settings will be fine in most cases.
 8 Enter your activation code. Towards the end of the installation, you will need to enter an activation code. Windows will verify this code for authenticity before proceeding.
 - After installation, you will need to authorize your copy of Windows over the Internet or over the phone. After logging into the new restored system, you will see the product activation wizard. If you have an internet connection, you can authorize your copy of Windows with one click.
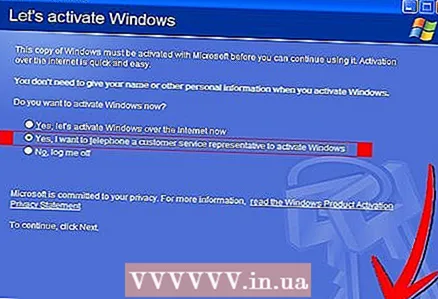
- After installation, you will need to authorize your copy of Windows over the Internet or over the phone. After logging into the new restored system, you will see the product activation wizard. If you have an internet connection, you can authorize your copy of Windows with one click.
- 9 Check the programs. After the installation is complete, your restored Windows will start. Since the system files have changed, some of your programs may not work - they will need to be reinstalled.
- You may need to reinstall drivers for some of your devices.To find out which devices are not working correctly, open Start and right-click on My Computer> Properties> Device Manager. If you see devices with a yellow icon and an exclamation mark, then you need to reinstall the drivers for them.

- Your personal data and documents should be intact during recovery. Check if everything is in place.

- You may need to reinstall drivers for some of your devices.To find out which devices are not working correctly, open Start and right-click on My Computer> Properties> Device Manager. If you see devices with a yellow icon and an exclamation mark, then you need to reinstall the drivers for them.
Method 2 of 3: Format and Install
 1 Save your data. Formatting and reinstalling Windows will clean up your hard drive. Make sure to back up all your important data before starting the installation. Photos, movies and music will be erased.
 - 2 Insert the Windows disc. Make a note of your activation code, you will need it during installation. Configure booting from CD to run the installer.
- This action is detailed in steps 1-4 in the first section of the article.
- 3 Wait for the drivers to load. To begin the installation process, Windows needs to download the required drivers. After that, you will see a welcome window. Press Enter to start installation. Do not launch the Recovery Console.
- 4 Read the agreement. After that press F8 to agree and continue. The program will display a list of Windows that are available for installation.
- 5 Delete partitions. You will see a list of your hard drive partitions. These are C: and D: drives (the letters depend on your system settings).
- This is your last chance to restart your computer and save your data if you forget something. After deleting the partition, the data will be deleted.
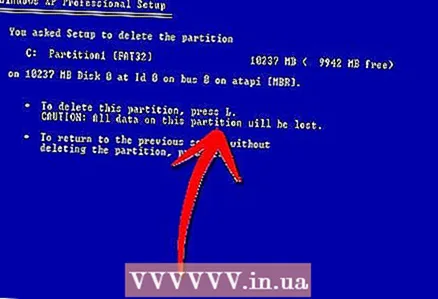
- Highlight the partition that contains Windows. This is usually section C. Press D to delete the section. Confirm the deletion of the partition by pressing Enter.
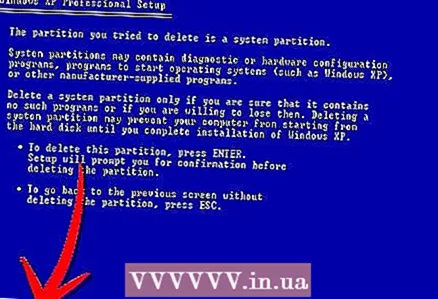
- You have one more chance to go back. To actually confirm the deletion of the partition, press L.
- This is your last chance to restart your computer and save your data if you forget something. After deleting the partition, the data will be deleted.
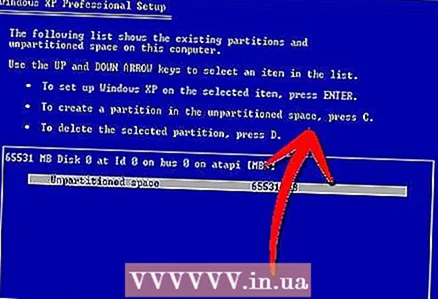 6 Create a new section. Select an unallocated area. Press C to create a new section. Enter the maximum possible value and press Enter.
 - You can create a smaller partition if you plan to create other partitions later on through Windows. There are several reasons why you can do this, but for most users the option with the largest possible volume will work.
- You can create a smaller partition if you plan to create other partitions later on through Windows. There are several reasons why you can do this, but for most users the option with the largest possible volume will work.
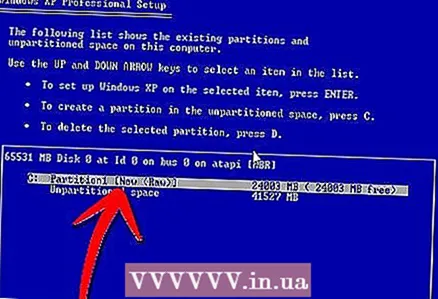
- 7 Begin installing Windows. Once you've created your partition, highlight it and press Enter to start installing Windows. You will need to format this section. Select "Format the partition using the NTFS file system". Choose NTFS over FAT as NTFS works much better with Windows.
- Formatting starts. It can last up to several hours, it all depends on the size and speed of your hard drive. For most users, however, it only takes a few minutes.
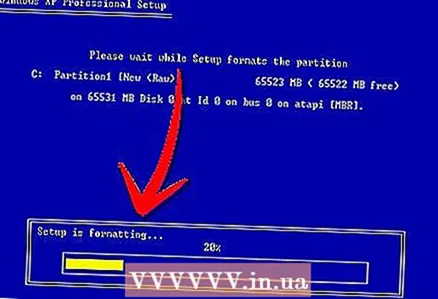
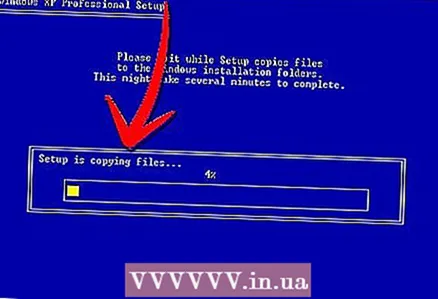
- After successfully formatting, Windows will copy the files it needs to install. It also takes a few minutes and requires no user intervention.
- Formatting starts. It can last up to several hours, it all depends on the size and speed of your hard drive. For most users, however, it only takes a few minutes.
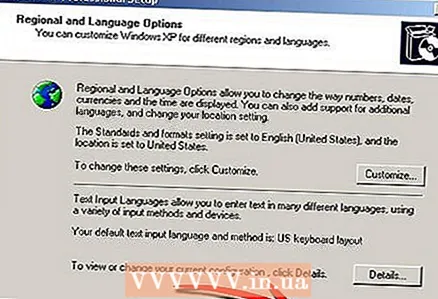
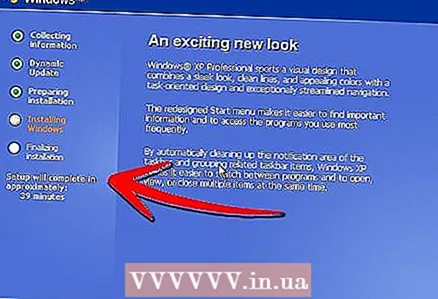 8 Windows will begin installation. This is an automatic process during which you only need to enter some data. First of all, this is your language and region. Change the default settings if they are not appropriate. Then click "Next".
 - Now enter your name and organization. They will be used to sign documents and can be changed later in Windows.
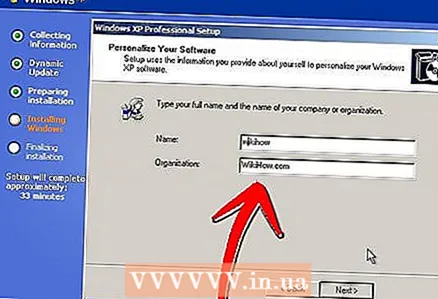
- Now enter your name and organization. They will be used to sign documents and can be changed later in Windows.
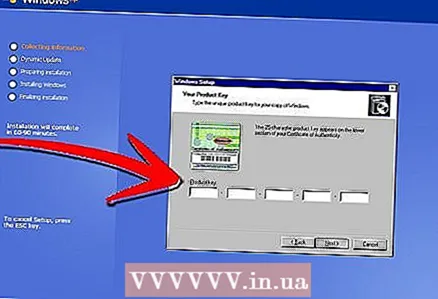
 9 Enter your activation code. You will need to enter a 25-digit code. If you are installing Windows XP SP3 from a disc, you will not need to enter it at this stage.
 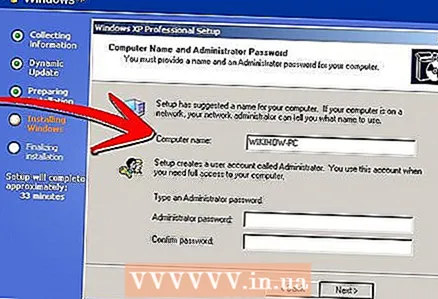 10 Enter the computer name. This name will appear on the network to describe your computer. Windows will automatically create a name for you, although you can easily change it to something else.
 - In XP Professional, you will be prompted to create a password for the administrator account.
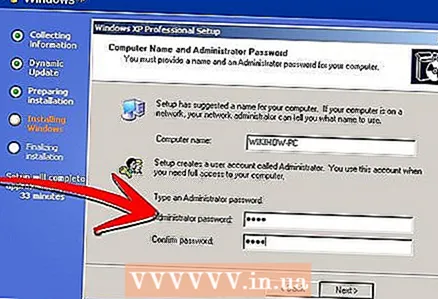
- In XP Professional, you will be prompted to create a password for the administrator account.
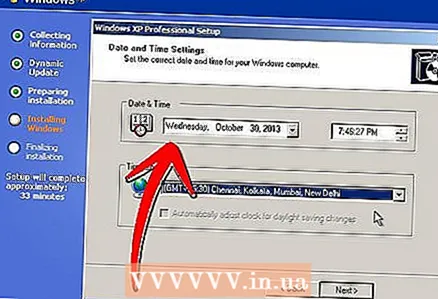 11 Set the correct date and time. You will see a calendar and clock that you can customize. You can also set the time zone for your region.
 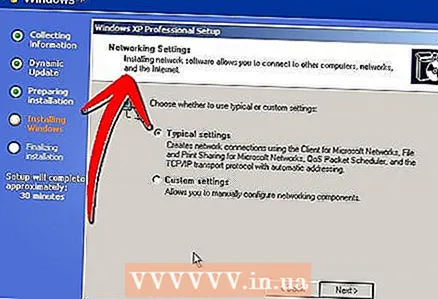 12 Make basic network settings. You will have to choose between standard and manual network configuration. For most users, the default settings are fine. If you are installing the system in a corporate environment, check with your administrator.
 - When asked to enter a team name, most users will choose the first option and leave the default. If you are in a corporate environment, you will need to manually specify the domain. Check with your administrator about this.
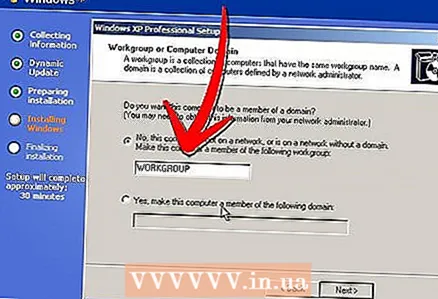
- When asked to enter a team name, most users will choose the first option and leave the default. If you are in a corporate environment, you will need to manually specify the domain. Check with your administrator about this.
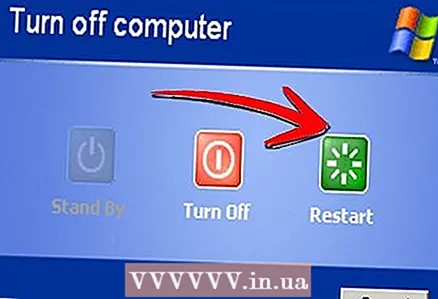
 13 Windows will complete the installation. This takes a few minutes and does not require user intervention. After completing the installation, your computer will automatically restart and start Windows XP.
 - If you changed your BIOS settings to boot from CD, you may see Press any key to boot from CD again. Do not click anything and wait until the phrase disappears. This will allow the computer to continue booting from the hard drive and complete the Windows installation.
- If you changed your BIOS settings to boot from CD, you may see Press any key to boot from CD again. Do not click anything and wait until the phrase disappears. This will allow the computer to continue booting from the hard drive and complete the Windows installation.
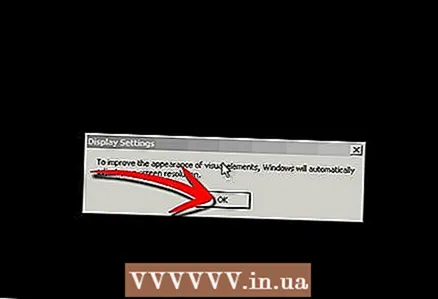 14 Click OK to adjust the screen resolution. Windows will try to automatically adjust the screen resolution for your computer. During setup, you will be asked if you can read the text on the screen. If so, click OK to continue. If not, click Cancel, or wait 20 seconds until the screen returns to default settings.
 - 15 Click Next to proceed with the installation. After configuring the screen, you will see the Windows welcome window. It only takes a couple of minutes.
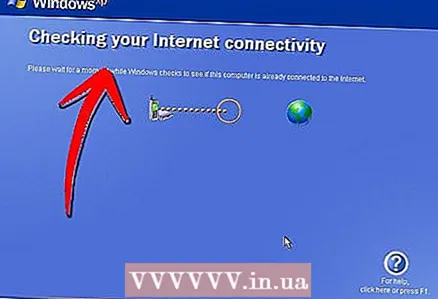
- Windows will also check your internet connection. If you plan to set it up later, you can skip this step.
- Next, Windows will ask you if you are connected to your home network or directly to the Internet. If you are using a router, select the first item. If the modem is connected directly to your computer, select the second item.

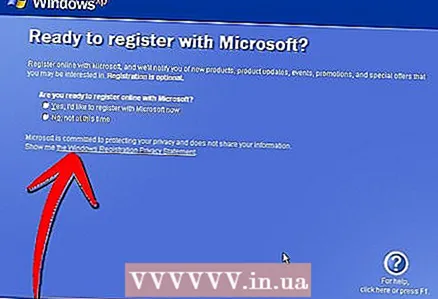
- You will be prompted to register your product with Microsoft. Decide if you need it or not. It is not required to use Windows.
- Windows will also check your internet connection. If you plan to set it up later, you can skip this step.
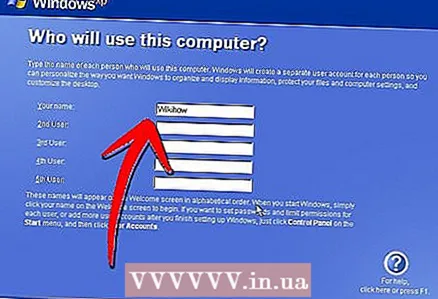 16 Enter your username. You can create multiple accounts on your computer. You need to create at least one. In this window, you can add up to five users, more can be added through the Control Panel after installation.
 - After entering the names, click Finish to complete the installation. Windows will start loading and you will soon see your new desktop.
- After entering the names, click Finish to complete the installation. Windows will start loading and you will soon see your new desktop.
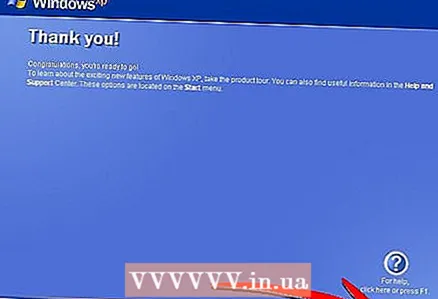
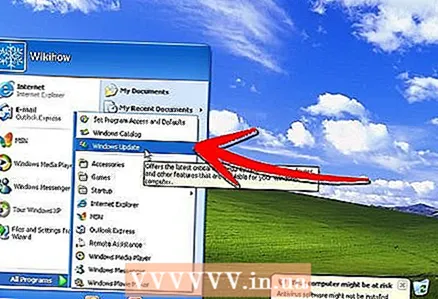 17 Run Windows Update. Your installation is complete, but you should first run Windows Update to download the latest system updates. This is very important as they fix system vulnerabilities and improve stability.
 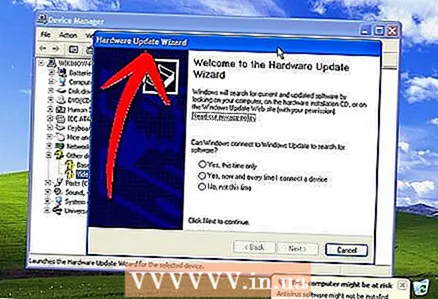 18 Install the drivers. You will most likely need to install the drivers again because the computer was formatted. Depending on the components of your computer, these may be drivers for a video card, modem, network card, sound card, etc.
 - These drivers can be found on the discs that came with your computer or downloaded from the manufacturer's website.
Method 3 of 3: Install without disk
- 1 Installing from the recovery partition. Most computer manufacturers ship their computers with a hard disk partition that contains the Windows setup files. In order to start the installation, you need to boot from the recovery partition.
- The most commonly used key to start the recovery partition is the F11 key. You will see which key to press next to the manufacturer's logo while the computer boots up.

- Recovery partitions differ from manufacturer to manufacturer. Follow the instructions on the screen to launch Windows Setup. Then follow the instructions in step 3 of the previous section of the article.
- The most commonly used key to start the recovery partition is the F11 key. You will see which key to press next to the manufacturer's logo while the computer boots up.
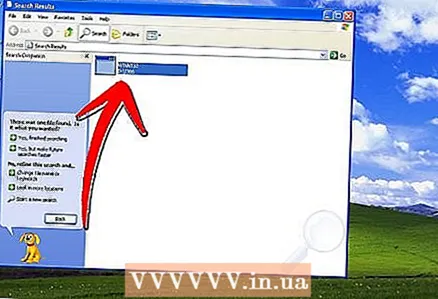 2 Installation from Windows. You need to use the winnt32.exe file. This is a Windows boot file that can be found in Windows XP. To do this, open Start and click Search. On the left, select All files and folders. Enter "winnt32.exe" in the search bar.
 - Running winnt32.exe will reboot your computer to start Windows installation. From now on, follow the instructions in step 3 of the previous section of the article. You will still need to enter an activation code. Your data will be deleted as in a normal installation.
- Running winnt32.exe will reboot your computer to start Windows installation. From now on, follow the instructions in step 3 of the previous section of the article. You will still need to enter an activation code. Your data will be deleted as in a normal installation.
Tips
- Before starting the installation, make sure you have everything you need. Check for an activation code. Download all the required drivers to a disk so you can install them right after the Windows setup completes.


