Author:
Sara Rhodes
Date Of Creation:
11 February 2021
Update Date:
1 July 2024
Content
- Steps
- Method 1 of 3: Using a horizontal seam
- Method 2 of 3: Using a V-stitch
- Method 3 of 3: Making a pencil skirt
- Tips
- What do you need
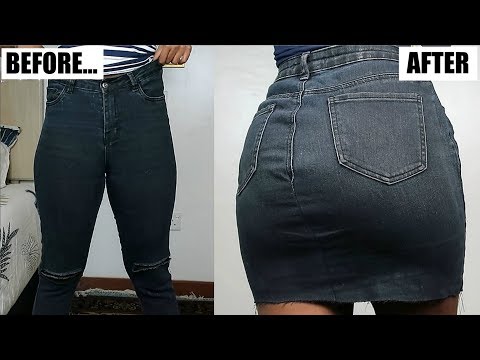
If you have old pants that you haven't worn in a while, get ready to see them turn into a trendy skirt! All you need is a pair of scissors, a needle and thread, some fabric, and a couple of hours to create a new piece of your wardrobe.
Steps
Method 1 of 3: Using a horizontal seam
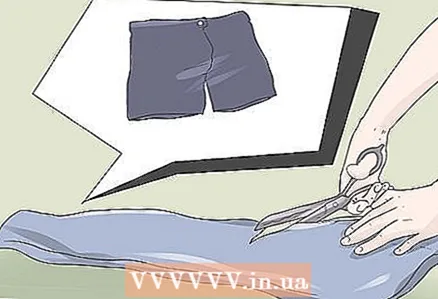
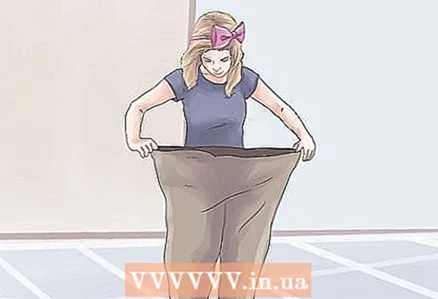
 1 Take a pair of pants that you no longer wear. They must be your size or larger. If you don't have a matching pair, look for something at a thrift store! Jeans, khakis, parachute pants - everything will do.
 - If the pants are too big, you will need to open the side seam, cut off the excess fabric, and re-sew the sides.
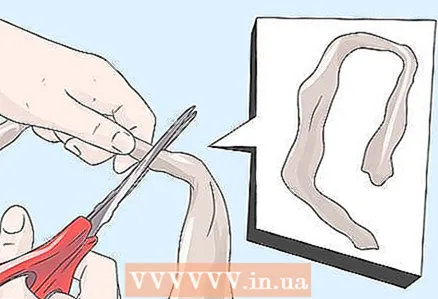
 2 Cut the pant leg to the start of the "cuff". Make sure the fabric is flat. The fabric should not wrinkle, it should fit naturally to the table.
 - If you didn't cut the legs straight enough, that's okay! It doesn't matter at what angle the pants are cut. A steeper angle will give your skirt a sophisticated look and will not be stuck.
- If you want to use the pant legs for the rest of your skirt, don't throw them away!
 3 Cut a piece out of a different fabric to give the skirt a length. You may need 15 cm of fabric or more. You can use cuttings left over from past sewing. Alternatively, use the leg you just cut off.
 - Cut the fabric 1.25 cm wider for the seams.
- Make sure the fabric is long enough to cover the entire diameter of the skirt.
- If you are using your old jeans, you may need to open the seam where the skirt meets. Otherwise, there will be too many seams in one place. And, if you are using denim, make sure that the structure of the fabric runs along both the front and back.
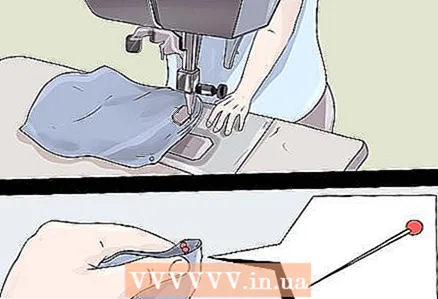
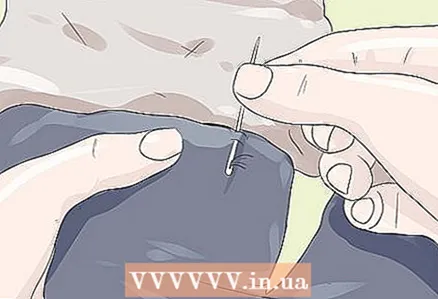 4 Pin the fabric to the hem of the skirt and sew. Sew the fabric to the skirt, leaving a supply of fabric on the inside. Turn the skirt over and sew with a sewing machine.
 - If necessary, sew a seam down the bottom of the skirt. The main thing is not to make the skirt too short.
- If the fabric is wrinkled, iron it. So it will be much easier to work with her.
 5 You can add additional style elements to your skirt to your liking. Your skirt is ready! But if you want to make it really original, add a pattern on the fabric or some other material on the sides. You can also add sequins, prints, stickers, sequins!
Method 2 of 3: Using a V-stitch
 1 Take pants of any size. If they are larger than your size, you will need to loosen the side seam and trim off the excess fabric. Any material will suit you. Jeans, khakis, wide leg pants - whatever.
 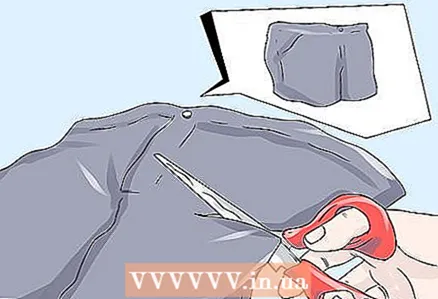 2 Measure the length to your liking and cut the pants. Remember to leave about 5cm for the seams, otherwise your skirt will be a little shorter than you would like. Do not throw away your pant legs, they will come in handy for sewing.
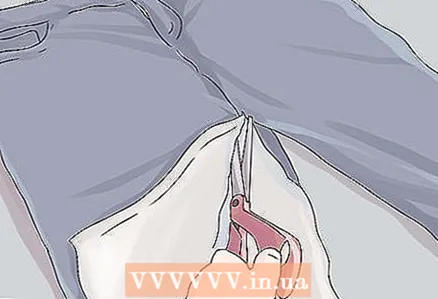
 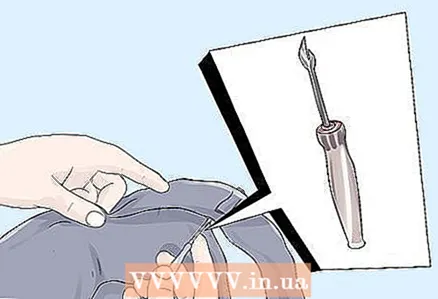 3 Remove the seams on the inside from the end of the legs to the "cuff". This will take a while, so sit back, put on your pajamas and turn on the TV.
 - This is the most difficult and painstaking part of the job. It will be easier further!
 4 Fold up the open edges and pin them up. Seam marks? They shouldn't be visible! So fold them in about 2cm and pin them from the inside out. Do this for both sides. You should now have a V-neck. It should be flat, the sides should be a mirror image of each other.
 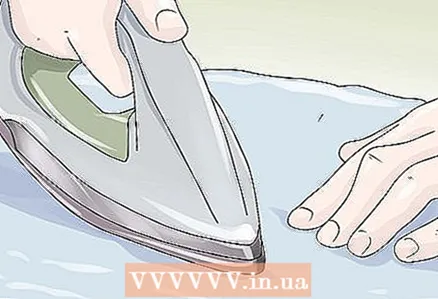 5 Iron. Don't skip this step! It may seem unnecessary, but it will be much easier for you to work with material that lies flat and does not bump. You will also be better able to see if you have straight lines.
  6 Take the cut off leg. Turn the skirt inside out and pin the leg fabric (which you just cut), covering the entire V-shaped open space. Cut the fabric so that it covers the entire neckline.
 - You will need to do this on both sides of the skirt, of course, unless you want a huge cut in the front or back.
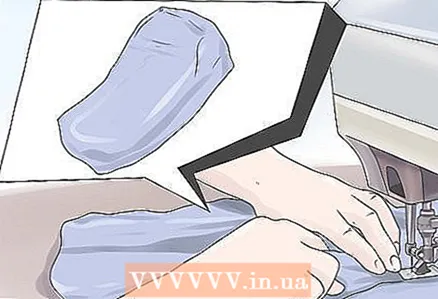
 7 Turn the skirt over again and start sewing the fabric around the edges, starting from the bottom. Walk on both sides, placing the seams as close to the seams of the fabrics as possible. You can do this by hand, but it will be much easier with a sewing machine.
 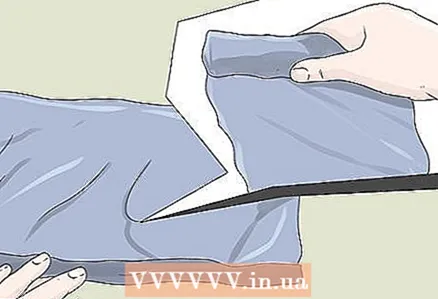 8 Make a hem along the bottom of the skirt. Now you will need to transform the bottom edge of your skirt (now it really is a skirt!). Grab 1.25 cm from the edge, fold, iron and sew for a clean, beautiful line.
  9 Remove excess fabric and iron the skirt again. You may have some excess fabric on the inside of the seams, which can be trimmed. Then iron the skirt one last time. Tadam! Your fashionable skirt is ready!
Method 3 of 3: Making a pencil skirt
 1 Take a pair of pants. If they are your size, make sure they are the correct fit - you will need high-waisted pants for the pencil skirt. If they are low-slung, you'd better swap them for a much larger pair. The large size can easily be converted into a high-waisted skirt.
 - Any material will work, not just jeans. If your mom has 80s wide leg pants lying around, give them a try!
 2 Cut the seams from top to bottom. If the pants are larger than yours, you will need to trim both the inner and outer seams. If this is your size, only the inner seams need to be trimmed.
 - Trim the roll so that the pants lie flat on the table. If you do not do this, then excessive puffing material will form on your skirt, and this is not necessary for you. Trim to the point where the material no longer puffs.
 3 Fold the resulting fabric in half where the cuff was, and sew the seam all the way down.
- If you bought a much larger pants, you will have to do this procedure twice.
 4 Fold the legs together and sew. Fold the legs together so that they form a single fabric. Step back about 1 cm from the edges, leaving room for the stitching. You can trim the excess material right away or later. But if you want a skirt with a slit, don't sew all the way through!
 - Your stitch should be as close to the edge as possible - you can follow in the footsteps of an existing seam. You can sew a line either manually or on a typewriter.
- If you are working with larger pants, the procedure will need to be repeated twice again.
 5 Turn the skirt inside out. Or, if you are working with two halves (in the case of oversized pants), simply lay one half over the other right-side up.
 - If the skirt is too big for you, take a skirt in your size and place it on top. Cut your pant skirt to size, leaving 1 cm on each side for the seams. If you don't get along well with the seams, leave 2cm each.
- If the skirt is your size, start sewing the edges!
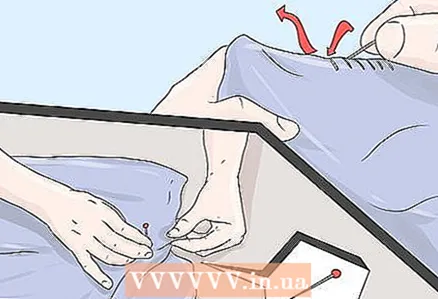
 6 Pin the sides and start sewing. You need to stab each side well (top and bottom for each side) to make it easier for you to stitch. If you are working with denim, make sure you are using denim thread. Don't you have one? Then use regular cotton thread and double stitch.
 - If you are using denim, sew very slowly. You may also need to stretch the fabric slightly to keep it flat and free from puckering after sewing.
- Now try it on! You can adjust the length to suit your body.
 7 Cut the skirt to the desired length and trim the bottom of the skirt. Once you have put on the skirt, determine the length you want and pin the skirt with pins at this point. Now take off your skirt, you're almost done! Cut to length, work on the bottom, and now you're done!
 - You have two options: topstitching the hem, or leaving the edges frayed to give the skirt a slightly sloppy look. If you chose a hemstitch, fold the edge over by 1.25cm and sew along the edge. Do the same with the cut, if you have one.
Tips
- It's a great idea to sew a frill down the bottom of the skirt for a more girly look!
- This is a great gift idea for your loved ones! You can use your pants if they fit the person, or buy a pair of cheap, sized pants at a thrift store.
- Feel free to add what you like. Sequins, prints, drawings - have fun!
- Get creative! Find beautiful fabrics in different colors!
What do you need
- Trousers
- Scissors
- Seam ripper
- Needle and thread (or sewing machine)
- Safety pins
- Measuring tape (centimeter)
- Iron
- Fabric (optional)
- Ruffle, paint, decorations (optional)


