Author:
Mark Sanchez
Date Of Creation:
5 January 2021
Update Date:
1 July 2024
Content
A dynamic link library (or DLL files) is the backbone of traditional Windows programming. These are external data files that are accessed by various programs (accessed without outside interference); this eliminates the need to embed such files in every program. DLL files run in the background and the average user rarely encounters them. However, for one reason or another, it may be necessary to open one of the DLL files. In this article, we'll show you how to do it.
Steps
Method 1 of 2: Using DLL Files
 1 Know what a DLL file is. Dynamic library (DLL files) are external data files that programs access for their normal functioning; this eliminates the need to build libraries into every program.
 - The dynamic link library is the backbone of traditional Windows programming and allows you to create efficient and small programs.
 2 Be aware that the average user does not need to open or edit DLL files. For most, these are files that run in the background. Programs install and access DLL files automatically, and moving or deleting them can lead to system crashes.
 - Sometimes, when installing a program, you may be prompted to install additional DLL files. Make sure you get the program from trusted sources, as DLL files may contain malicious code.
- If you are interested in creating DLL files, see the next section.
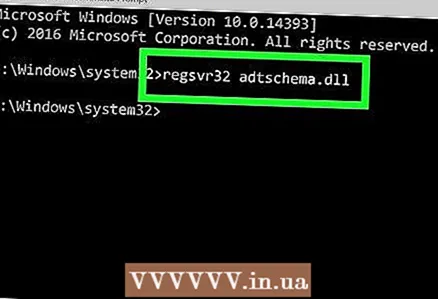 3 Register a new DLL file. If you installed the DLL file manually (copied it to the program folder), you may need to register it in order for the program to work with it. Check your program's documentation to determine if you need to register the DLL file (in most cases, you don't need to).
 - Open a command prompt. Click Start -> Run (or press Win + R) and type cmd... Change to the directory with the new DLL file.
- On Windows 7 or newer, open the folder containing the new DLL file, hold down Shift, right-click the folder and select Open Command Window from the context menu. The command line will open directly in the current directory.
- Enter regsvr32 dllname.dll and press Enter. This command will add the DLL file to the Windows Registry.
- Enter regsvr32 -u dllname.dllto remove the DLL file from the Windows registry.
Method 2 of 2: Decompiling DLL Files
 1 Download and install the decompiler. A decompiler is a program that allows you to view the source code used to create a file or program (in our case, a DLL file). To view the DLL file, you need a decompiler to open the source code of the file. Opening the DLL file without a decompiler (for example, using notepad) will display unreadable characters.
 - dotPeek is one of the more popular free decompilers. It is available here.
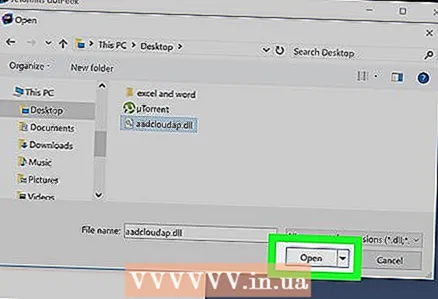 2 Open the DLL file in a decompiler. If you are using dotPeek, click File -> Open and then locate the DLL file you want to decompile. You can view DLL files without breaking the integrity of the system.
 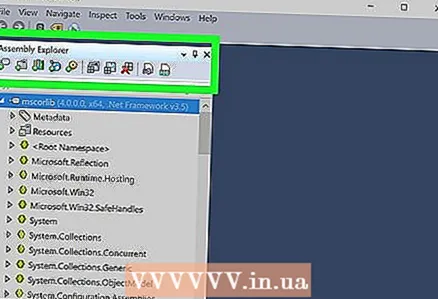 3 Use the Assembly Explorer function to open the nodes of the DLL file. DLL files are made up of "nodes", or code modules, that form a DLL file. You can open and view each node and any nested nodes within it.
 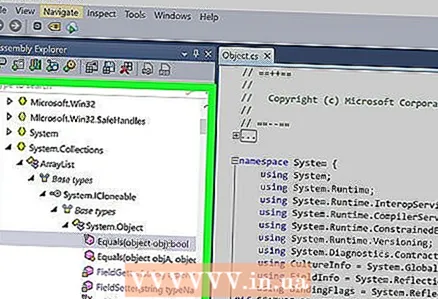 4 Double click on a node to view its code. The node code will be displayed in the right dotPeek window. dotPeek displays the code in C #, or he can download additional libraries to view the source code.
 - If additional libraries are required to view the site, dotPeek will try to load them automatically.
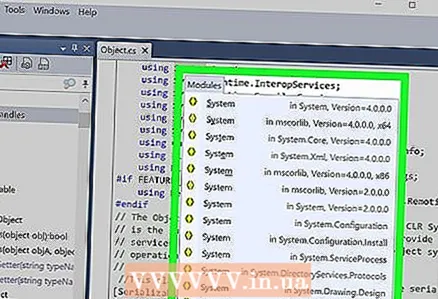 5 If you don't understand a piece of code, use the Quick Documentation feature to find out what the commands are for.
- Hover the cursor over a piece of incomprehensible code (in the "Code View" window).
- Press Ctrl + Q to open the Quick Documentation window.
- Click on the hyperlinks to get information about a particular team.
 6 Export the code to Visual Studio (Visual Studio). If you want to edit your code and create a new DLL file, you can export the source code to Visual Studio. The exported code will render in C # (even if the source code is written in another language).
 - Right click on the DLL file in the Assembly Explorer.
- Select "Export to Project".
- Select export options. You can open the file directly in Visual Studio if you want to start editing it.
 7 Once you load the file into Visual Studio, you can edit its code and create a new DLL file. Click here for detailed instructions on using Visual Studio.


