
Content
- Steps
- Method 1 of 2: Start by setting up your server
- Method 2 of 2: Configuring the Client
- Tips
- Warnings
- What do you need
Imagine you are on a business trip abroad, where you are working to conclude an agreement with an offshore supplier. This is a very important meeting for you and your company. If you make a deal, you will get a promotion. On the morning of your presentation, you turn on your laptop and find that its hard drive is broken. In a panic, you call the office to ask for an electronic copy of your presentation, but due to the time difference, no one answers you.
On the other hand, if you knew how to set up a virtual private network (VPN), you would be able to access your files from anywhere in the world! VPN allows you to connect to your computer and access your file from anywhere in the world. Setting up a VPN on Windows is a two-step process. 1) Setting up a computer on which access to files is provided (server). 2) Setting up a computer that has access to them (client).
Steps
Method 1 of 2: Start by setting up your server
 1 Open your browser and go to www.whatismyip.com. Write down your IP address. You will need it to configure the client.
  2 Click the button Start and click on Execute.
- 3 Enter Control Panel and press Enter.

 4 Click on Network and internet connections.
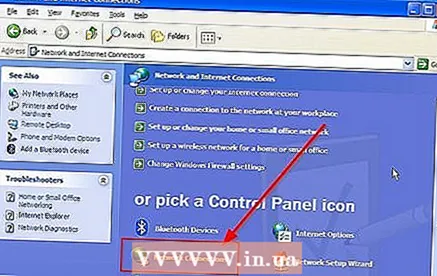 5 Click Network connections.
 6 Select on the left side of the window Create a new connection.
 7 Will open New Connection Wizard. Click on Further.
  8 Select the last option on the list Establish a direct connection to another computer. Click on Further.
 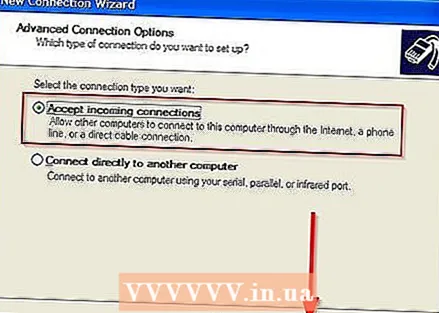 9 Please select Accept incoming connections. Click on Further.
 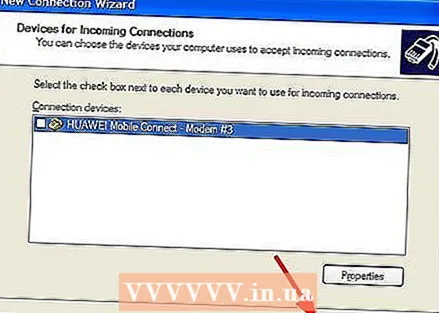 10 You will see a window Devices for incoming connections. Don't choose anything here. Click on Further.
  11 Please select Allow virtual private connections. Click on Further.
 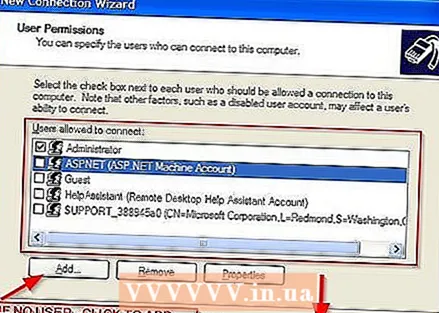 12 Select who you want to share with. Click on Further... If the user is not listed, you need to add him.
 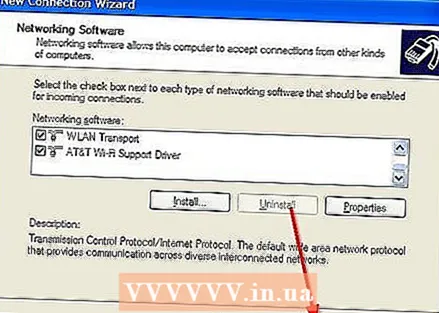 13 Do not change anything on the screen Networking programs. Click on Further.
  14 That's all! Your computer is configured for VPN connections. To complete the setup process, click Ready.
Method 2 of 2: Configuring the Client
- 1 Click the button Start and click on Execute.
- 2 Enter Control Panel and press Enter.
- 3 Click on Network and internet connections.
- 4 Click Network connections.
- 5 Select on the left side of the window Creating a new connection.
- 6 Will open New Connection Wizard. Click on Further.
 7 Please select Connect to the network at the workplace then again Further.
 8 Click Connecting to a virtual private network and Further.
 9 Enter the name of your network. Click on Further.
  10 Enter IP addresswhich you recorded earlier and then press Further.
 11 Please select Add connection shortcut to desktop and press Ready.
Tips
- You can also try using VPN software if you don't want to configure it.
- Enter exactly the same username and password that you used on the server.
- IP address must be entered exactly the same as on the screen.
- If the VPN is not working, disable your firewall. If it works now, you need to forward ports. For security reasons, do not leave the firewall disabled.
- Both computers must be connected to the Internet.
Warnings
- Do not give access to the “guest” account. It doesn't use a password, so anyone can connect to your VPN.
What do you need
- Two computers running Windows XP
- Server IP
- High speed internet connection.


