Author:
Bobbie Johnson
Date Of Creation:
9 April 2021
Update Date:
26 June 2024
Content
- Steps
- Method 1 of 4: Standing Wolf
- Method 2 of 4: Howling Wolf
- Method 3 of 4: Cartoon Wolf
- Method 4 of 4: Simple Wolf
- What do you need
Learn to draw a wolf by following the steps in this tutorial.
Steps
Method 1 of 4: Standing Wolf
 1 Draw the torso.
- Draw a bean-like flattened oval.
- Make sure you work with a sketching pencil so you can erase unnecessary lines.
 2 Sketch the joints and head.
- Draw a circle at one end of the bean for the head.
- For the joints of the hind legs, draw two intersecting circles. One circle should be slightly smaller, as the hind leg will not be fully visible.
- In the front of the torso, draw a slightly elongated circle for the front legs.
 3 Draw the neck and add the ears.
- Draw two curves on top of the head to form two pointed ears. Wolves, unlike foxes, have smaller ears.
- To draw the neck (or scruff), simply add two slightly curved lines connecting the circle of the head and the oval of the torso.
 4 Add the muzzle and legs.
- To draw the hind legs, draw two curved lines from each joint. The lines should bend towards the tail.
- To draw the front legs, simply add two thick sticks (English letters "l"). Since one of the legs is hidden, draw only a small part of the other leg.
- To draw the muzzle, draw a small arc (the English letter "U" on the head.
 5 Add eyes and nose and finish off the hind legs.
- To draw the eyes, just add two small drop-shaped elements above the muzzle.
- Draw the hind legs by adding C-shaped curves at the end of each leg. Do the same with the front legs.
- The wolf's tail is almost invisible, so draw the tail hidden behind the paws by simply adding a curve at the end of the body.
- You should now have the base for the wolf shape.
 6 Using a pen, draw the final outline of the wolf shape on top of the sketch.
- Remember the lines will be invisible.
- Use slanted strokes to create a wool effect.
- The lines of the drawing may seem imperfect and not very clear, but in general, after you erase the pencil sketches, the drawing should look neat.
 7 Erase the sketches and construction lines and add details.
- You can add details like ears, eyes, mouth, nose, jaws, fangs, and fur.
- You can add additional strokes to highlight the jaw and coat.
 8 Color in the drawing.
- Depending on the breed, wolves can be in different colors and shades - from gray to brown - and even white.
Method 2 of 4: Howling Wolf
 1 Draw the torso.
- Draw a bean-like flattened oval.
- Make sure you work with a sketching pencil so you can erase unnecessary lines.
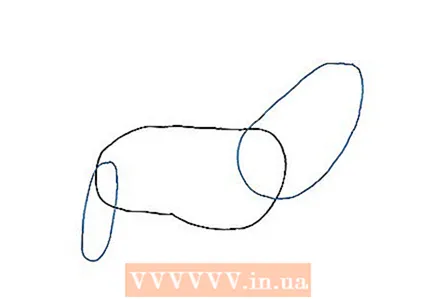 2 Add 2 ovals.
- One oval should be larger and longer, it needs to be directed upwards - this will be the neck and head of the wolf.
- The second oval needs to be drawn on the opposite end of the body. It should be long, thin and vertical - this will be the tail.
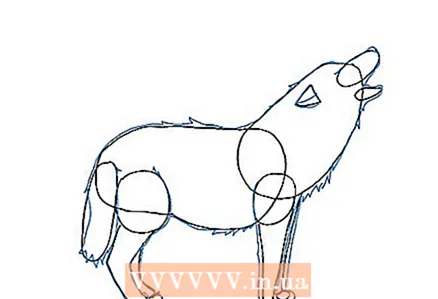
 3 Draw the muzzle and joints.
- Just at the tail and at the base of the head oval, add two circles for the leg joints.
- For the muzzle, add a small oval oriented in the same direction as the neck and head oval.
- Add two teardrop shapes below the muzzle for the jaw.
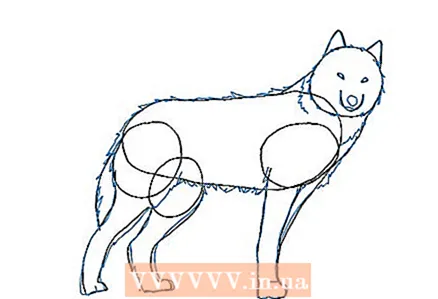
 4 Draw the ears and paws.
- Because the wolf is turned sideways, only one ear will be visible. To draw it, simply add a small rounded triangle, oriented in the opposite direction to the muzzle.
- Add paws by drawing lines below the joints. The hind feet should bend towards the tail.
 5 Draw the paws.
- Add similar lines to define the length of the wolf's legs. The lower legs should be flat to the ground.
- Add another pair of legs behind the ones you drew earlier - only a small part of the legs should be visible. They should sort of peek out from behind those in the foreground.
 6 Draw the paws.
- Add a couple of circles at the base of the legs.
- You should now have the base for the wolf shape.
 7 Using a pen, draw the final outline of the wolf shape on top of the sketch.
- Be aware of lines that will be hidden or invisible.
- Use slanted strokes to create a wool effect.
- The lines of the drawing may seem imperfect and not very clear, but in general, after you erase the pencil sketches, the drawing should look neat.
 8 Erase the sketches and construction lines and add details.
- You can add details like ears, eyes, mouth, nose, jaws, fangs, and fur.
- You can add additional strokes to highlight the jaw and coat.
 9 Color in your drawing.
- Depending on the breed, wolves can be in different colors and shades - from gray to brown - and even white.
Method 3 of 4: Cartoon Wolf
 1 Draw a circle. For the ears, add two protruding pointed shapes on each side of the circle. Draw two curved lines to form the nose.
  2 Draw a circle below the head and connect it to the previous one using curves for the outline of the torso.
 3 Draw three straight lines for the forelegs and a semicircle for the paws. Add another semicircle for the back paw.
  4 Draw a crescent shape for the tail with a pipe.
 5 Add details to the face. Draw a pair of ovals for the eyes and add smaller circles inside them for the pupils. Draw arches for the eyebrows and a circle at the tip of the nose. Add three small circles to the side of the nose and draw a sharp canine tooth using a pointed shape.
 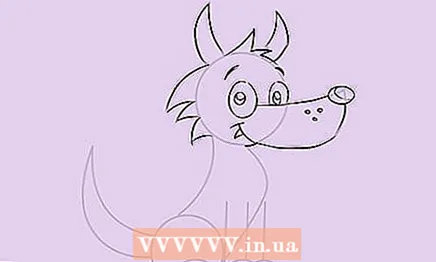 6 Draw the head and make it look fluffy with short, curved strokes.
 7 Draw the rest of the torso. Add some curved strokes on the chest for a fluffy look, and draw small slanted lines on the legs to separate the toes.
 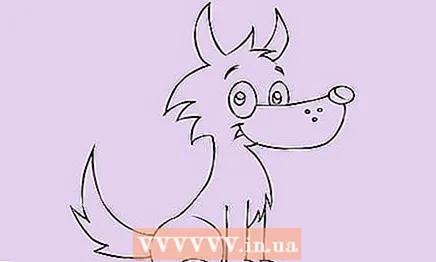 8 Erase unnecessary lines.
 9 Color in your drawing.
Method 4 of 4: Simple Wolf
 1 Draw a circle for the head. For the ears, add pointed shapes on each side of the head. Draw a curved line in front of the circle for the protruding nose, and add a crosshair of lines from the circle to the nose.
  2 Draw a larger circle for the neck area and another oval shape for the torso.
 3 Draw the legs using curved and straight lines.
 4 Add a tail on the back of the wolf using a curved line.
 5 Add details to the face. For the eyes, draw two pointed shapes with circles for the pupils inside. Add a nose using a pentagonal shape. Draw the mouth and sharp fangs.
 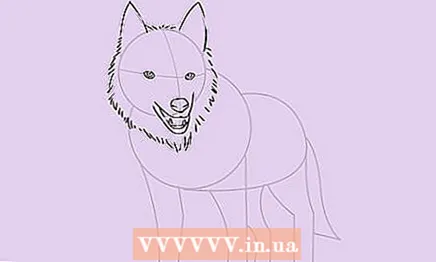 6 Draw the head using short slanted strokes for a fluffy coat effect.
 7 Draw the rest of the body, adding some slanted strokes for the fur. Add short, slanted lines on each foot to separate the toes.
  8 Add soft slanted strokes on some parts of the wolf's body, especially on areas that are usually in shadow.
 9 Erase unnecessary lines.
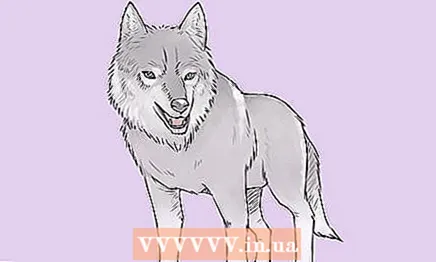 10 Color in your drawing.
What do you need
- Paper
- Pencil
- Pencil sharpener
- Eraser
- Pen
- Crayons, wax crayons, markers, or watercolors


