Author:
Marcus Baldwin
Date Of Creation:
17 June 2021
Update Date:
1 July 2024
Content
- Steps
- Method 1 of 3: Preparation
- Method 2 of 3: Energizing with chevron stripes
- Method 3 of 3: Adding depth with vertical or horizontal stripes
- Tips
- What do you need
- Warnings
- Sources
Revitalizing your living space does not mean expensive renovations or complete replacement of furniture. Add some color variety to your home with tips for drawing stripes on the walls of rooms.
Steps
Method 1 of 3: Preparation
 1 Select the pattern you want to create. Stripes can be wide or narrow, horizontal or vertical, or drawn in a specific pattern.
  2 Frame the stripes with masking tape before painting. Applying masking tape is the most difficult part in drawing stripes because of the tendency for paint to flow under the tape.
 - Sculpt the tape along the bottom and fix the top edge of the tape with a thin coat of paint in the base color of the wall to prevent other paint from seeping under the tape. Let the paint dry before starting to paint the streaks.
 3 Choose a color combination. Know which colors work well and which don't. Do you want to make a room in a daring style, benevolent, warm, cold, calm, or choose something in between?
 - Monochrome combinations are combinations of similar tones in different shades of the same color. This color scheme is achieved by adding black or white to the base paint to slightly change its shade.
- Analogous combinations combine colors that are similar in tone and feel, but not related to the same color. For example, orange, yellow, and green would represent analog circuitry that creates soft contrast.
- Contrasting schemes are made up of different colors that are not alike. With such an adventurous yet balanced style, you can combine three colors evenly spaced from each other on the color wheel.
- Complementary schemes use two colors that are opposite to each other on the color wheel, creating intense variations that will bring any room to life.One example of such a scheme is a combination of blue and orange.
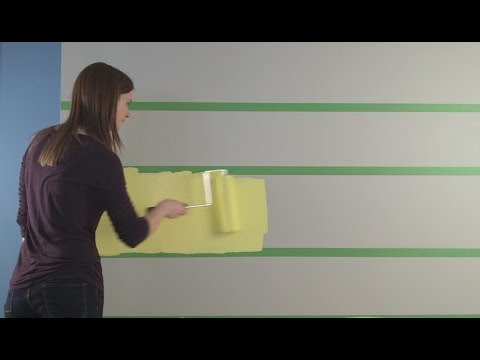
 4 Use a small roller to paint stripes, not a brush. The smaller the roller, the more control you have over how the paint is applied. Rollers create a more even, full coverage than brushes.
Method 2 of 3: Energizing with chevron stripes
 1 Give any room a bright, mesmerizing look by painting chevron stripes on the walls. The zig-zag pattern is a classic technique used mainly to emphasize walls, i.e. specifically one wall in a room that is painted differently from the others.
 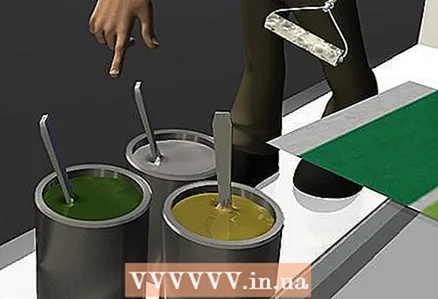 2 Choose colors that suit your design. Chevron stripes are very eye-catching, so if you want them to be the most eye-catching feature in a room, go for complementary colors or contrasting schemes. For a more subtle, sophisticated effect, lean towards a monochrome color scheme.
  3 Mark with a pencil the points of the tops of the stripes and their lower points, while using a level so that the points are evenly located.
- The bottom points should be located at the midpoint between the top points, while there are no specific requirements for the length of the chevron strips themselves. The smaller the distance between the peaks, the sharper they will be.
 4 Tape the stripes around with masking tape: from top to bottom, from bottom to top, etc. Make sure the tape is firmly attached to the wall.
  5 Using the base color of the wall, paint the edges of the tape with a roller. This will prevent other paint from getting under the tape.
  6 Place the correct paint marks between the strips of tape to have a cheat sheet for coloring the stripes.
 7 Finally, paint the stripes and let them dry overnight before removing the tape.
Method 3 of 3: Adding depth with vertical or horizontal stripes
 1 Create the illusion of depth and openness with vertical or horizontal stripes in your home. Vertical and horizontal stripes are great for small rooms as they open up space and make the room appear larger.
  2 Match colors and paint the entire room with a base color. Let the paint dry.
  3 Decide how wide the stripes should be and mark the stripes with a ruler and pencil, starting at the top of the wall. Continue measuring and placing marks at the bottom of the wall.
 - If you want to use fewer and larger strips, place them further apart.
- If you want to make asymmetrical stripes, place the tape at different distances to create the effect of a random stripe width.
 4 Using a traditional building or laser level, connect the pencil marks together to form stripes.
 5 Attach the tape securely to the outside of the strips. Apply masking tape in the shape of the letter X to the strips, which should remain in the same color.
 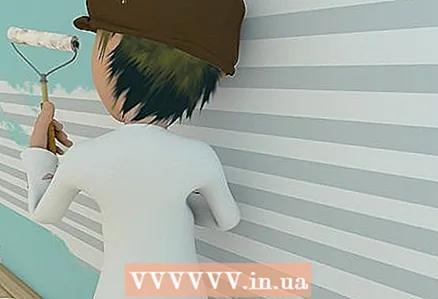 6 Apply a second coat of base color paint to the stripes. This will prevent smudges.
  7 Let the second layer dry and then paint the stripes with a different color or colors that you picked. Do this twice if necessary.
 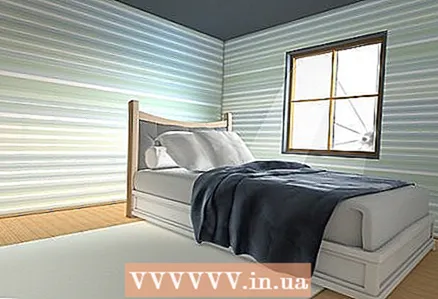 8 Let the walls dry overnight and remove the tape to reveal the refurbished room.
Tips
- If you don't like how the strip came out (usually due to smudges), re-tape a small area with tape, and then repaint it more carefully.
- To vary the size of the stripes, group large stripes with smaller stripes in a visually similar order.
- Use tarp, plastic, or covers to protect furniture and floors from paint.
- Wear old clothing to protect yourself from paint.
What do you need
- Masking tape
- Paint roller
- Interior paint
- Pencil
- Construction or laser level
- Paint tray
- Stool or ladder
- Covers
Warnings
- Paint does not come off carpets. Cover them with covers, like anything else you don't want to ruin.
- The room must be ventilated. Paint fumes can be toxic at high concentrations.
- If you are painting stripes on a freshly painted wall, let the paint dry for 48 hours before applying the stripes.
- Don't put too much paint on your brush or roller. The paint should not drip or drip under the tape.
- Don't overload the room with too many stripes or bright colors. Your home already has bright accessories, lean towards a neutral, monochrome color scheme.
Sources
- http://www.bhg.com/decorating/color/basics/color-wheel-color-chart/


