Author:
Joan Hall
Date Of Creation:
3 July 2021
Update Date:
1 July 2024

Content
- Steps
- Part 1 of 3: Sand the surface and apply wood conditioner
- Part 2 of 3: Apply the stain
- Part 3 of 3: Apply a protective layer
- Tips
- What do you need
A chopping table is a popular type of wooden kitchen counter. If you want to install a cutting table in your kitchen, remember to pickle it to protect the wood surface and improve its appearance. Etch your butcher's counter if it is years old and the finish is worn or faded. Sand the wood first, then select the stain and apply at least two coats. Then apply a top coat with tung oil or other food safe sealant.
Steps
Part 1 of 3: Sand the surface and apply wood conditioner
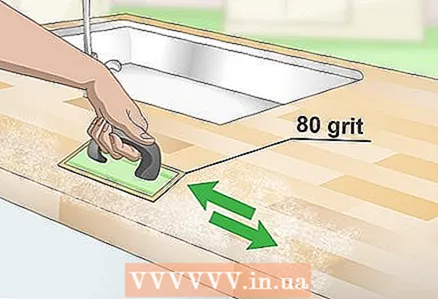 1 Sand the wood with a 20-N grit sandpaper. Coarse sandpaper will remove previous layers of stain and varnish, as well as other marks and scratches that are present on the wood surface. Sand with long strokes along the grain of the wood.
  2 Sand the wood again using an 8-H grit sandpaper. As before, sand with long strokes along the grain of the wood. The fine sandpaper will remove the marks left by the coarse sandpaper and prepare the surface for staining.
 - Use a paper towel or clean rag to wipe off any dust after sanding.
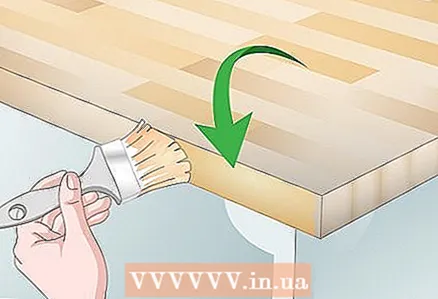
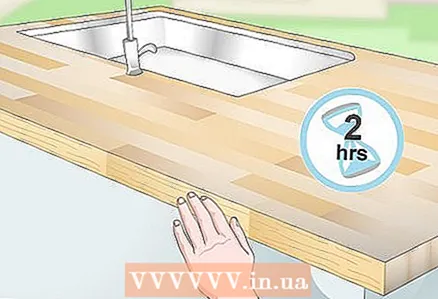
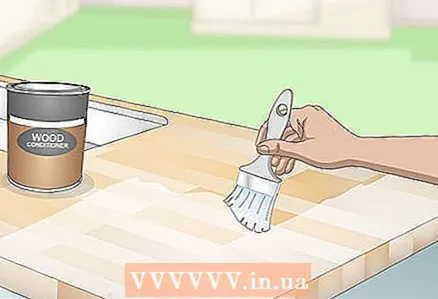 3 Apply a coat of wood conditioner. Take an 8 cm wide brush and apply an even coat of conditioner all over your cutting table. Paint with long, even strokes parallel to the wood blocks. The air conditioner will dry for at least two hours.
 - If you are going to tint wood with a water-based stain, then the conditioner should also be water-based. If the stain is oil, buy an oil-based conditioner.You can find wood conditioner at a paint supply store.
- The cutting table is made up of many different colored wooden blocks. If you pre-treat them with conditioner, then after applying the stain, they will acquire the same shade.
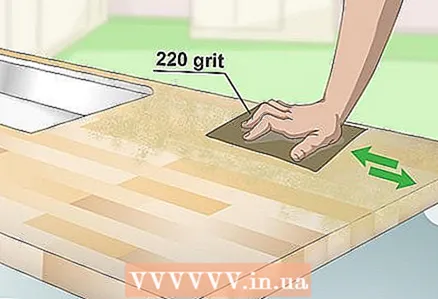 4 Sand the table one last time with 6-H grit sandpaper. After the conditioner is dry, use a very fine-grained emery paper over the entire surface of the cutting board. As before, sand with long strokes along the wood blocks. Be sure to remove all streaks and stains left by the conditioner.
 - Wipe off dust after sanding with a clean cloth.
- If you're tired of hand sanding, rent an electric sander from your local hardware store.
Part 2 of 3: Apply the stain
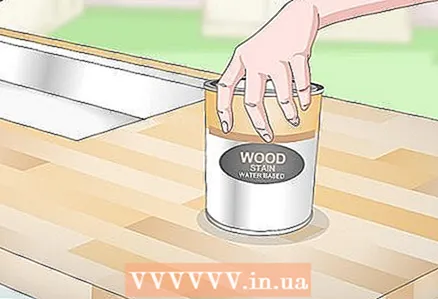 1 Buy a water-based or oil-based stain in the color you want. Oil stains better protect the surface from stains and have a longer service life. They also penetrate deeper into the tree. Note that water-based stains tend to apply faster. Decide what kind of stain you want to use and buy several swatches of different colors to find the one that best suits your needs.
 - Some prefer darker walnut-colored stains, others prefer more reddish tints of cherry color, and still others prefer light pine-colored stains.
- When choosing a color, keep in mind that it should harmonize well with other wood surfaces and cabinets in the kitchen.
 2 Check the stain on a small section of the cutting table. Take a new 8 cm wide brush and apply one coat of stain to an inconspicuous area of the cutting board. Apply a generous amount of stain as if trying to cover the entire rack.
 - If, after setting up the cutting table, you have orphaned pieces of wood, check the stain on them.
 3 Wait two hours for the stain to dry and check the color. If the color turned out to be even and uniform and the stain was able to emphasize the texture of the wood, proceed to the treatment of the entire surface.
 - If the surface is stained, and the wood is colored in different tones, try a different brand or a different stain color.
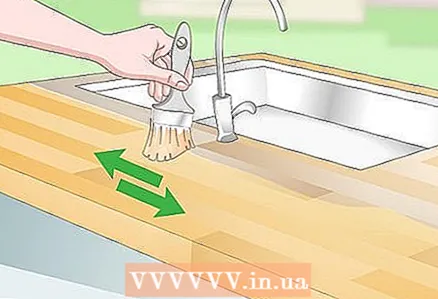 4 Apply the stain parallel to the direction of the blocks. Dip the brush into the stained jar, then tap on the edge to remove excess liquid. Apply the stain to the entire surface of the cutting table: top, sides and bottom (if any part protrudes from the cabinets under the cutting table). Paint with long strokes along the wooden blocks.
  5 Wait at least 8 hours. Wait long enough for the first coat to dry before applying the second coat of stain. While you wait, do not touch or place anything on the stain that is still wet.
 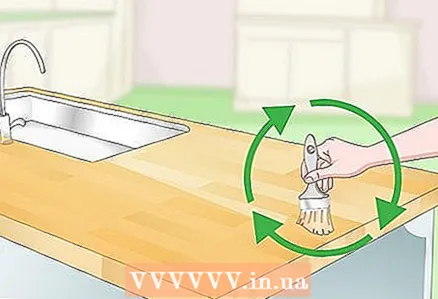 6 Apply a second coat of stain. As before, take a paintbrush and apply the stain in long strokes along the grain of the wood. The second layer will darken the wood and better protect the surface from scratches. Let the stain dry overnight.
 - If after the table is dry, there is excess stain on its surface, wipe it off with a dry cloth.
- If you want your cutting board to get even darker, apply a third coat of wood stain.
Part 3 of 3: Apply a protective layer
 1 Buy 100% tung oil from your local paint supply store. Make sure it is real tung oil - the packaging should say “100% tung oil”. You can buy tung oil at a hardware store or paint store.
 - One liter of tung oil is enough to cover a 4.5m chopping board.
- If instead of tung oil you want to apply something longer lasting, treat your cutting table with a more durable chemical treatment like Waterlox. Both of these products can be used on surfaces that come in contact with food.
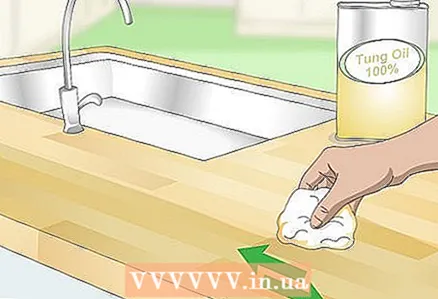 2 Apply a layer of tung oil to protect the etched cutting table. Dip a clean, dry cotton cloth or rag in a container of Tung Oil or Waterlox. Then, with the same cloth, apply the impregnation to the entire surface of the cutting table. Apply the impregnation in long, straight strokes parallel to the wood blocks that make up the cutting board.
 - Wait at least 12 hours for the coating to dry completely.
 3 Apply four additional coats to the cutting table. Applying a protective coating to a cutting table takes quite a long time. You will have to apply several coats of Tung Oil or Waterlox to it. Apply each layer in the same way: dampen a clean cloth with the impregnation, then apply it to the surface of the cutting table. Wipe off excess impregnation with a clean cloth.
 - Wait at least 12 hours for the previous one to dry before applying the next coat.
 4 Wait at least seven days for the tung oil to dry completely. Do not use the surface for all seven days so that the oil can completely penetrate the wood. Start using your cutting table after a week.
 - The counters on the cutting table can be used up to seven days. But keep in mind that they will be greasy and can stain your dishes or your belongings.
 5 Apply a new coat of tung oil every four months. Tung oil will wear out over time, after which it will need to be replaced with a new layer. Apply tung oil every four months or as soon as the cutting table surface has faded.
 - Subsequent layers of oil will not dry all week. Just in case, wait 3-4 days before using the surface again.
Tips
- Popular and common brands of wood stains include Varathane, Watco, Oxiddom and Minwax.
What do you need
- Stain
- Wood conditioner
- Two tassels 8 cm wide
- 20-N grit sandpaper
- 8-Grit sandpaper
- 6-N grit sandpaper
- Tung oil or Waterlox impregnation
- Soft cloths or rags


