Author:
Virginia Floyd
Date Of Creation:
12 August 2021
Update Date:
1 July 2024
Content
- Method 2 of 4: Simulating a Dog
- Method 3 of 4: Simulating a monkey
- Method 4 of 4: Modeling a Swan
- Tips
- Warnings
- What do you need
- Use modeling balls (WDM) size 260. These are long balls specially designed for animal modeling. These can be purchased at carnival stores. Water filled balloons and classic latex balloons are not suitable for animal modeling.
- The balloons can be inflated with light balloons, but it is much easier to buy a small hand pump. They are sold, for example, in toy stores and carnival stores that sell balloon modeling products.
- You must squeeze the ball firmly, but not allow it to burst.Make sure your jewelry or nails do not pierce the rubber. If the balloon bursts at the slightest touch, change the brand to a better one. Cheap ball manufacturers use less rubber, and thin surfaces break more easily.
 2 Learn to twist with a "lock". Inflate the balloon and tie a knot at the end. Make three simple twists side by side. Four bubbles should form. To keep the balloon from spinning, hold all four bubbles with one hand. With your other hand, grab the two middle bubbles and gently push them away from the two outermost bubbles. Twist the two medium bubbles three times. You can take the balloon in one hand and you will see that all the bubbles are fixed.
 - Twisting with a "lock" allows you to fix the structure. Without it, the ball spins up.
- Twisting with a "lock" is also used to create the ears of animals and other parts of the body.
3 Learn to do the kink twist. Inflate the balloon and tie a knot at the end. Do one simple twist near the knot. Hold the bubble with one hand, and bend the longest part of the balloon with the other. Take both the bubble and the rest of the balloon that you bent in one hand and twist it three times to form a loop. You now have three bubbles: two outer ones and one with a loop. - Twisting with an inflection has the same function as twisting with a "lock": thanks to it, the ball does not unwind.
- The kink twist is often used to create ears, noses, and other parts of the animal's torso.
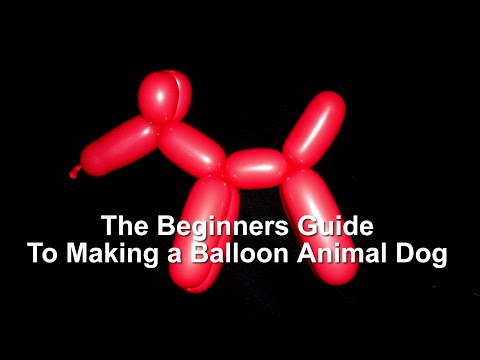
Method 2 of 4: Simulating a Dog
- 1 Inflate the balloon and leave a "tail" 7-8 cm long (that is, just inflate the balloon until the air reaches a point 7-8 cm from the end of the balloon). Tie a knot at the end.
- 2 Do three simple twists. Starting at the knotted end of the balloon, do three simple twists to form four bubbles. The first knotted bubble will be the dog's face. It should be slightly longer than the next two, which will turn into dog ears. The last bubble will be the dog's torso and should be the longest.
- Keep all the bubbles in one hand to keep the ball from spinning, as you haven't made the "lock" yet.
- Experiment with the length of the bubbles that turn into a muzzle and ears. If you make a very long muzzle, you can model an anteater.
- 3 Twist the two medium bubbles. With your free hand, grasp the second and third bubble (s) and twist them three times. This "lock" will prevent the ball from spinning. See the dog's face?
- 4 Do three more simple twists. Do the first at a distance of 6-8 cm from the muzzle to form a neck. Then make two more twists to make two bubbles of equal length. These will be the front legs. Hold all four new bubbles in one hand to keep them from spinning.
- If you want to make a giraffe instead of a dog, leave more space after the muzzle so that the neck is very long. The rest of the body is done in the same way as in a dog.
- The blisters that become paws can be long or short, but they must be the same length.
- 5 Twisting of the bubbles that act as the front paws. Bend the ball at the twist point between the front legs. With your free hand, grab both paws and twist them three times at the point where the neck ends. The neck and front legs are now locked.
- 6 Do three more simple twists. This time, the rest of the ball should be divided into four equal parts. The first bubble will become the body of the dog, the second and third will become the hind legs. The last bubble will be the tail. Keep all four pieces in one hand to keep the ball from spinning.
- 7 Twisting of the bubbles acting as the hind legs. Bend the ball at the twist point between the hind legs. With your free hand, grab both paws and twist them three times at the point where the torso ends.Admire the finished dog: it has a knotted nose, short ears, front and hind legs, and an upturned tail. The work is done.
Method 3 of 4: Simulating a monkey
- 1 Inflate the balloon and leave a “ponytail” about 15 cm long. If you leave the “tail” too short, then the ball may burst during the simulation. Therefore, make sure there is enough air space at the end of the balloon. Make a knot.
- 2 Do a simple twist. Twist the ball a few centimeters from the knot to form a small bubble that becomes the face of the monkey. Hold both bubbles in one hand to keep them from unwinding.
- 3 Do a kink twist. First, do another simple twist a short distance from the first so that a small bubble forms between them. Bend it so that the twist points are flush. With your free hand, grasp the bent bubble and twist it three times to lock it in place. You just made a monkey ear.
- 4 Do another simple twist. A few centimeters from the first ear, do another simple twist to form a small bubble. Keep it in one hand to keep it from spinning. This little bubble will become the forehead of the monkey.
- 5 Then do another fold twist. First, do another simple twist a short distance from the previous one, so that a small bubble forms between them. Bend it so that the twist points are flush. With your free hand, grasp the bent bubble and twist it three times to lock it in place. He will be the second ear of the monkey.
- 6 Twist the monkey's ears. Gently take both ears in your hand. A monkey's forehead will stick out between them. Twist the ears three times to lock them in place. Now the monkey's head is ready: it consists of a nose, a forehead and two ears.
- 7 Do three more simple twists. Do the first not far from the head to form the neck. Next, make two more simple twists to form two bubbles of equal length. These will be the front limbs. Keep all the bubbles in one hand to keep them from spinning.
- 8 Twist the front legs. Bend the ball at the twist point between the front legs. Grasp them and twist them three times to secure the front legs and neck. The ball should now resemble a monkey with a head, neck and front legs.
- 9 Do three more simple twists. Do the first not far from the front legs to form a torso. Below, make two more simple twists to form two bubbles of equal length. These will be the hind legs of the monkey. Keep all the bubbles in one hand to keep them from spinning.
- Leave plenty of room at the end of the balloon for the tail to form. This bubble should be the longest of all.
- 10 Twist the hind legs. Bend the ball at the twist point between the hind legs. Grab them and twist them three times where the torso begins. Now the hind legs and torso are fixed, and the tail hangs below.
- 11 Make the trunk of the palm tree. Choose a balloon that contrasts with the monkey's color, inflate it fully and tie a knot at the end. There is no need to leave the "tail". Hang the monkey on the trunk of a palm tree so that it can hold on to it with its paws and make it seem as if it is climbing a palm tree.
Method 4 of 4: Modeling a Swan
- 1 Inflate the balloon and leave a “ponytail” about 10 cm long. Both white and black balls make wonderful swans.
- 2 Bend the ball to resemble a paper clip. There should be a knot in the center of the staple, and the "tail" should protrude beyond the edge of the staple. You can also achieve this shape in another way: form a circle, put the ends of the ball on top of each other, then place one end of the ball in the center of the circle, leave the other outside.
- 3 Do a simple twist. Grasp the middle of the bent ball.You should now have three pieces in your hand: the sides of the paperclip and the knot in the center. Twist these three pieces so that the knot is at the point of the twist. Hold the ball in this place so that it does not unwind. You now have two loops and a long neck starting at the center of the twist.
- 4 Pass one loop through the other. With your free hand, grasp one loop and thread it through the other. Thus, the body of a swan is obtained: threaded through another loop resembles folded wings, and the other resembles the lower side of the body. Threading one loop through another also allows you to fix the structure so that it does not unwind.
- 5 Make a head. Grasp the neck at a short distance from the "tail" and press with your hand so that air penetrates into the part of the balloon that has not yet been inflated. Thus, the upper part should bend into the shape of the head. The remaining part of the “tail” not inflated will become the swan's beak.
Tips
- Learn to make snakes, turtles, and various objects such as swords, hearts and funny hats.
- Always carry a permanent marker with you to draw your animals' faces.
- Give preference to new balls. Balloons that have been stored for a long time are much more likely to burst during inflation or twisting.
- Use cornstarch to keep the latex balls from sticking together in the package.
- If the balloon bursts during the simulation, don't worry. Pretend it's part of the show.
- Experiment with balls of different sizes and shapes to simulate apples or, for example, bumblebees.
- Store balloons in an airtight container, as air will degrade latex.
- Use a low-cost hand pump available from toy stores. Some people can blow balloons with their mouths, but there aren't many. Using the pump is more hygienic.
- If the balloon bursts, laugh, joke. Tell them you are doing this on purpose so that everyone has fun. The children will go a few steps further, but they will not leave.
- Carry balloons in your pocket wherever you go and wherever your children may be, such as to school or to a wedding.
- Speak while modeling. Be fun and entertain the audience. This will help you if you suddenly get it wrong.
- You can first inflate the balloon completely, and then release some air so that the tail is 7-8 cm long, as described in the third step.
- Never buy cheap balls. First, wander around the carnival shop and check out the clown supplies. Check the expiration date of the balls. Be prepared that you will have to pay an order of magnitude more than regular balls, but believe me, it's worth it.
- Remember that every child will definitely want a little animal. So, if possible, do not let them go home empty-handed and with tears in their eyes.
Warnings
- Balloons are dangerous for small children as they can cause suffocation.
What do you need
- Balls size 260.
- Hand pump for inflating balloons or strong lungs.


