Author:
Eric Farmer
Date Of Creation:
12 March 2021
Update Date:
1 July 2024
Content
- Steps
- Method 1 of 3: Site Preparation
- Method 2 of 3: Planting Seeds
- Method 3 of 3: Laying the turf
- Tips
- What do you need
An ideal lawn is the dream of every owner of a private house. What could be better than standing on the doorstep and admiring the beautiful green lawn? You don't have to become a landscape designer to get your dream lawn. It's all about proper preparation and good soil, so you can grow a lawn from seeds or lay a ready-made turf in rolls.
Steps
Method 1 of 3: Site Preparation
 1 Choose herbs that are appropriate for your climate. Some types of herbs take root better than others - it all depends on where you live. They can be divided into two main categories: heat-loving and cold-loving.
 - Heat-loving grasses can survive hot summers and thrive in southern areas. Choose species such as narrow-furrowed one-sided, finger-faced pig, snake-tailed eremochloa.
- Cold-loving herbs tolerate cold better than heat-loving varieties. They can withstand frost and drought, but don't expect them to survive the heat or last longer than four weeks without water. Bluegrass is a popular choice.
 2 Choose the right planting time. Heat-loving grasses should be planted in late spring. For cold-loving herbs, the best time is late summer or early autumn.
 - In the case of turf, the time of year is not critical, although in summer it can be too hot.
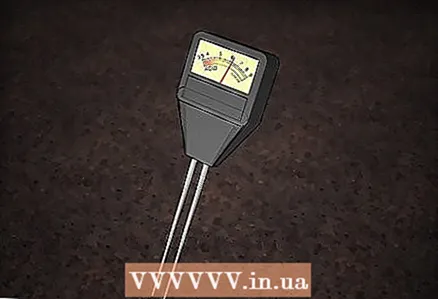 3 Conduct soil analysis. Before setting up a lawn, you need to know the condition of the soil. It will be helpful to research the properties of the soil in order to know the exact type and amount of fertilizer needed.
 - Once the lawn takes root, it will be difficult to change the properties of the soil.
- If necessary, add fertilizers to the topsoil 10-15 centimeters deep.
 4 Prepare the soil. This is a critical step. Soil preparation is the most important aspect of growing a healthy lawn. You need to get a loose soil rich in organic matter and capable of retaining moisture with good drainage.
 - Clear the area of weeds, stones and roots. Use a shovel to dig out any large objects in the area. Be sure to remove all weed roots.
- Sometimes you need to use chemical weed control products to get rid of them completely. In this case, follow the manufacturer's directions for use.
- Till the soil by hand or using a walk-behind tractor, depending on the size of the plot. Now is the best time to add compost or other fertilizers.
- Add gypsum to the soil to improve drainage properties.
 5 Flatten the area. After cleaning and processing, the area should be leveled. Take a rake and level the entire area under the lawn. Fill in depressions and break up clumps.
 - At this stage, it does not hurt to make a slope away from the foundation of the house. It will help you avoid future water drainage problems.
Method 2 of 3: Planting Seeds
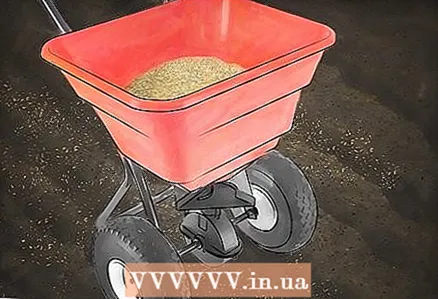 1 Sow your lawn. Adjust the recommended flow rate of the planter and cover halfway with seed. For optimal coverage, make the first pass in one direction along the entire length of the lawn. Then add any remaining seed to the planter and drive the area perpendicular to the starting direction. Plant the seeds crosswise.
 - You can also re-walk the entire area with an empty planter to ensure good seed-to-soil contact.
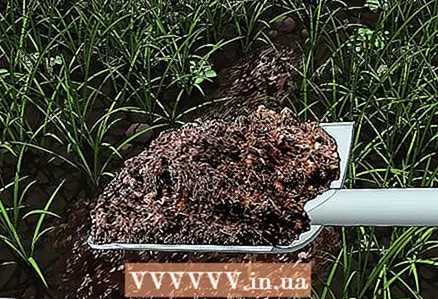
 2 Apply top dressing to the soil. After planting the seeds throughout the entire area, add peat moss to help the seeds take root and retain moisture. Spread the peat moss in a thin layer over the seed using a wire roller.
 - A layer of mulch will keep the seeds moist during germination. It will also protect them from birds and restrict movement in the event of heavy rains.
- You can also gently scatter the moss with a shovel. Use a rake with the tines facing up to press the mulch to the ground and cover the seeds securely in contact with the soil.
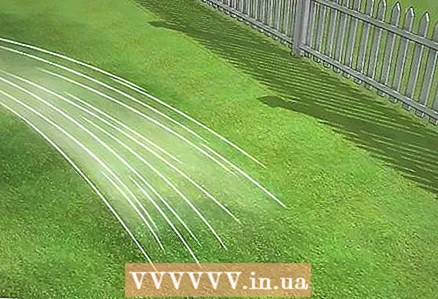
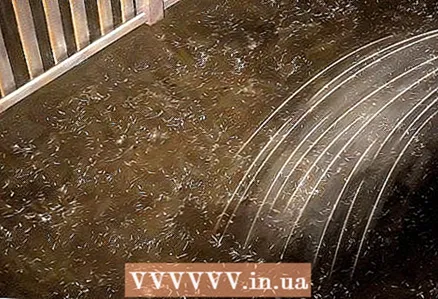 3 Water the seeds. The best watering option is an oscillating sprinkler. If you have multiple sprinklers, install them in different parts of the yard to evenly water the entire area.
 - For best results, water the seeds 2-3 times daily for 5-10 minutes for the first 8-10 days. It is very important that the seeds remain moist at this stage. You don't need to pour too much water, but moisture is needed for germination. It is best to water the area in the morning to reduce the likelihood of water evaporation.
- Do not use high pressure to water a newly planted lawn to avoid drowning or washing the seeds.
- When watering, consider the potential rainfall in your area. Find out your normal rainfall and try to provide 2.5 centimeters of water per week.
- If there is a lot of rainfall in your area, then you can lose some of the seeds. In this case, the rain must be strong enough to move the soil and get to the seeds.
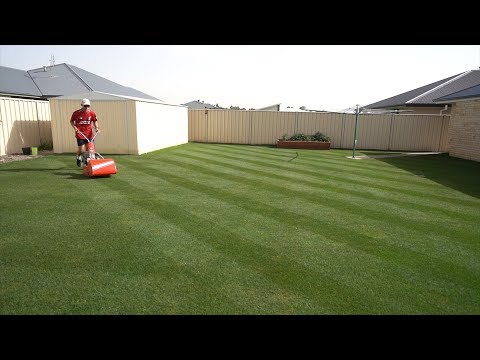
 4 Mow a new lawn. When the grass on the lawn reaches a height of 7.5-10 centimeters, start mowing. The soil should be dry so as not to pull the grass out of the ground.
Method 3 of 3: Laying the turf
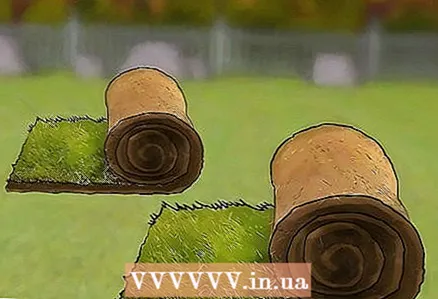 1 Buy turf. It is much more expensive to grow a lawn from turf, but everything happens much faster. Sod rolls are grass that has been grown for a little over a year. The roots hold the sod together and allow long strips to be laid on the prepared soil.
 - Sod is usually sold on heavy wooden pallets in the order of 40–65 square meters. Transporting pallets is difficult, so it is better to immediately ask the supplier for the cost of delivery. In some cases, you have to pay a refundable deposit.
- Sod can be planted at almost any time of the year, but in summer you will need a lot of water.
 2 The turf must be laid on the day of delivery. Sod rolls on pallets start to deteriorate and die quickly, so plan to stack on the day of purchase and buy as much sod as you can plant in one day. Moisten the turf slightly, cover with burlap and leave in the shade until styling.
 - The turf must remain moist and cool during installation. Always keep a spray bottle filled with water close at hand to keep the sod from drying out.
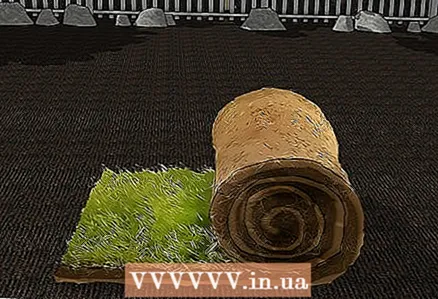
 3 Lay the first row. Start laying the turf along the longest, straight edge of the lot (usually along a fence or driveway). Do not walk on the turf while laying. If you step on the sod, gently rake the trail.
 - Trim off excess sod with a sharp knife and leave strips for irregular corners.
- Remember to smooth out the sod. It must be pressed to the ground for the roots to grow to the soil.
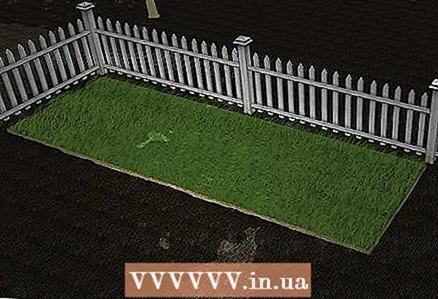
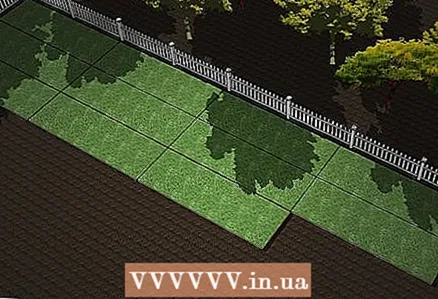 4 Lay the turf tightly. There should be no gaps between the strips during installation. Fit the rolls tightly near hard surfaces such as cobbled paths or bricks to keep the edges from drying out.
 - Trim half of the second strip of turf before laying to create staggered seams similar to brickwork. This will make the seams less visible and the edges will not dry out.
 5 Water your lawn as you install it. The new turf must remain moist. After laying a couple of the first rolls, water the area abundantly. Take a break to monitor moisture every few rows.
 - Pay special attention to the edges as they dry out quickly. You can cover the edges with mulch or topsoil to help the sod retain moisture better.
 6 Please fill in all the blanks. Even with dense bales, gaps can be found between the strips. Instead of small pieces of turf, which will dry out very quickly, it is better to use a substrate or peat moss.
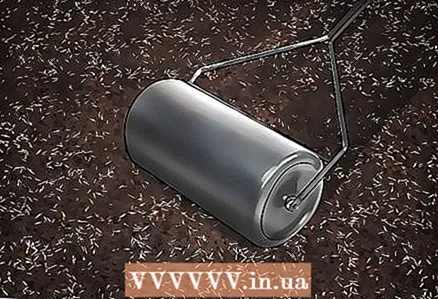
  7 Use a lawn roller to press the sod into the soil. After the turf has been laid, walk over the area with a lawn roller filled with water or sand at least ¾ of its volume. Flatten out all the sod to press firmly against the soil.
  8 Perform final watering. After finishing laying the sod, it is necessary to fill the area with the lawn.
 - Water until the ground under the turf is wet through and through. This will help the roots take in faster and you won't be tempted to walk on the lawn. However, make sure that there are no puddles on the lawn, otherwise the sod may separate from the soil.
- Try not to walk on the lawn for the first couple of weeks, so as not to disturb the turf and interfere with the strengthening of the root system. The lawn can be safely mowed approximately two weeks after laying.
Tips
- Fertilize your lawn after the first mow. Both the turf and the seed lawn need feeding.
- Different herbs require different care. Pay attention to the needs of the herb you choose.
- After placing the sod roll, spill some water over it to keep the sod moist. After a few weeks, you can walk on the lawn and mow the grass for the first time.
- If heavy rain has washed out some of the seeds, then level the soil after drying and fill in such areas.
What do you need
- Seeds or turf
- Fertilizer
- Peat moss
- Rake
- Shovel
- Hose or spray
- Seeder
- Gloves


