Author:
Ellen Moore
Date Of Creation:
16 January 2021
Update Date:
29 June 2024

Content
- Ingredients
- Main ingredients
- Pickle spices
- Steps
- Part 1 of 2: Preparing the brine and garlic
- Part 2 of 2: Preserving Garlic
- Tips
- Warnings
- Additional articles
It doesn't matter how you store fresh garlic, over time it dries up or starts to rot. Preservation allows you to preserve the garlic for a longer period. Canned garlic takes on its own flavor, which is different from fresh garlic, however, the general notes remain. If you're just a garlic lover or fleeing vampires, here's a simple recipe for canned garlic.
Ingredients
Main ingredients
- 450 grams of dry garlic
- 1 1/4 cups (310 ml) white wine vinegar (can be substituted with apple cider vinegar)
- 3/4 cup (190 ml) water
- 1 tablespoon coarse salt (finely ground table salt will make the marinade cloudy)
- 4 jalapenos or habanero peppers (optional, marinated if possible)
- 1/2 lemon
- half-liter canning jars
Pickle spices
- 2 tablespoons (30 grams) mustard seeds
- 1 tablespoon (15 grams) peppercorns
- 1 tablespoon (15 grams) whole garlic cloves
- 1 tablespoon (15 grams) ground coriander
- 4 sprigs thyme
- 4 bay leaves
Steps
Part 1 of 2: Preparing the brine and garlic
 1 Prepare canning jars. Before you start, make sure you don't transfer bacteria to the canning jars. The slightest trace of contamination can ruin an entire batch of garlic, so make sure the jars are sterile beforehand. After sterilization, place the jars on a clean kitchen towel and let them dry.
 - Perhaps the quickest way to do this is to wash the jars and lids in the dishwasher using sterilize mode. If you don't have a dishwasher, or your dishwasher doesn't have a sterilization mode, put the jars and lids in boiling water and sterilize them for 10 minutes.
- When removing freshly sterilized jars and lids, use clean tongs or jar tongs. Any contact of clean cans with human skin can lead to unwanted transfer of bacteria into the cans.
- Try not to use old jam and jam jars, they will not preserve the garlic properly. Choose jars specially designed for canning. If you marinate the garlic in jam jars, you will need to store the garlic in the refrigerator and use it within 3 months.
 2 Place a clean autoclave on the stove over low heat. The autoclave should warm up while you peel the garlic and prepare the brine.
  3 Peel the garlic. When you're processing a lot of garlic, peeling almost a pound of food can seem like a tedious task. You can do this task quickly and efficiently. Here are two main ways to quickly de-peel garlic:
 - Shake the garlic... Disassemble the cloves into cloves and place them in a metal bowl. Cover the bowl exactly the same size to create an enclosed space. Grip the structure with your hands firmly and shake it vigorously for 30 seconds. The cloves must be completely free of husks!
- Blanch the garlic... Disassemble the cloves into cloves and immerse them in boiling water for 30 seconds. Remove them and immerse them in cold water to stop the cooking process. Separate the husks from the cloves. After blanching, the husk should be easy to peel off.
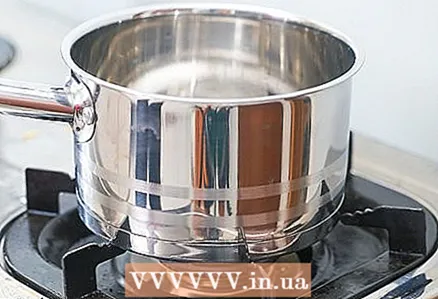
 4 Prepare the brine. In a saucepan, combine the water, vinegar, and salt and bring the brine to a low boil. Make sure the salt is completely dissolved.
 - Use a stainless steel, teflon-lined, ceramic, or glass pan. Do not use a copper pot, as too much copper in the water can cause the garlic to turn blue or green.
Part 2 of 2: Preserving Garlic
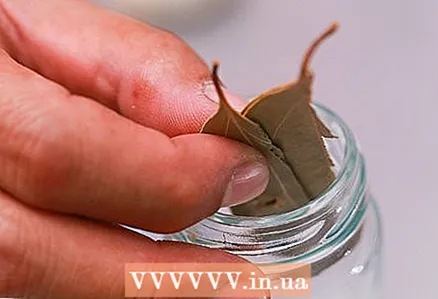 1 Fill each jar with spices and herbs. 450 grams of garlic should fit in 4 half-liter jars. Place 1/4 spice, thyme sprig, and 1 bay leaf in each jar.
  2 Fill the jar with the garlic cloves evenly. Be careful not to add too much garlic, remember to completely submerge it in the brine.
  3 Add the brine so that it completely covers the garlic, then place a slice of lemon in each jar to keep the garlic covered in the brine. Wipe down the neck of the jars to remove any remaining brine. Screw on the caps without overtightening. The process of heating and subsequent cooling of the cans will close the lid tightly.
  4 Start the autoclave. Turn on a heat so that the water in the autoclave boils slightly. Place the jars of garlic in the autoclave using the jar tongs.
 - Add water to the autoclave as needed. The water should cover the cans by 2.5 cm.
- Place the metal can holders on the bottom of the autoclave. The can can burst if it stands directly on the bottom, over a direct fire.
 5 Let the jars sit in the autoclave at a gentle boil for 15 minutes. Heating the brine and then cooling it down will create a vacuum in the jar, preserving the garlic.
  6 Remove jars from hot water and let cool completely. Do not tilt the jars when removing them from the autoclave. Make sure the cans are well rolled with this:
 - After the jars are completely cool, press the center of each jar to check if the lids flex up and down. If they bend, then the can is not rolled up correctly.
- Repeat the seaming process on a can that has not closed properly and you cannot use that much garlic at once. Take new lids and let the lidded jars sit in the autoclave for another 15 minutes.
Tips
- Canned garlic can change color and turn blue or green. This can be due to the fact that you canned unripe or not completely dried garlic. Garlic varieties with red hulls can also turn blue or green when preserved. The color change of canned garlic is not an indicator of the quality of the garlic, it can be eaten.
Warnings
- If you canned garlic, and then, when opening the jar, did not hear the characteristic cotton or hiss, consider that the garlic not edible... In all likelihood, the canning technology has been violated, and you can get botulism.
Additional articles
How to store garlic correctly How to quickly peel garlic How to make peaches ripe
  How to measure dry pasta
  How to cut tomatoes
  How to make clear ice How to cut a melon into pieces
  How to save too watery rice How to boil water in the microwave
  How to wash the rice How to cook a steak in a skillet How to dice potatoes How to make a thick sauce
  How to add an egg to ramen


