Author:
Peter Berry
Date Of Creation:
18 February 2021
Update Date:
1 July 2024

Content
Borders can grab the reader's attention and make your information stand out. In Word, you can add borders to specific sections of text or to entire pages. Word comes with a variety of frames, but if you can't find the template you want, you can use the image file to create your own border.
Steps
Method 1 of 3: Add a border to the text
Highlight the part of the text you want to frame. Borders work best when you highlight an entire paragraph or a single line. If you highlight multiple lines that do not fit within a paragraph, each line will have its own frame.
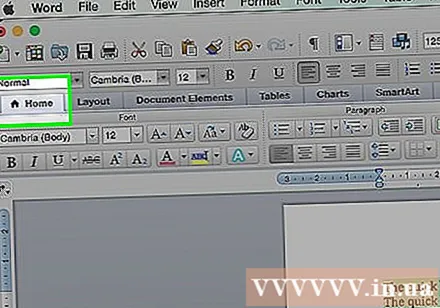
Open the Home tab. The Borders option is located on the Home tab on all versions from 2007.
Find the Borders button in the Paragraph group, next to the Shading button.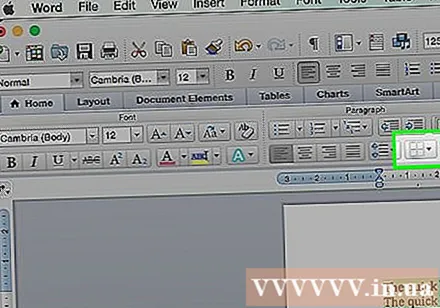
- After clicking the Borders button, a simple bottom border is added to the selected text.

Click the ▼ next to the Borders button to view your preferences. A list of contour shapes will open. You can see a preview of the frame when hovering over each option.- If you only want a simple frame, you can choose from this menu. If not, read on for a more stylized border.
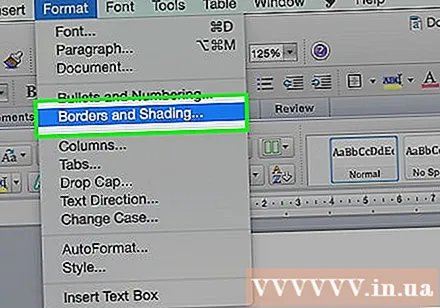
Select "Borders and Shading" to customize the frame. By default, the border will be just a simple solid line. The Borders and Shading window will allow you to customize the outline.
Select contour settings. You can choose between Box (box style), Shadow (shadow), and 3-D (3D style). These options are located along the left side of the Borders and Shading window.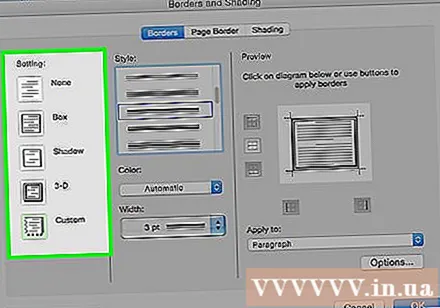
Select a border pattern. The Style menu will display a list of available border styles. Please select the template you want.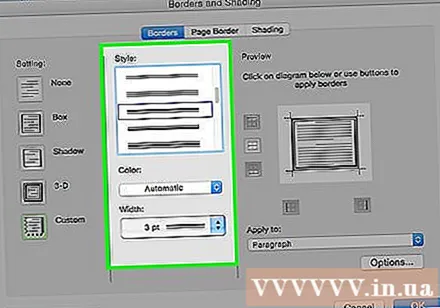
- Use the Color drop-down menu to change the outline color.
- Use the Width drop-down menu to change the width of the border.
Enable / disable border edges. By default, the border is a complete frame. You can press the buttons around the preview image to enable / disable the edges.
Click the Options button to change the border spacing (optional) if you want the border to be closer or further away from the text. You can set the spacing for each side of the frame.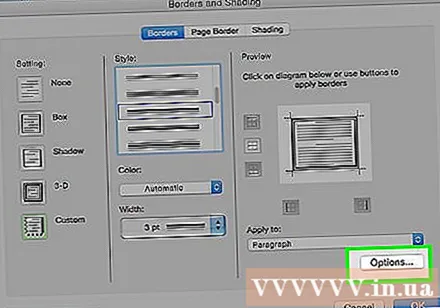
Click OK to apply the border. The frame you just selected will be put into the highlighted text. advertisement
Method 2 of 3: Add a border to the page
Create separate sections to use many different frames in a document. Normally, one page border will be applied to all pages in the document. If you want the frame to apply to specific pages only, or want to create different borders for different pages, you need to divide the document into "sections".
- Place the mouse pointer at the bottom of the page before the page where you want to start a new section.
- Open the Layout tab and click the Breaks button in the Page Setup group.
- Select "Next Page" under Section Breaks to start the next one on the next page.
Click the Design tab. The Page Borders tool is located in this ribbon.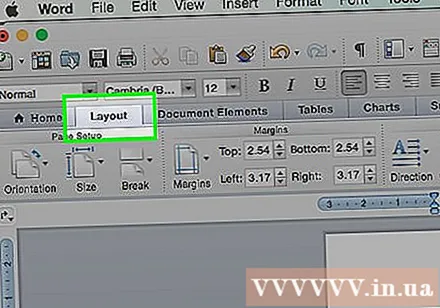
Click the Page Borders button to the right of the Design tab of the Page Background group. The Page Borders window will appear.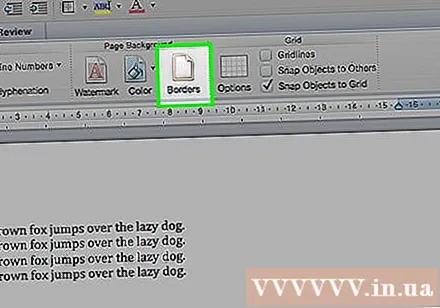
Customize the page border template. Use the Style menu to find the border style you want to use. The Color menu allows you to change the border color. Width is used to change the border thickness. The Art menu includes many repeating patterns that make up a border.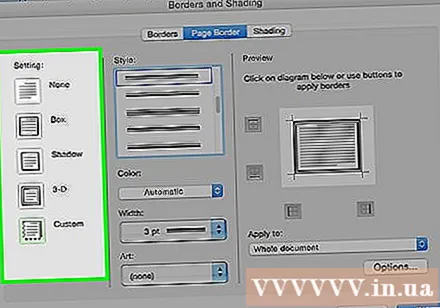
Enable / disable border edges. By default, the border is a complete frame. You can press the buttons around the preview image to enable / disable the edges.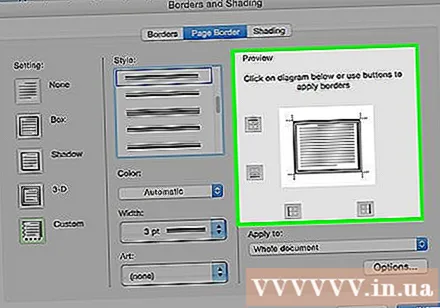
Select the page where you want to apply the frame. The "Apply to" menu allows you to choose between "Whole document" and "This section". If you split the document into separate sections in the first step, you can use this option to apply a different border to each section of text.
Click OK to apply. The outline will appear immediately. advertisement
Method 3 of 3: Use photo contour
Insert the picture that you want to use as a border. If you want to use a picture as a frame instead of the built-in border tool, you can insert a picture into your document. You can use a separate picture for each edge, or insert a complete frame photo. There are several ways to do this:
- Click the Insert tab and select "Pictures". Browse for the border image you want to use.
- Click and drag the file to drop onto the document. The picture will be inserted.
- Copy the photo from the website and paste it into the document.
Select a photo and click the Format tab to change its position and layer.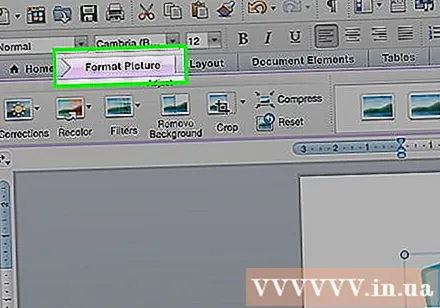
Click the "Wrap Text" button and select "Behind Text". The entire text will be above the image file, which is especially useful if the image is a complete frame. You can also move the image without affecting the text.
Move and resize the image if necessary. You can click and drag the photo to the appropriate location. Click on the corners of the frame and drag to resize the photo.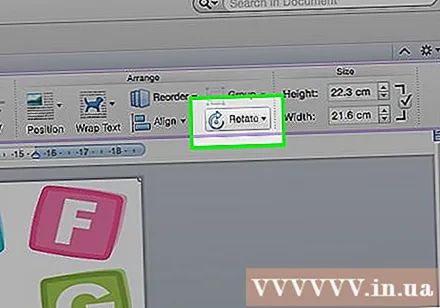
Repeat with additional border images. If you are contouring from various image files, repeat the process until all the pictures are in place. If you need to flip the image (for opposite sides), click the Rotate button in the Format tab and choose Flip Horizontal or Vertical. advertisement


