Author:
Bobbie Johnson
Date Of Creation:
7 April 2021
Update Date:
1 July 2024
Content
- Steps
- Method 1 of 3: Change the regional location settings
- Method 2 of 3: Change your network location settings
- Method 3 of 3: Disable Location Services
- Tips
- Warnings
Windows 8 has a built-in geolocation system that tells apps, web pages, and networks about your current location. While this service adjusts ads and offered content to suit your needs, location services can be annoying. Geolocation regional settings can be changed or disabled in the "Control Panel". You can also change your network status from Public to Home and vice versa.
Steps
Method 1 of 3: Change the regional location settings
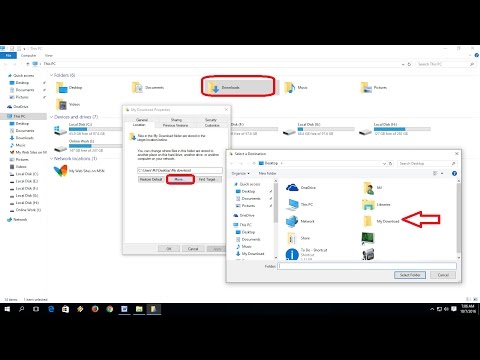
 1 Open File Explorer by clicking on the folder icon next to the Start menu.
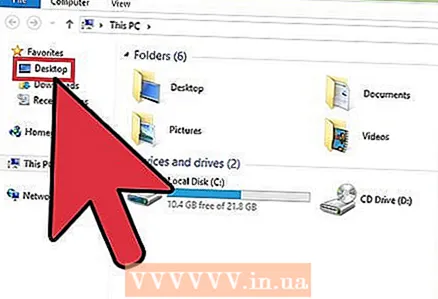 2 Click the "Desktop" tab. It's on the left sidebar of the File Explorer menu.
  3 Double click on the "Control Panel" shortcut. In the Control Panel, you can change the settings of your system.
 - There is another way to open the Control Panel: hold down the key ⊞ Win and press X, and then in the menu that appears, select the "Control Panel" section.
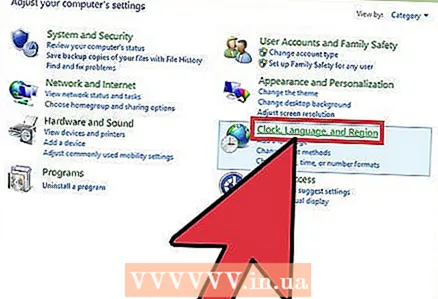 4 Open the Watches, Language, and Region category. In this section of the Control Panel, you can change the date and time, the preferred language and regional standards.
 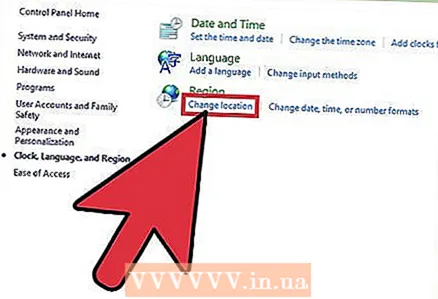 5 Click on the "Change Location" option under the "Regional Standards" section. The Regional Options section is located at the bottom of the Clock, Language, and Region menu.
 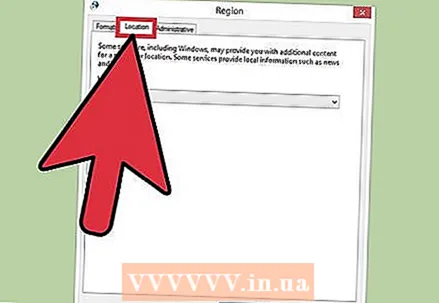 6 Click the Location tab. It is in this window that you can select a regional location.
 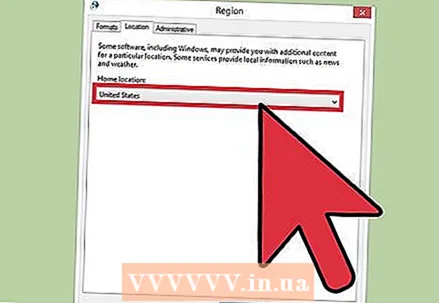 7 Expand the menu below the Primary Location field to display a list of the different countries. Change this option if you have recently moved or have not indicated your country of residence at all before.
 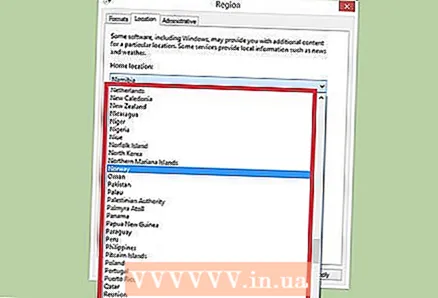 8 Select your country of residence. If you don't see your country right away, try scrolling down the list.
  9 Click "OK" to confirm the changes. You have successfully changed your regional location settings!
Method 2 of 3: Change your network location settings
 1 Make sure you're signed in to your preferred Wi-Fi network. To be able to make changes to the location settings of the WiFi network, you must actively use it.
 - To enter a Wi-Fi network, click the Wi-Fi icon in the toolbar at the lower right corner of the screen, and then select your preferred network. You may need to enter a password to log on to the network.
 2 Click on the Wi-Fi icon in the lower right corner of the screen. In the menu that opens, select your current network.
  3 Right click on the desired network to display the network parameters.
 4 Click Turn Sharing On or Off. Sharing is optimal for private networks because you don't have to worry about someone else stealing your data over the network.
 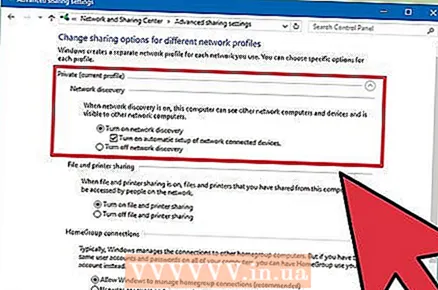 5 Explore the available options. During the network creation process, Windows will ask you to specify whether the network is Home, Enterprise, or Public. The selected category will determine the security settings for this network. Changing the sharing settings can affect the original settings - for example, if you accidentally make your home network “Public,” enabling sharing will make that network private.
 - Click No, don't turn on sharing and connecting to devices if you want the network to be public. This will make your computer invisible to other computers and devices (such as Bluetooth speakers or printers). If you do this at home, you will not be able to use devices connected to your home network on your computer.
- Click Yes, turn on sharing and connecting to devices if you want the network to be private. This will make your computer visible to other computers and devices, bypassing the standard security settings of the "Private" network. Be careful when choosing this option in a public place, as this puts your computer in potential danger.
 6 Go back to your desktop. You have successfully changed your network settings!
Method 3 of 3: Disable Location Services
 1 Open File Explorer by clicking on the folder icon next to the Start menu.
 2 Click the "Desktop" tab. It's on the left sidebar of the File Explorer menu.
 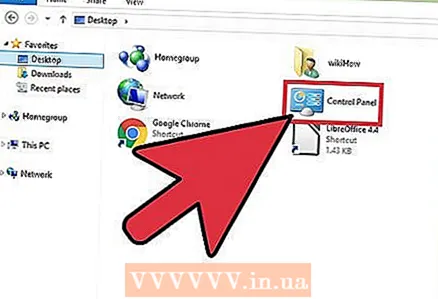 3 Double click on the "Control Panel" shortcut. In the Control Panel, you can change the system settings.
 - There is another way to open the Control Panel: hold down the key ⊞ Win and press X, and then in the menu that appears, select the "Control Panel" section.
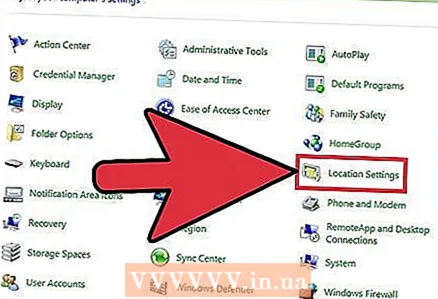 4 Open the Location Options category. If you do not want your computer to tell third-party programs about your location, turn off location services.
 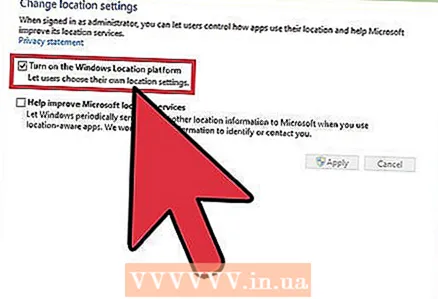 5 Click the cell next to Enable Windows Location Platform. The absence of the checkbox will mean that the layout platform is no longer active.
 - To turn on the location service, click on the cell again. Make sure the box is checked before closing the window.
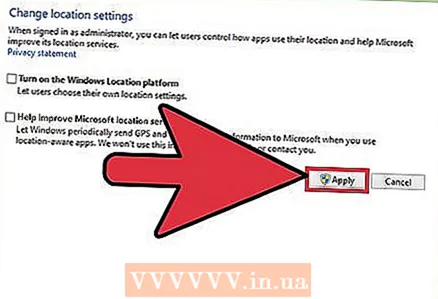 6 Click "Apply" to confirm the changes. You have successfully disabled location services!
 - Please note that disabling location services may affect features such as desktop news, app and site data collection. If you need these events to be customized according to your location, do not disable location services.
Tips
- You can enable or disable location framework during Windows 8 setup.
Warnings
- Never enable public access to your home network.
- If you are unsure if a site is safe, try disabling your location settings for a while before accessing it.


")
