Author:
Christy White
Date Of Creation:
6 May 2021
Update Date:
1 July 2024

Content
- To step
- Method 1 of 3: Using silicone caulk and liquid soap
- Method 2 of 3: Using silicone sealant and cornstarch
- Method 3 of 3: Using two-component silicone
- Tips
- Warnings
- Necessities
- Use silicone sealant and liquid soap
- Use silicone sealant and cornstarch
- Use two-component silicone
Molders prefer a silicone mold because it is easy to use and you don't need a lot of mold cleaning spray. You can buy silicone molds in a variety of shapes, sizes and patterns, but sometimes it is impossible to find the perfect mold for a special and custom piece. When that happens, you will have to make your own mold. You can always buy a set for making a silicone mold with two components, but it's a lot easier to make your own at home.
To step
Method 1 of 3: Using silicone caulk and liquid soap
 Fill a bowl with water. The water should be about room temperature - neither too hot nor too cold. Make sure the water is deep enough to put your hand in.
  Stir some liquid soap into the water. You can use almost any type of liquid soap, including shower gel, dish soap, and hand soap. Keep stirring until the soap is completely dissolved and you no longer see streaks.
 - Try to use about 1 part soap to 10 parts water.
- You can also use liquid glycerine. The glycerine will react with the silicone sealant so that everything clumps together.
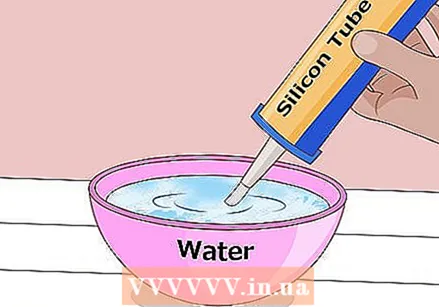 Squeeze some silicone sealant into the water. Buy a tube of pure silicone sealant from a hardware store. Make sure not to buy a quick-drying sealant. Squeeze enough silicone sealant into the bowl to cover your desired item.
 - Many different types of silicone sealant are sold at hardware stores, including sanitary sealant.
- If there is no nozzle on the tube of silicone caulk, then you will need to buy a caulking gun, insert the tube, cut the end of the tube, and poke a hole in the tip.
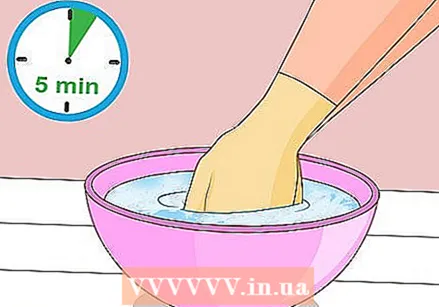 Knead the silicone while submerging it. Put on plastic gloves and put your hands in the water. Grab the silicone sealant with your fist and squeeze the sealant together. Knead the sealant under water until it is no longer tacky. This should take about 5 minutes.
  Make a thick disk from the silicone sealant. Start by rolling the kit between your palms into a ball. Push the sealant against a flat surface and apply light pressure. Make sure the disc is thicker than the object you want to make with the mold.
 - If the silicone sealant is tacky, cover your hands and your work area with a thin layer of liquid soap.
 Push the object of your choice into the silicone sealant. Make sure to push the item right side down into the silicone sealant. Gently push the edges of the mold against the object so that there are no more gaps.
  Let the silicone sealant harden. Silicone sealant never hardens, but always remains flexible. Just wait a few hours for the silicone sealant to be stiff enough and you can still bend the sealant, but not make pits in it.
 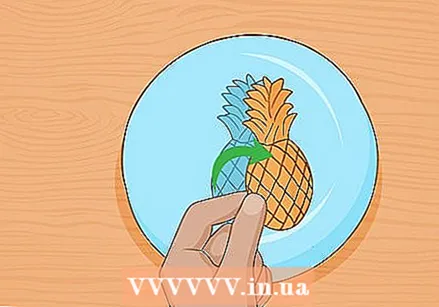 Remove the object from the mold. Grab the mold by the edges and bend it back and away from the object. The object should come off on its own and fall out of the mold. Hold the mold upside down to let the object fall out.
  Use the mold. Fill the mold with clay, take out the clay and let the clay dry. You can also try using resin in this mold, but let the resin cure and dry first.
Method 2 of 3: Using silicone sealant and cornstarch
 Squeeze a little silicone sealant into a bowl. Buy a tube of pure silicone sealant from a hardware store. Usually this is sold in a tube with a nozzle on it. Squeeze a little silicone sealant into a disposable dish. You need enough sealant to cover the object you want to make a mold with.
 - Many different types of silicone sealant are sold at hardware stores, including sanitary sealant. Don't buy a quick-drying kit.
- If there is no nozzle on the tube of silicone caulk, you will have to buy a caulking gun, insert the tube, cut the end of the tube, and poke a hole in the tip.
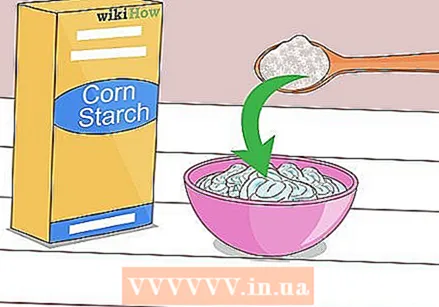 Use twice the cornstarch as a sealant. If you can't find cornstarch, try using cornmeal or potato flour. Keep the box handy as you may need more.
 - If you want to make a colorful mold, add a few drops of acrylic paint. This has no effect on how well the mold works.
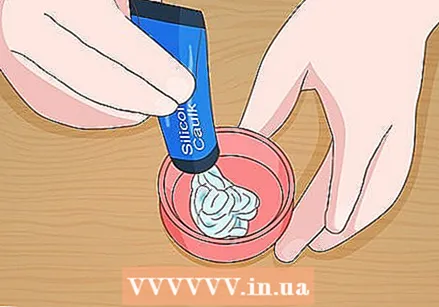
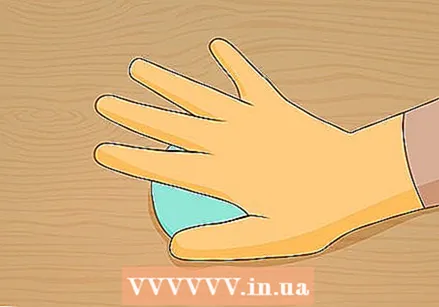
 Put on plastic gloves and knead the ingredients together. Keep kneading until the silicone and cornstarch are mixed and you get some kind of filler. It may be dry and crumbly at first, but keep kneading. If the mixture is too sticky, add some more cornstarch.
 - There may still be some cornstarch in the dish. That's fine. Enough cornstarch will have stuck to the silicone.
 Roll up the silicone sealant into a disc. Start by rolling the kit between your palms into a ball. Push the sealant against a flat surface and apply light pressure to flatten the sealant slightly. Make sure the disc is thicker than the object you want to make with the mold.
 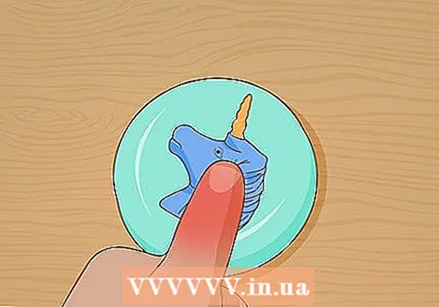 Push the object of your choice into the silicone sealant. Make sure to push the item right side down into the silicone sealant with the back showing. Use your fingers to gently push the edges of the mold against the object so that there are no more gaps.
  Let the silicone sealant harden. This will take about 20 minutes. You are ready to begin the next step when the mold is stiff. The mold should still be flexible, but you shouldn't be able to pit it or knead it in any other shape.
  Remove the object from the mold. Hold the silicone sealant mold by the edges and gently bend them back and forth and away from the object. Turn the mold upside down to let the object fall out. If necessary, use your fingers to pry the object out of the mold.
  Use the mold. You can press in pieces of wet clay, pull them out again and let them dry. You can also pour resin into the mold, let the resin cure and then press the resin object out. Remove all the items you made with the mold in the same way as the first item you used.
Method 3 of 3: Using two-component silicone
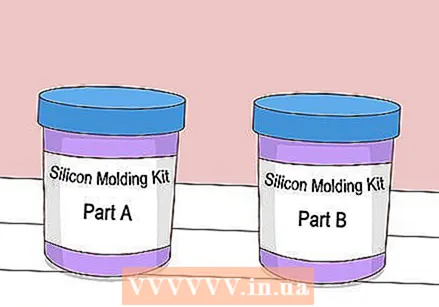 Buy a silicone mold making kit. You can buy these at hobby shops and hardware stores with a wide range. Otherwise, search online for a good webshop. Most kits have two packs labeled "Part A" and "Part B". Sometimes you have to buy both components separately.
 - Do not mix the silicone yet.
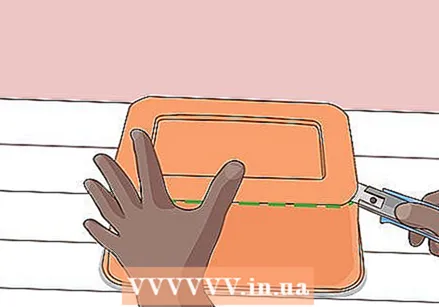 Cut the bottom out of a plastic food container. Find an inexpensive food container made of thin plastic. Use a utility knife to cut out the bottom. Don't worry if the edge isn't very neat and jagged as this will be the top of your mold.
 - Choose a container that is slightly larger than the object you want to make a mold from.
 Place overlapping strips of tape on top of the package. Remove the lid from the packaging. Cut several long strips of packing tape and place them on top. Overlap the strips by about half an inch. Let the tape hang over the edge a few inches on all sides.
 - Run your finger along the edge so that the tape seals the package tightly.
- Make sure there are no holes, otherwise the silicone will flow out of the mold.
 Fold the edges of the tape over the edges of the bin. When you fill the container with silicone, there is a small chance that a little will leak from under the tape. By folding the tape over, you prevent everything from leaking out of the bin and ruining your workplace.
  Place the object you want to make into a mold in the container. Place the tray on a flat, stable surface with the cut side up. Place the object or objects in the bin and push them against the tape. Make sure that the objects do not touch the side of the container and each other. Also make sure that the right side of the object is facing up and that the back is pressed against the tape.
 - It is best to use objects with a flat back for this.
- If necessary, clean the items beforehand.
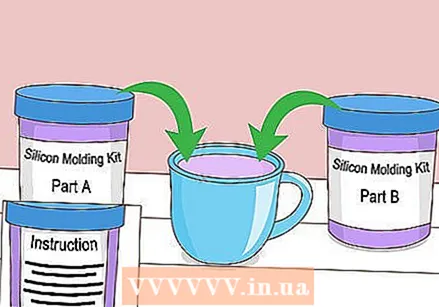 Measure the silicone according to the directions on the package. You will always have to mix part A and part B together. Some types of silicone you have to measure by volume, and some types you have to weigh. Read the instructions that you received with the set carefully and measure the silicone accordingly.
 - Pour the silicone into the cup provided with the kit. If the kit does not include a cup, pour the silicone into a disposable plastic cup.
- You need enough silicone to cover the objects with half an inch of silicone.
 Stir through the two components until the mixture has an even color. You can do this with a skewer, popsicle stick, or even a plastic fork, spoon, or knife. Keep stirring until the color is even and you no longer see stripes and spirals.
 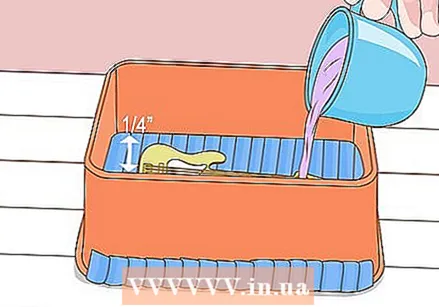 Pour the silicone into the container. Use your stir stick to scrape any remaining silicone from the cup so you don't waste anything. Make sure you have the top of the object with at least half a centimeter of silicone. If the layer is too thin, the mold can tear.
 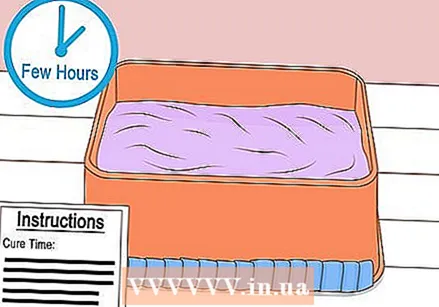 Let the silicone harden. How long this takes depends on the type and brand you are using. Some brands are ready to use within hours, while other brands of silicone should be left overnight. Check the instructions that came with the kit to find out how long to let the silicone cure. Do not touch or move the mold during curing.
 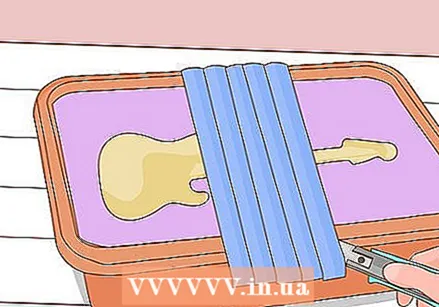 Remove the silicone from the container. When the silicone has hardened and stiffened, peel the tape off the tray. Gently slide the silicone mold out of the tray. There may be thin strands of silicone hanging from the mold. If you don't like these, remove them with scissors or a utility knife.
  Remove the objects from the mold. The items you put in the bin are now stuck in the silicone. Gently bend the mold back to get the objects out. This is a bit like removing ice cubes from an ice cube tray.
  Use the mold. You can now fill the cavities with resin, clay or even chocolate (if the material is food safe). If you used clay, you can already remove the wet clay from the mold. However, you will have to let the resin harden completely before removing it from the mold.
Tips
- Nothing will stick to silicone, but it can still be a good idea to spray the inside of your mold with mold removal spray before pouring resin into it.
- Molds made of silicone sealant and dish soap or cornstarch are not suitable for use in baking and candy making. Silicone sealant is not food safe.
- If you want to make a mold for fondant or chocolate, you will have to buy a silicone set with two components. Read the directions on the packaging to make sure it is food safe.
- Two-component silicone molds are stronger than silicone sealant molds. This is because they are made using professional casting materials.
- A silicone mold does not last forever. The material will eventually disintegrate.
- It is best to use a mold made of two-component silicone if you want to use resin.
Warnings
- Silicone sealant can give off fumes. Make sure you work in a well-ventilated area.
- Do not touch the silicone sealant with your hands. You can get skin irritation.
Necessities
Use silicone sealant and liquid soap
- Water
- Liquid soap
- Come on
- Water
- Object to make the mold
- Plastic gloves
- Silicone sealant
Use silicone sealant and cornstarch
- Disposable dish
- Cornstarch or cornmeal
- Object to make the mold
- Plastic gloves
- Silicone sealant
Use two-component silicone
- Set with two-component silicone
- Disposable cup
- Stirrer
- Plastic food packaging
- Creasing knife
- Packing tape
- Object to make the mold


