Author:
Bobbie Johnson
Date Of Creation:
10 April 2021
Update Date:
1 July 2024

Content
1 Moisturize your hair. Sprinkle water on your hair before you cut it to help you shape and cut it. Hair should be damp, but not wet. Take a towel and blot your hair to dry it slightly. Then take a comb and part your hair into sections.- Determining where the hair will split is very important because you can make the transition smoother in the shorter section than in the longer section. This will depend on the style chosen.

Laura martin
Laura Martin is a licensed beautician based in Georgia. Has been working as a hairdresser since 2007 and has been teaching cosmetology since 2013. Laura martin
Licensed cosmetologist
Laura Martin, a licensed cosmetologist, says: “To create a haircut like this, you need to make a gradual transition from a no-attachment cut along the hairline to a no-attachment cut or attachment number 2, moving up the sides of your head. The hair on the crown can be shortened or left long. "
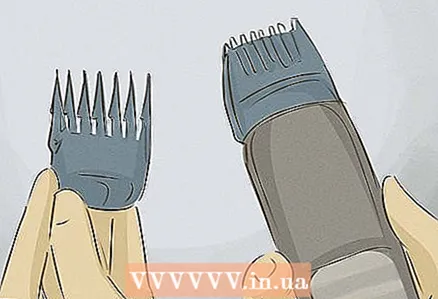 2 Choose the right hair clipper. The smaller the nozzle number, the shorter the haircut will be. To get started, take a nozzle with a large number, for example # 3.
 - Use the larger number to shave the baseline evenly along the sides and back of the head.
- To achieve exactly the "fade" haircut, you need to change the attachments to a smaller number as you go down. If you start with a larger nozzle, it will be easier for you to achieve a smooth transition.
- You will trim the sides and back of the hair with the first brush, then repeat with the smaller one, dropping lower and lower, leaving the maximum desired length on top.
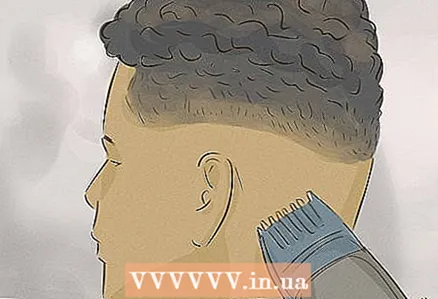
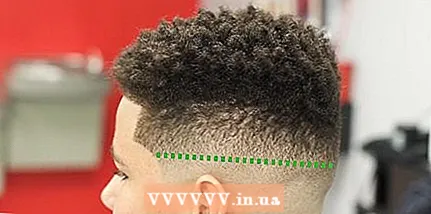 3 Decide where the transition line (s) will be. The transition line will define where one hair length merges into another. It will span the circumference of the head from ear to ear.
 - The transition lines do not have to go straight through the back of the head. In fact, it happens that the transition lines go down a little at the back of the head, and then return to the original level as they approach the second ear.
- You can have more than one transition line. For your first haircut, start with one, and when you feel more confident, do two.
- The place where you will make the transition line, choose at your discretion. You can place it anywhere, for example, almost immediately above the ear or 5–7 cm above it.
 4 Part the top section of your hair. Take a comb and outline a rectangular section above where the skull curves upward. This will separate the longer hair at the crown from the shorter ones at the sides. Use a hairpin or elastic to pick up this section of your hair.
 - If you are not sure how large a rectangular area should be, use the eyebrows as a guide. The sides of the rectangle should be in line with the outer edges of the eyebrows. Include the entire mass of hair at the back of your head in it.
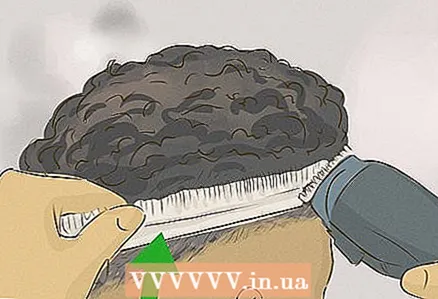
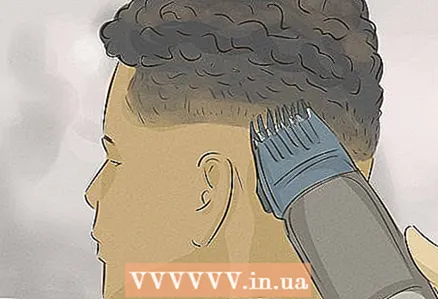
 5 Keep the clipper upright when shaving your hair. Just like shaving your face, the main rule is to shave your hair against its growth. Start at the temples and move upward towards the back of the head.
 - Do not cut the section of hair that you cut off in the previous step.
- Move the car in an upward motion and pull it back in an arc.
- With your free hand, lightly press the scalp where you are cutting at this moment. This will give you a smooth, even haircut.
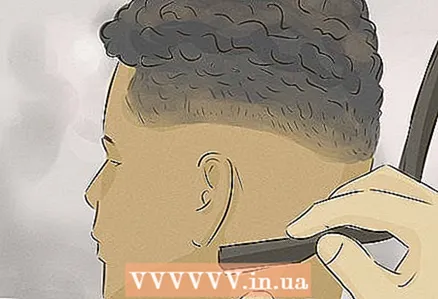
6 Walk the machine also to the sides along the transition line. This does not mean that the clipper must be turned horizontally; it must remain upright. Do not forget that the transition line is where the length of the hair goes from one to the other. - Hold the clipper with your thumb on top and your other fingers on the bottom. Move upward with fluttering movements of the wrist.
- To smooth the transition line, you need to hold the clipper at an angle so that only the bottom third or quarter of the blade touches the head at the transition line.
- The part of the blade that does not touch the head will still shave off the hair, but at a natural transition angle.
7 Hold the tool firmly and shave off hair in small sections. The slower you do everything and the more precise your movements are, the better your haircut will look, and it won't take you long to smooth out the irregularities. - Press down on the clipper a little more in uneven areas so that it grips all the hair.
- To pull the hair behind the ears, pull the top of the ear downward and tuck the hair away, starting from where the ear meets the head. You may need to cut at an angle to catch the hair behind your ear.
8 Change the attachment to continue the transition from one length to another. When you've finished shaving the sides and back of your head, it's time to move on to another attachment. If you started with # 3, change it to # 2. - Repeat the same as before, shaving the hair from the bottom up.
- Do not shave your hair all the way to the crown. To get a smooth and smooth transition, you should outline the location of the next transition line. Its location will differ individually, but the second transition line should be above the ear.
- Depending on how short you want the hair to be at the bottom, you may need to change the attachments again and repeat the process, shaving the bottom of the hair with attachment # 1.
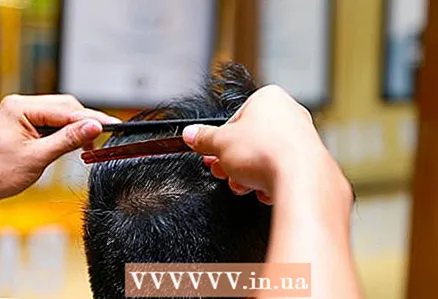
 9 Mark the transition line with a comb haircut. Start marking the transition line using a regular comb. (Use a white comb for dark hair and black for light hair.)Position it at a 45-degree angle with respect to the transition line and lift your hair up, running the comb in it just a few centimeters. Place the clipper over the comb so that it shaves off the hair that is above the teeth of the comb.
 - Repeat this process along the transition line, lifting your hair the same length all the way.
- If you do everything right, you will have a smooth, smooth transition with no visible lines. The hair should gradually get shorter as it reaches the base of the skull.
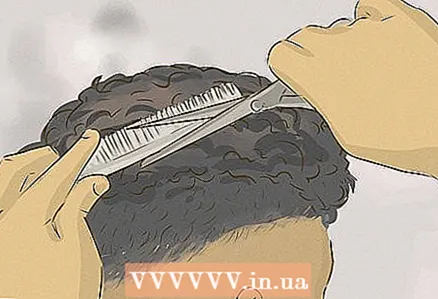 10 Trim the top of your hair. Use a pair of scissors if you want to keep your hair long, or a high-numbered attachment if you want a hedgehog. For styles such as quiff, pompadour or messi top, you will need scissors, while for caesar or cru, you will most likely use a clipper.
 - To trim your hair with scissors, use the comb to lift the hair up with your fingers and trim it a little over your fingers or comb. Keep your fingers or a hairbrush straight and parallel to the floor.
- Consider the angle at which you cut your hair. For a fade with longer hair on top, you should cut the hair at an angle as you get closer to the back of the head, making a gradual transition to avoid a potty cut.
- Pay attention to the corners. For this haircut, they must be smoothed out.
- If too much hair falls backwards on top, you can use thinning scissors or a hair clipper to trim it.
Part 2 of 3: Final touches
 1 Use a beard trimmer or clipper to shave off the bottom of your hair. Now you need to make the transition have a visible end line at the base of the head and at the bottom of the temples. Take a trimmer or clipper and shave off any remaining hair.
 - You may not want to do this on the temples if the man you are cutting has facial hair that turns into sideburns.
- Shave the base of the neck and slightly above to the bottom transition line to even out the hairline.
 2 Smooth out any remnants of the visible line with a typewriter. Look for areas where the hair has been cut unevenly and walk through it again to clean up the unevenness.
 - You need to hold the machine at an angle to remove any irregularities along the transition line.
 3 Clean the base of your neck. When the bottom transition line is outlined, trim the hair underneath. Grab sections with finer, longer hairs.
 - Clean the edges with a straight blade or trimmer, and remove hair from the neck.
- If using regular blades, apply shaving cream to the area to be treated, then wipe with a damp warm towel.
- Shake off the hairs and apply the gel to the hair at the top to complete the look.
Part 3 of 3: Choosing the Right Equipment and Getting Ready
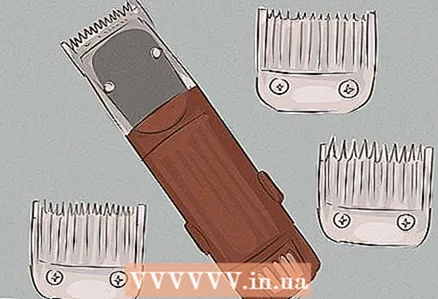 1 Get a professional-grade hair clipper. Clippers can be expensive, but in order to make the right transition, your clipper and attachments must be powerful and reliable. The quality of the machine is of the utmost importance.
 - Some popular and high quality cars:
- Oster Classic 76 Clipper w / 2 Blades;
- Wahl Senior machine;
- machine Andis Master.
- Make sure your clipper comes with at least 5 different sized attachments.
- You should also buy a good professional trimmer that will be used to straighten the temples and clean up the areas around the ears, neck and forehead. Check with your hairdresser where he buys the equipment, or search online.
- Some popular and high quality cars:
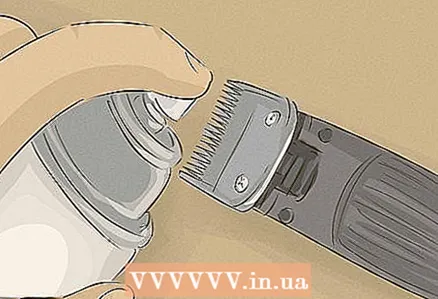 2 Clean the blades of the clipper. Even if your machine is new, you should still wash it before using it. The cleaning solution should be included with the clipper, but if not, you can use distilled white vinegar.
 - Make sure the clipper is unplugged and pull out the blades.
- If you have a cleaner, spray it on the blades and let it sit for a while before wiping it off.
- If using distilled white vinegar, soak the blades in the white vinegar solution for a few minutes.
- Do not wash the blades with soap and water as this can cause rust.
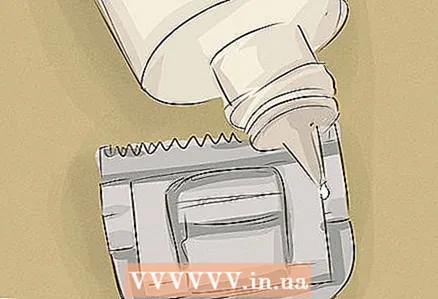 3 Lubricate the blades before use. Read the instructions for your clipper to find out if you need to remove the blades before oiling them, or if you just need to point them with the bottom towards the sink and pour oil on them. When you apply oil to the blades, wipe off excess oil with a soft, dry cloth.
 - When applying the oil, be sure to remove any excess hair that may be on the blades.
- Turn on the clipper and let the oil spread evenly over the working blades.
- Leave the clipper on for 20 seconds.
- Dry the blades well to keep the tips dry, otherwise hairs will stick to them.
Tips
- Don't worry if your first fade doesn't look perfect. This technique takes experience and practice.
- You can make an easy transition using three different attachments. The first nozzle will be the longest (the higher the number, the more hair remains), go over the entire head with a typewriter with this nozzle. The second nozzle will be the shortest, select the transition line and lightly walk under it. The third nozzle will be medium in size, it will help smooth out the transition line, start just below the transition line and walk a little over it. There will be no more straight and too clear lines!
- If you have done a linear or mushroom haircut - with very noticeable lines - ask your hairdresser to fix the situation.
- If you have never done this before, ask the hairdresser to explain to you what he does when cutting. It's very important to be honest and say that your friends asked you to cut their hair, or that you want to keep the haircut in order between visits.


