Author:
Mark Sanchez
Date Of Creation:
2 January 2021
Update Date:
2 July 2024
Content
- Steps
- Part 1 of 3: Getting Started with Surya Namaskar
- Part 2 of 3: Moving to the middle of the complex
- Part 3 of 3: Returning to the starting position
- Tips
Surya namaskar (sun salutation) is the twelve yoga postures with which you praise the sun. Traditionally, this set of exercises is performed in the morning or evening, facing the sun. You should start the movement with several poses, and then return to the starting position, performing the same movements, only in the opposite direction.
Steps
Part 1 of 3: Getting Started with Surya Namaskar
 1 Start from a standing position. Make sure your feet are next to each other. Straighten your knees. Hands should be extended to the sides, palms open, fingers pointing down. Concentrate on your body and get ready to do the exercise.
 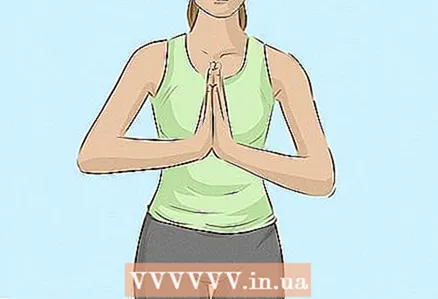 2 Get into a greeting pose. The first pose of the Surya Namaskar complex is also known as the mountain pose or the prayer pose. It's simple. Put your palms together in front of your chest, pointing your fingers up. The palms should be at the level of the heart, and the thumbs should be directed towards the sternum. Inhale and exhale, holding this position for a few seconds.
 - The weight should be evenly distributed over the entire area of the feet.
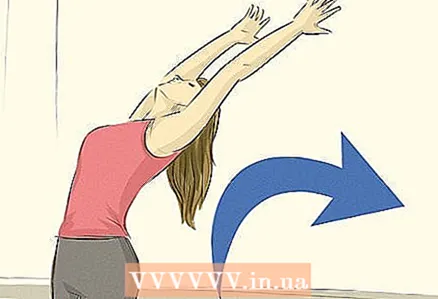 3 Move to the arms up pose (crescent moon pose). While standing in a prayer position, take a deep breath. As you inhale, raise your arms above your head and bend back slightly. Bring your buttocks forward slightly. Try to bend as far as you can, but be gentle and careful. Stretch your fingers up. The gaze should be directed to the palms.
 - In this position, the palms should be facing each other.
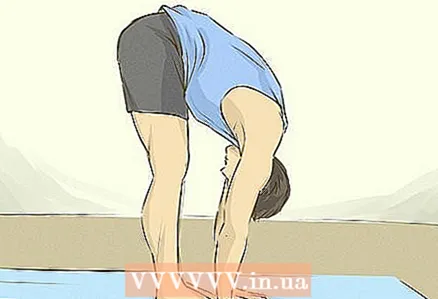 4 Place your hands on the floor in front of you. To move on to the next pose, exhale and bend towards your legs. Place your palms on the floor on either side of your feet. The head should hang down, touching (or nearly touching) the knees.
 - If you find it difficult to reach the floor with your palms, then bend your knees. As soon as your hands touch the floor, try to straighten your legs as much as possible.
- This pose (the third pose) is called the hand-to-feet pose, or tilt.
Part 2 of 3: Moving to the middle of the complex
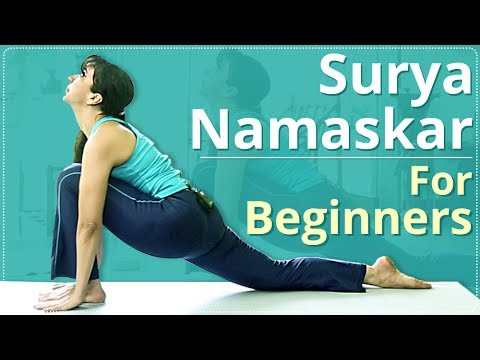
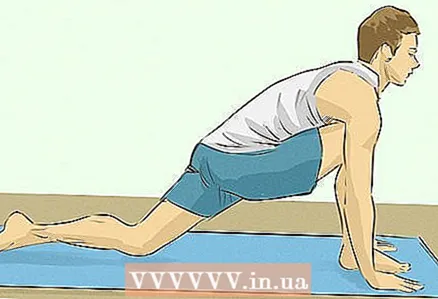
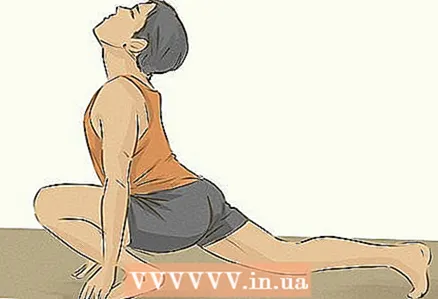 1 Straighten your right leg back and inhale. To move into the rider pose, straighten your right leg back as far as possible.The knee of your right leg should be touching the floor when you stretch your head up. The left leg should remain between the hands.
 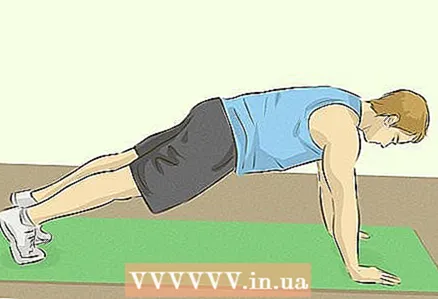 2 Move your left leg back and inhale. Extend your left leg back so that it lies symmetrically with your right. Along with this, straighten your arms. Make sure your back and legs are straight and your neck should also be straight. Keep your arms perpendicular to the floor. Keep your arms and legs absolutely straight.
 - This pose is called the plank pose, although some people call it the mountain pose.
 3 Lower yourself to the floor using eight points. First, lower your knees to the floor, then lower your body. The body should touch the floor at eight points: palms, knees, toes, chest and forehead or chin.
 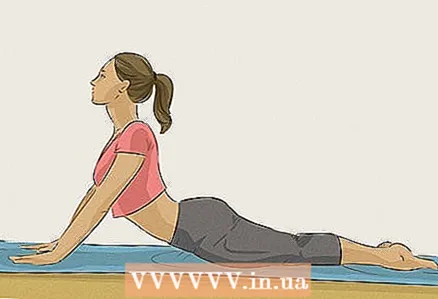 4 Raise your head into cobra pose. Shift your weight forward, leaving your body mostly on the floor. Then lift your upper body by straightening your arms. Raise your head and look up.
Part 3 of 3: Returning to the starting position
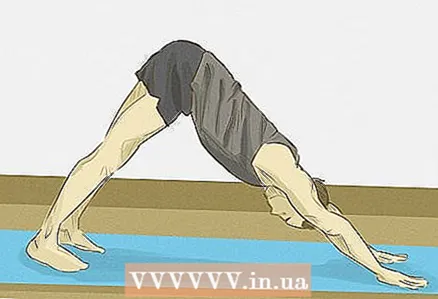 1 Return to Mountain Pose. As you exhale, lift your buttocks up so that your body forms a triangle. Keep your arms and legs straight.
 - This pose corresponds to the plank pose (mountain pose) that you did earlier. Some people do mountain pose in both cases.
 2 Pull up your right leg to return to rider pose. Place the foot of your right foot between your palms on the floor. Raise your head up and bend slightly to your left leg.
 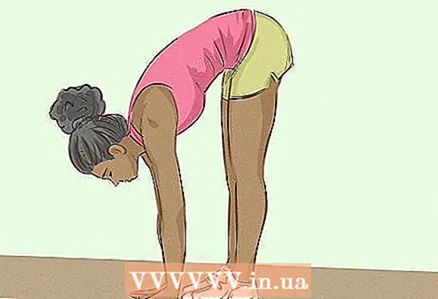 3 Return to the slope. Pull up your left leg by placing it next to your right. Perform this movement as you exhale. The palms should be on the floor on either side of the feet. Stretch in this position, trying to reach your knees with your forehead.
 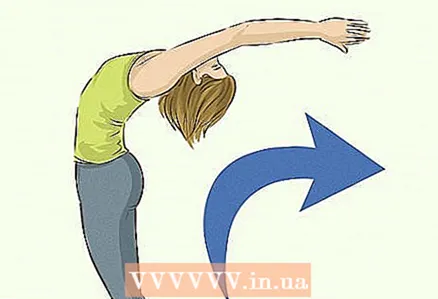 4 Straighten up and return to a pose with your arms raised. While inhaling, straighten your body, do not forget to "twist" the spine forward. Bend back with your hands up, stretch back and up.
 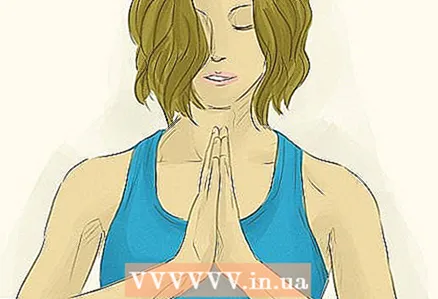 5 Return to starting position. As you exhale, lower your arms and straighten your back. Place your palms together with your thumbs towards your chest. Relax in this position and then lower your arms to your sides.
Tips
- Perform all movements smoothly, continuously, so that each new pose is linked to the previous one.


