Author:
Bobbie Johnson
Date Of Creation:
3 April 2021
Update Date:
1 July 2024
Content
Many photographers strive for perfectly sharp images. No matter how good the picture is, a blurry frame will look mediocre compared to a sharp one. Do not worry. It's easy to start photographing, not difficult to get your photos the way you want them - clean and sharp. It only takes a little technical knowledge.
Steps
 1 Avoid camera shake.Watch your shutter speed. As a general rule, it should not be allowed to go below the reciprocal of the 35mm equivalent focal length. However, if you are using a digital camera (or want to use up film a little faster), you can take a series of shots in the hope that one of them will be the required level of clarity.
 - Turn on vibration compensation (also called image stabilization, depending on the manufacturer) if you have it. When VR / IS is on, the elements of the lens or sensor move so that the image stays in place when projected onto the sensor. As a result, camera movement is unlikely to affect the clarity of your photos. Turn off this mode if you are using a tripod, it is unnecessary and actually makes your photos less clear.
- Use short focal length lenses (or zoom out) and get closer. Remember that, according to the inverse rule of photography, reducing the focal length will reduce camera shake regardless of the shutter speed. In addition, if you are using a variable aperture zoom, you often get larger apertures at shorter focal lengths. And more - shooting at close range will require more imagination from you in framing.
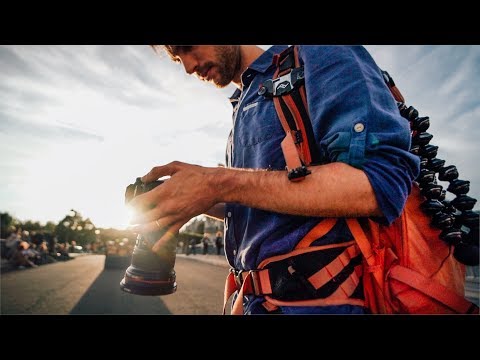
 Sometimes you will have no choice but to shoot with the lens wide open, as in this shot with a single haze light source several kilometers away. Use a tripod or monopod... When using a DSLR camera, sooner or later, due to low light, you will have to shoot at long exposures, so consider purchasing a remote release.If your camera has a mirror lock (also called exposure delay mode), use this feature. This will prevent the mirror from vibrating and ruining your pictures. Check the instructions for your camera to understand what it calls this mode. Mirror fixation has two definitions. Its second meaning is when the mirror and shutter are hidden when the shutter is pressed, to give you the opportunity to clean the sensor when it is not working. If the camera does not have a mirror lock function, use the self-timer.
- 2 More sanity when installing a diaphragm! Most lenses are at their sharpest two or three stops above their minimum aperture (usually f / 8 or f / 11).
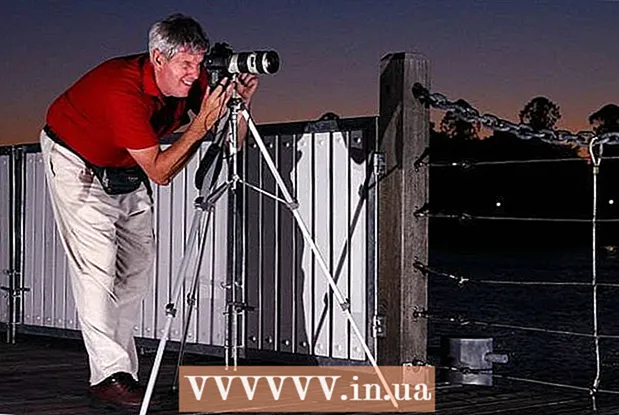
 In addition, shooting with wide open apertures can result in very shallow depth of field, especially on telephoto lenses. This shot was taken with a 135mm lens - notice the shepherd's nose was out of focus. Try to avoid photographing with the lens as wide open as possible, unless this is the effect you are trying to achieve. ... Nearly all lenses are noticeably softer at wide open compared to lower apertures. What's more, with fast lenses (which also increase any defocusing) your depth of field will be so shallow that any slightest movement after autofocus is triggered will result in a loss of sharpness in the entire picture.
 Shots like this don't require a lot of depth of field so don't set lower than f / 8 unnecessarily. You should also not shoot at the smallest aperture.Everything lenses are inherently softer at small apertures due to diffraction effects. If you don't need depth of field, don't set your aperture less than f / 8 or so on modern DSLR cameras. With small apertures, the shutter time will increase, which increases the risk of camera shake, which will make your photos look blurry.
(With this in mind, if you have to choose between the desired depth of field and diffraction, you may choose to use diffraction over defocusing. The phenomenon of diffraction is relatively easier to correct later using software than defocusing. Defocusing is not easy to correct - it differs even on the same lens depending on the aperture and distance to the subject, and also varies from lens to lens.) If you need to close the aperture to achieve a slower shutter speed, get a ND filter.
- 3 Watch out for focus misses. They can be caused by both human errors (yours) and errors in the operation of the camera.
 Use focus aids. If you focus manually, use the camera assist functions. Review your camera manual to understand how to focus manually using the assist functions. Some autofocus cameras will give an audible or visible confirmation that the subject is in focus - use this. Otherwise, if you will be focusing manually on cameras with autofocus, set up a focusing screen such as Haoda.
- Make sure autofocus does not overshoot. Some combinations of lens and camera can do this for reasons known only to their manufacturers. Check - if you constantly get out of focus on a lens you are familiar with, you need to check your camera.
- Use AF lock. If your subject does not hit the AF target point, select the closest focus point, lock AF, aim the point over the subject, and re-frame. Remember that AF lock also includes AE lock. You may need to use exposure compensation.
- Calibrate the viewfinder, if your camera has one. They often get frustrated over time.
- 4 Keep track of the set ISO on digital cameras. Most digital cameras use noise reduction at high ISOs; sometimes it smudges small details and makes pictures look less sharp than they really are. Disable noise reduction if it affects the sharpness of your pictures. Do not shoot at high ISO in daylight. If you have a top-end DSLR camera (like the Nikon D3 or Canon EOS-1Ds Mark III), you don't need to keep an eye on ISO values.
- 5 Use multi-frame mode. The camera moves slightly when your finger overcomes the resistance of the shutter button when you press it. If you have a DSLR camera, the movement of the mirror inside it makes the camera shake. Some of these movements can be avoided by shooting in the multi-frame mode that your camera has. In this mode, the camera takes pictures one by one while the shutter is pressed. In addition to avoiding camera shake the first time you press the shutter, you can also choose the best shot from the whole series.
 6 Use the plugin "Unsharp Mask" in Photoshop, GIMP or your favorite photo editor. It won't fix focus errors, camera shake, or spherical aberrations that often occur when shooting wide open lenses (these are too complex to be corrected this way), but it will add a little sharpening to your shots. Choose a small radius (one pixel or less) and a large value. If you are good at layer-by-layer masking, do it selectively so that only the parts that catch the viewer's attention will be super sharp (hint: Apply a large radius Gaussian blur on the mask layers).
Tips
- Always use a flash, even (and especially) in full light. An extremely short flash not only fills in shadows, but also captures fine details such as hair, making the whole picture look sharper. Two or more flashes are better than one for this. Mount one flash on the camera and the other on the off-hand grip.
- Most internet browsers display images at 100% resolution, so if you want to view your footage at 100% resolution, open them in your browser.
- If you are considering purchasing a new lens, and this article rightly assumes that most lenses are sharp when used correctly, consider buying a prime lens (a lens with a fixed focal length, that is, one that cannot be zoomed). Lenses such as the 50mm f / 1.8 are very popular for crop sensors, are cheap, sharp and great for portraits. Normal lenses (50mm 35mm film equivalent) are suitable for many photography situations. For cheaper Nikon or Canon DSLRs, the normal lens has a 35mm focal length. Fixes are sharper, cheaper, and faster (meaning you can shoot at a faster shutter speed). But don't buy a new lens to sharpen your photos if you haven't tried the methods above.


