Author:
William Ramirez
Date Of Creation:
16 September 2021
Update Date:
1 July 2024
Content
- Steps
- Method 1 of 3: Learn to interpret the notes
- Method 2 of 3: Learn to interpret the notes
- Method 3 of 3: Learn to play music
- Tips
Learning to play the piano is not easy, time consuming, but very rewarding. If you do not have the opportunity to receive traditional lessons, you can learn to play the piano on your own. Below is a basic beginner's guide to reading piano sheet music. Check out our other music reading tips for more information.
Steps
Method 1 of 3: Learn to interpret the notes
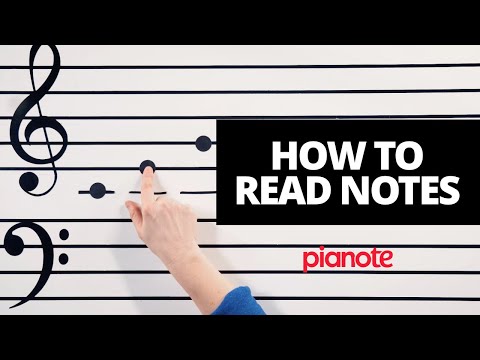
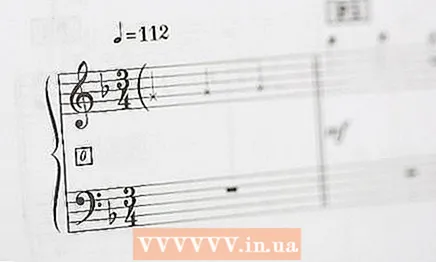
 1 Learn to recognize the stave rulers and the location of the notes. As you read the notes, you see five lines with four spaces in between. This is called the staff or staff. Both the lines and the spaces between the lines are used as locations for the notes. The location of the note determines the pitch of that note. We will talk about this below.
 - Lines and spaces between lines can also be created above and below the normal five lines by adding extra short lines above or below the staff.
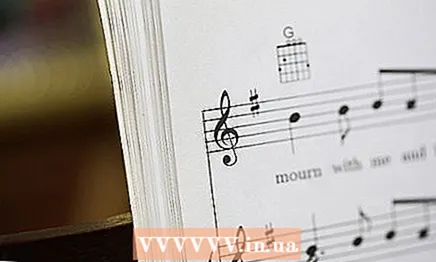
- 2 Learn to recognize keys. Clefs are various signs located at the very beginning of the staff, which indicate the pitch of the note on the staff. They are easy to recognize because they are large and cover all five lines. Although there are several keys, you only need two to read piano music:
- The treble clef or clef g is a clef or symbol that is usually associated with music. It should look familiar. The notes on the lines from bottom to top are called “mi”, “sol”, “si”, “re”, “fa” (E, G, B, D, F). The notes between the lines from bottom to top are called "fa", "la", "si", "mi" (F, A, C, E).
- A bass clef or F clef looks a bit like an upside-down C with two dots behind the arc. The notes on the lines from bottom to top are called "sol", "si", "re", "fa", "la" (G, B, D, F, A). The notes between the lines from bottom to top are called "la", "do", "mi", "sol" (A, C, E, G).

- The treble clef or clef g is a clef or symbol that is usually associated with music. It should look familiar. The notes on the lines from bottom to top are called “mi”, “sol”, “si”, “re”, “fa” (E, G, B, D, F). The notes between the lines from bottom to top are called "fa", "la", "si", "mi" (F, A, C, E).
 3 Learn to recognize key signs. Key signs indicate which notes are changed (altered). Natural notes include "la", "si", "do", "re", "mi", "fa", "sol" (ABCDEFG), but there are also semitones between the notes, which are indicated by # (sharp) or b (flat). Sharps and flats, located at the beginning of the staff, show key signs on the lines or in the spaces between the lines. This means that any note that is on these lines or in these spaces between the lines is played with either a sharp or a flat.
 - Additional sharps and flats are written before the note anywhere on the staff and raise or lower that note.
- A sharp means the note is going up, a flat means that the note is going down.
- The same black key has two names. C sharp and d flat - these are the black keys between "do" and "re".
- Sharps and flats are the black keys on the piano. We will talk about this below.
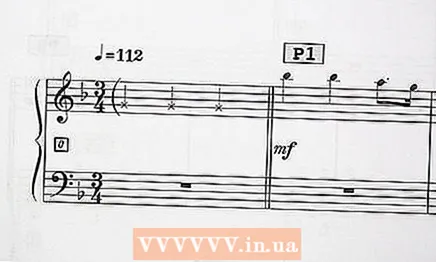 4 Learn to recognize the time signature. The time signature, indicated by two numbers at the beginning of the staff, shows how many and of which duration notes are contained in one measure (time interval). The lower number indicates the duration of the note, the upper number indicates the number of these notes per measure).
 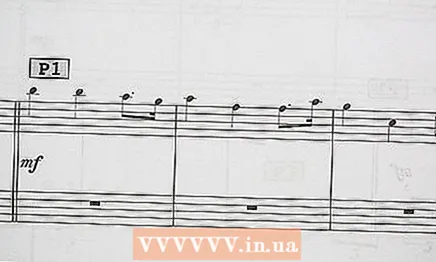 5 Learn to recognize beats. Looking at the staff, you see random vertical lines crossing the horizontal lines of the staff. The space between these lines is called the beat. Think of the beat as a musical proposal. Bar lines separate these sentences. There are no breaks in time between measures. Bars help you break up your music into equal time intervals.
Method 2 of 3: Learn to interpret the notes
 1 Learn to recognize parts of a note. The picture of the note consists of several parts. Like the lines and circles that make up the language of written Russian, the lines and circles in the depiction of the notes show how the note functions in the musical sentence. Understand the parts of the notes to understand how they sound.
 - The head is the round part of the note. It can look like an open oval or a filled oval. The location of the head indicates the pitch of the note.
- Calm is the line adjacent to the head. It can go up or down, it does not change the note (this is determined by the lines on which the note is located).
- The flag is a small tail that is connected to the end of the calm. There can be one or more checkboxes.
- 2 Learn to recognize the types of notes. There are several general types of notes that include different parts. There are also pause marks that indicate a period of time when there is no sound. Here is a list of the most common notes:
- Whole note: The whole note is indicated by an open head without a calm. They are indicated by a unit at the bottom of the size.

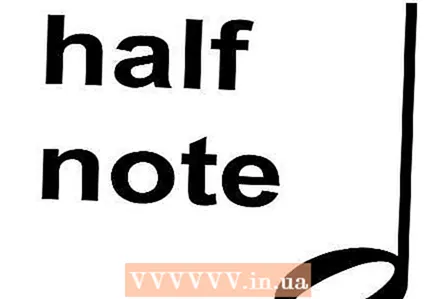
- Half note: The half note is indicated by an open head with a calm. They are marked with a 2 at the bottom of the size.
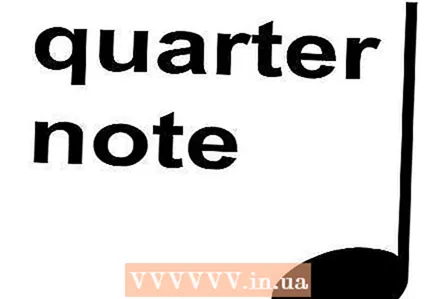
- Quarter note: The quarter note is indicated by a closed head with a calm. They are indicated by a four at the bottom of the size.
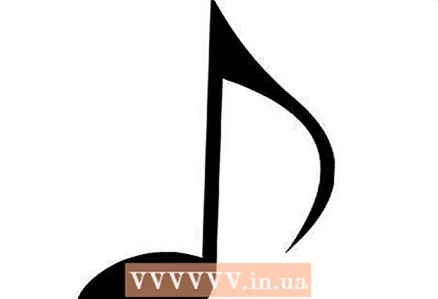
- Eighth note: The eighth note is indicated by a closed head with a calm and one flag. They are marked with an eight at the bottom of the size.
- Sixteenth note: The sixteenth note is indicated by a closed head with a calm and two flags.

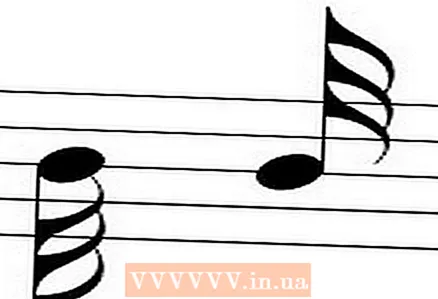
- Grouped notes: Eighth and sixteenth notes can be grouped by turning flags into lines (edges) that connect them.
- Whole note: The whole note is indicated by an open head without a calm. They are indicated by a unit at the bottom of the size.
 3 Learn to recognize pauses. There is no graceful way to explain this: the quarter pause is like a squiggle. The eighth pause looks like a diagonal line with one flag, while the sixteenth pause has two flags. The whole pause looks like a rectangle in the upper half of the middle space, while the half pause is in the lower part.
Method 3 of 3: Learn to play music
 1 Learn to recognize the staves for the left and right hand. Piano scores are composed of two staves connected by a curly brace - an accolade. Music bearers also share common bar features. The top stave indicates which notes are played with the right hand, and the bottom stave indicates which notes are played with the left hand.
 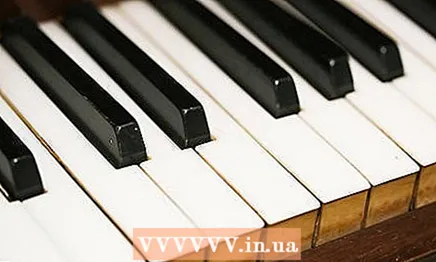 2 Learn to recognize notes on your piano. Each key, both white and black, represents a particular note. Notes are repeated every 12 keys. Take a look at the piano and you will see two black keys close together, and at intervals, three black keys close to each other. Starting at the first of these two black keys and moving on to the next note (including white notes), the notes are called C sharp or D flat (C # / Db), "Re" (D), "re sharp" or "e flat" (D # / Eb), "Mi" (E), "fa" (F), "f sharp" or "g flat" (F # / Gb), "G" (G), "G sharp" or "A flat" (G # / Ab), "A" (A), "A sharp" or "B flat" ( A # / Bb), "Si" (B), "before" (C). Black keys are highlighted in bold.
 - The writing on the keys while learning can be helpful.
 3 Use the pedals when instructed. When playing the piano instead of the synthesizer, you can see the pedals in your feet. The left pedal is called the “piano” pedal, the middle pedal is called the “moderator” and the right pedal is called the “hold” or “forte” pedal. When to use the damper pedal is indicated on the notes:
 - The holding pedal must be pressed when the word "Ped." written below the note, and let go when you see an asterisk. Instead, it is possible to use horizontal, vertical, or oblique lines together. A horizontal line means that the pedal should be depressed, an inclined line means that you briefly release the pedal, and a vertical line means that you release the pedal.
 4 Know how to read music lines. Reading music is like reading words. Think of the staff as a sentence and the notes as letters. Combine your knowledge of the staff with your knowledge of sheet music and start playing the music you see on the page. It will be difficult at first, but with experience it will become easier.
  5 Do not hurry. Play slowly as you learn to play the piano. Gradually, you will get used to hand movements, and you will be able to play without constantly looking at your hands.Play very slowly until you are ready to play faster.
 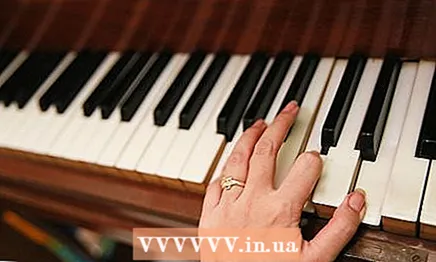 6 Exercise. Read and play music in a measured and correct manner. Learning how to read sheet music takes time and practice. Don't be discouraged if it doesn't work at first. If it were easy, people would not be impressed by the music of great composers! Exercise every day and get help if possible.
 - Perhaps your school music teacher can help you learn to play the piano. Perhaps there will be someone in your city who will teach you how to play the piano for free. Enter the appropriate query in one of the search engines. In addition, many useful videos can be found on YouTube.
- If playing the piano is challenging, consider taking classes with a teacher. It doesn't have to be expensive. You can also contact university students - they are unlikely to take a lot of money for their services.
Tips
- Experienced music readers learn something new as they play. In order not to hesitate during the game and properly assimilate the information, it will be useful to learn how to read the sheet music in advance.
- Use mnemonic techniques to memorize the order of the notes.

")

