Author:
Robert Simon
Date Of Creation:
20 June 2021
Update Date:
1 July 2024
Content
This article shows you how to increase your chances of getting Twitter authenticated by Twitter and getting a blue and white check mark next to your Twitter display name.
- Note: Since Twitter stopped submitting your verification request in November 2017, you cannot submit a verification request; however, you may qualify for your account verification to prompt Twitter to do so.
Steps
Method 1 of 4: Apply some basic tips
Find out the conditions for account verification. The most common conditions for account authentication, whether you submit your request yourself or are chosen by Twitter's validation team, include people from a large and influential public (singers, actors, athletes, artists, politicians, public or government agencies, etc.), or if your name is falsified by more than one Twitter account.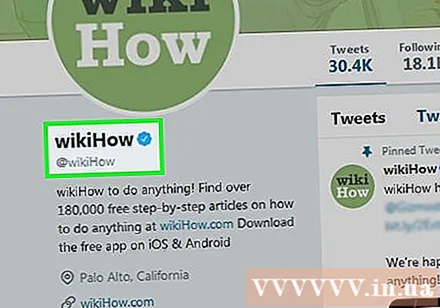
- Twitter will not rely on your followers or news feed when considering authenticity.
- For more information, read the Account Authentication clause at Twitter's account credentials page.

Be active on Twitter. Posting at least two news per day and interacting with people who remind you of your name in their posts will help your account meet Twitter's "positive" standards, and also increase the reader's positive reception. your content.- Be sure to swap your content, services or other skills with your readers so Twitter can see your readers care about your influence in the community.
Owning an account has influence on the community. As mentioned earlier, Twitter favors well-known accounts such as artist and business accounts instead of accounts that don't have a lot of popularity in the community. If you work at a publisher, show a company, or any other job with community links, show it off on Twitter.- You should also avoid posting content that is controversial or offensive. While Twitter's authenticity is not an endorsement from Twitter, they still value the kind side of the account owner.
- For example, you have a blog page or YouTube channel that you use to interact with your audience.This will be the point that you should focus on recommending on your Twitter account, if you want to increase your chances of account verification.
Update account information. Twitter's account validation conditions are quite strict, so you need to update your personal information as required, including your profile picture, cover photo, your name, your introduction and where you live.
Keep track of authenticated accounts. Here's how to help you understand the performance of your authenticated accounts and increase your chances of being verified by Twitter. Tracking authenticated accounts shows that you are serious about engaging with the authenticated community.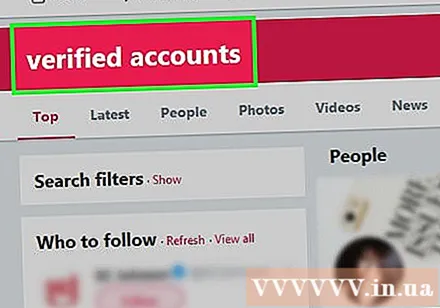
- As with all forms of social interaction, your reputation on Twitter will improve by tagging authenticated accounts in your content and communicating with them when possible.
Contact a Twitter Verified account (Twitter's account verification team). If you want to submit a request, you can contact Twitter Verified (@verified) and ask them to review your account. This may not give you the desired results, but it will make Twitter's account validation team know your account.
- Be polite to contact your Twitter Verified account. Your account could be blacklisted if they don't appreciate your manners.
Patience. Even if you have the perfect account and interaction, your account can take a long time to be verified (if that happens). Twitter has millions of accounts for curating content; so, be patient and continue to maintain your Twitter account while you wait for Twitter to consider the validation.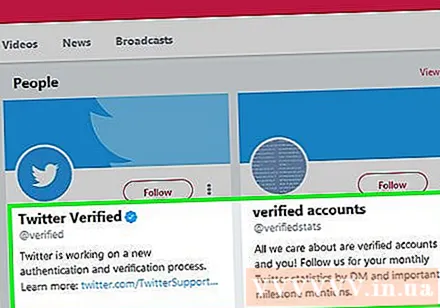
- The Twitter account verification request may re-apply at some point, meaning the process of submitting the account verification request will be more streamlined. For the moment, however, you still have to wait.
Method 2 of 4: Authenticate your phone number
Open Twitter by visiting https://twitter.com/ in the browser. This will open the Twitter account page if you are logged in.
- If not logged in, you will click Log in (Login), then enter your account information (email address / username / phone number, password) and click Log in.
Click on the profile page icon. It's a circle with your profile picture displayed in the top-right corner of the page. The screen will display a list of choices.
Click on options Settings and privacy (Settings and privacy) in the selection list to open the Settings page.
Click the card Mobile (Mobile) on the left side of the page.
Enter your phone number. Type your phone number in the field in the middle of the page.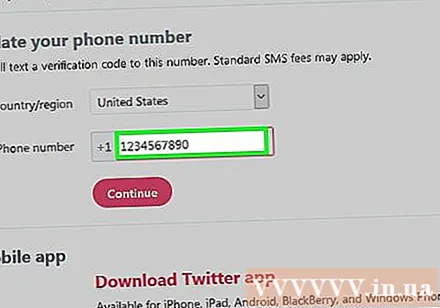
- This must be the phone number where the message is to be received.
- If you see your phone number here, your phone number is already authenticated.
Click the button tiếp tục (Continue) in blue below the phone number field. This will ask Twitter to send a verification code to your phone number.
Get a verification code. Open your phone's messaging app, open a message from Twitter and see the 6-digit code here.
Enter Auth Code. Type in the 6-digit verification code in the field in the middle of Twitter's Mobile Settings page.
Click the button Activate phone (Activate phone) in blue color below the data entry field. This will authenticate and add this phone number to your account.
- You can use your phone number to restore your Twitter account if you can't access it.
Method 3 of 4: Turn off private protection
Open Twitter by visiting https://twitter.com/ in the browser. This will open your Twitter account page if you are already logged in.
- If not logged in, click Log in (Login), then enter your account information (email address / username / phone number, password) and click Log in.
Click on the profile page icon. It's a circle with your profile picture displayed in the top-right corner of the page. The screen will display a list of choices.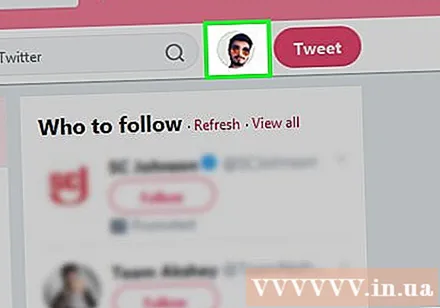
Click on options Settings and privacy (Settings and privacy) in the selection list to open the Settings page.
Click the card Privacy and safety (Security and privacy) on the left side of the page.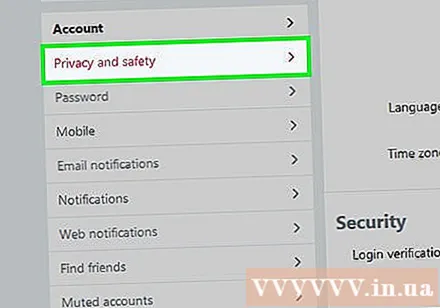
Uncheck the box "Protect your tweets" in the "Tweet privacy" section near the top of the page.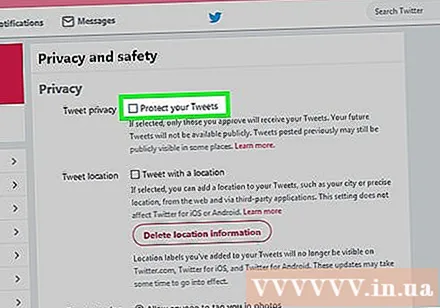
- If this box is left blank, your message is not protected.
Scroll to the bottom of the screen and select the button Save changes (Save changes) at the bottom of the page. This will turn off private protection on your account, allowing everyone to see posts and upcoming news. advertisement
Method 4 of 4: Edit the account in preparation for authentication
Open Twitter by visiting https://twitter.com/ in the browser. This will open your Twitter account page if you are already logged in.
- If not logged in, click Log in (Login), then enter your account information (email address / username / phone number, password) and click Log in.
Click on the profile page icon. It's a circle with your profile picture displayed in the top-right corner of the page. The screen will display a list of choices.
Click Profile (Personal page) near the top of the drop-down menu to open this page.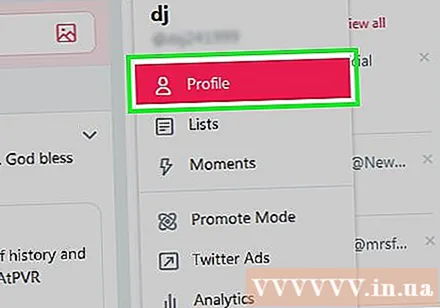
Click on options Edit profile (Edit Profile) on the left side of your profile. This will change your profile into "Edit" mode.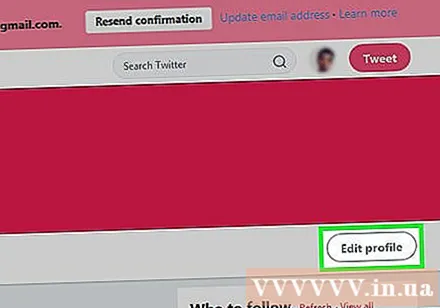
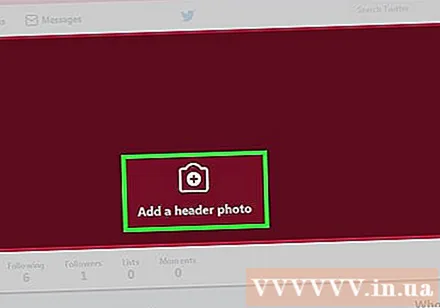
Change avatar and cover photo. You can change each photo by clicking the photo to change, selecting Upload photo (Upload photo) in the displayed menu, select an image, and click Open (Open).
- A cover photo should be an image that adds value to your gong (such as a presentation at a conference or performance on stage).
- Your avatar should be a portrait that exudes professionalism (or at least a shot with good lighting and quality).
Use real names. You will see the Twitter name selected in the input field on the left side of the page. If your Twitter name is not your real name (or stage name, if you are an artist or an actor), type your real name in this field.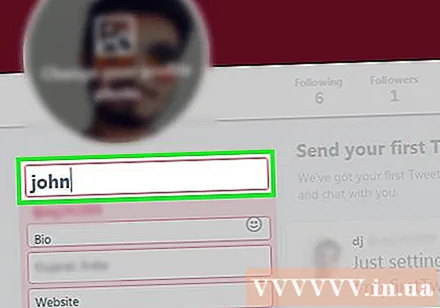
Add a specific location. Type where you are in the "Location" field on the left side of the page. Many people enter dumb or non-existent locations in the "Location" field, but you'll need to use your specific location (such as a city or province name) for Twitter to consider authentication.
Link to website. At the Website field, you'll set the path to your most impressive online achievements, such as an author info page, YouTube channel, or start-up page.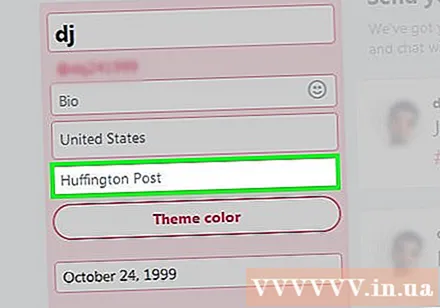
- The website you choose should provide information that proves you deserve to be verified. For example, if there is an author info page on a news site (such as Tuoi Tre), you should insert a link to that page.
- Always recommend the site that is arguably your best online accomplishment. For example, if you used to be a writer and become a publisher, add a website you own to your personal information.
Add a date of birth. This is just a general information gathering step; Twitter wants to make sure they have plenty of information about you when it comes to authenticating your account. You'll enter your date of birth in the "Birthday" field on the left side of the page.
Add your introduction information in the text field below your name on the left side of the page. Your introduction is important in proving to Twitter (and your readers) that you deserve validation; Please add the following information:
- The jobs and public services you do (briefly describe your role)
- Mention accounts that others can contact for reference (eg you can write "Editor at @wikihow" instead of "Editor wikiHow" here)
- One or two outstanding personal achievements (for example, "CEO of")
- A humorous tagline (as long as it doesn't mess with the rest of the info)
- You can also elevate your position in some contexts.For example, if you own a "small business" that specializes in editing other people's work, you can call yourself "the business owner" or even call yourself "CEO".
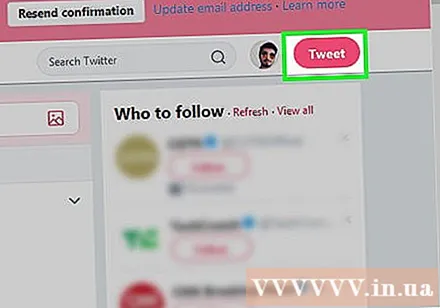
Click Save changes (Save Changes) in the top-right corner of the page. This will save and show your changes on your profile. Once your profile meets Twitter's credentials, you are getting closer to getting a small tick next to your name. advertisement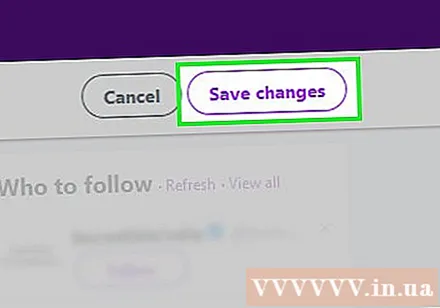
Advice
- You can research authenticated accounts to see how they represent themselves, if you need ideas. The easiest way to do this is to go to your Twitter Verified (@verified) account page and select the tag Following and view verified accounts here.
- Once your account is verified, some of your followers will be deleted.
Warning
- Don't add fake check marks after your name. This does not impress others, but may cause Twitter to delete your account.
- Changing your username can cause you to lose your authenticity mark.
- Having an authenticated Twitter account doesn't stop others from spoofing your account.
- Your Twitter account will not be authenticated if the information is protected, as the purpose of account verification is to attract attention to accounts that influence the community.


