Author:
Peter Berry
Date Of Creation:
18 February 2021
Update Date:
17 May 2024
Content
An Apple ID is used to access most Apple products and services. You'll need this ID to make iTunes and App Stores purchases, as well as to access iCloud and back up services for Apple devices like iPhones, iPads, or iPods. It only takes a few minutes to create an Apple ID and it's completely free. See the steps below to get started.
Steps
Method 1 of 3: Using Websites
Navigate to the Apple ID creation page. Searching for "Apple ID" on the web will quickly redirect to the appropriate page. Click the "Create Apple ID" button. Creating an Apple ID is completely free.
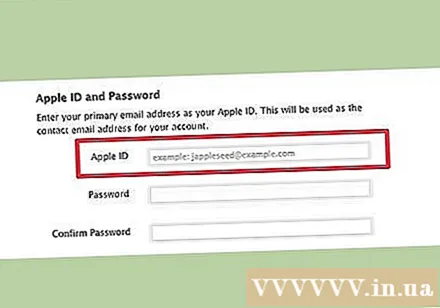
Enter your primary email address. To create an Apple ID, you will need to enter a valid email address. This email will be used for the contact, and also the Apple ID. When you sign in to a service that requires an Apple ID, you'll enter your email address and password.
Create a high-security password. Your Apple ID will be used for purchases, as well as lots of information about the Apple devices you use. Make sure your passwords are secure, and include numbers and symbols for better security.

Enter your security question and date of birth. This information will be used in the event of a forgotten password and a new one is required. Apple will use this information to verify your identity before sending a new password.
Enter your name and address. Apple needs this information for Apple ID purchases. An email address lets them know where customers use the company's products.

Do not receive promotional emails. Apple will automatically send newsletters and product updates to your email address. In case you do not want to receive this information, you can deselect that function.
Enter the CAPTCHA code. Type the characters that appear in the picture. If you cannot recognize them, click the "Try a different image" button to select a new one, or the "Vision Impaired" button for the computer to read the characters.
Read and accept the terms. Before creating an ID, you will need to indicate that you have read the Terms of Service and Privacy Policy. After reading and agreeing, click the box. Click the Create Apple ID button. You will receive an email asking you to confirm that you created your Apple ID.
- When creating an Apple ID through the website, you won't need to enter billing information. However, when you sign in to iTunes, you'll be asked to enter credit card information and billing address.
Method 2 of 3: Use an iPhone or iPad
Open the Settings app. Scroll down and select iTunes & App Stores. In the event that an Apple ID is signed in, click the Sign Out button.
Click Create New Apple ID. You will be asked to choose a storefront for your new ID. Choose the right store for your location. Click Done to confirm, and then press Next.
Read Terms and Conditions. You can also choose to send this content to your email address by entering a valid email and clicking Send by Email. To continue, click Agree and then Agree again to confirm.
Provide an email address. This email address will be used as an Apple ID. You will use this email to sign in to Apple services that require an Apple ID. Make sure your passwords are highly secure, as your Apple ID contains a lot of personal and financial information.
- You need to answer three security questions that will be used in case of forgetting your password.
Enter payment information. Select your credit card type and enter the correct information. You also need to enter a correct billing address.
- When you scroll down to the bottom of the list of credit cards, you can select "None" and skip the payment. You will not be able to make purchases until you enter valid billing information.
Verify your account. After creating your account, a confirmation email will be sent to the email designated as your Apple ID. This email contains a link that you must access to activate your account. Click this link, and then enter your new Apple ID and password to activate. advertisement
Method 3 of 3: Use iTunes
Open iTunes. Click the Store menu. Choose Create Apple ID from the Store menu. Click Continue in the new window.
Read and accept the Terms and Conditions. After reading, click to check the box and click Agree.
Enter personal information. You need to enter an email address to create an Apple ID. You will need to sign in to your Apple ID whenever you need to sign in to Apple services. You also need to enter a secure password. Password must be at least 8 characters long including letters and numbers.
- You will also need to answer your security question and date of birth to verify your identity in case you forget your password.
Opt out of receiving promotional emails from Apple. In the form there are two squares below. They are selected automatically by the program. If you don't want to receive promotional emails and news from Apple, you can uncheck those two boxes.
Enter payment information. Select the appropriate card type and enter credit card details and billing address. If you don't want to attach a credit card to your account, click the None option. Credit card information is required if you intend to make purchases in iTunes or the App store, but for free content, this information is not required.
Verify your account. Click Done to create an Apple ID. You will receive an email containing a link to verify your account. Once your account is verified, you can sign in to all Apple products or services with the new Apple ID.
Finish. advertisement
Advice
- You should have your information ready in advance, including your credit card or PayPal information.
- Creating an account using the Apple website doesn't require a payment method, but you won't be able to access the iTunes store until you've entered this information.
Warning
- Creating multiple accounts with false information will result in account deletion.


")
