Author:
Peter Berry
Date Of Creation:
19 February 2021
Update Date:
1 July 2024

Content
Looking for some simple ways to make paper hearts? There are many ways to do it, and the product you create can be used as a decoration or as a gift. These products are easy to make and are also fun activities for kids. Follow these steps, you will have a cute paper heart.
Steps
Method 1 of 4: Making Heart Decoration
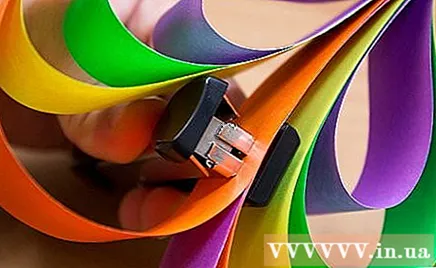
To have a lovely paper heart as a decoration, follow these simple steps. These hearts are beautiful and only take a few minutes to make, so they are also perfect for hanging on a wreath. This heart is made by bending colored paper strips into a heart shape.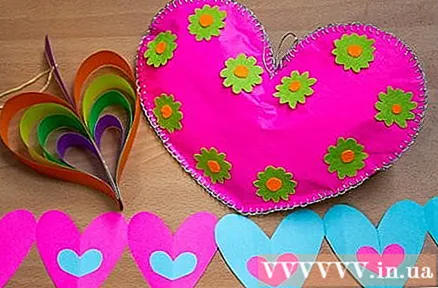
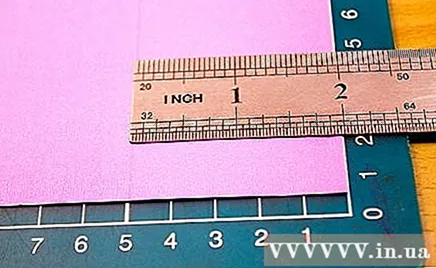
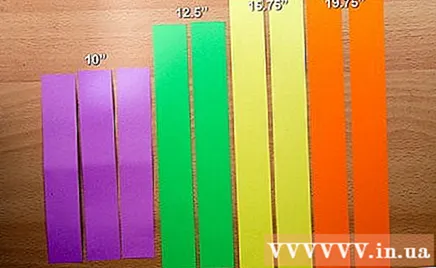
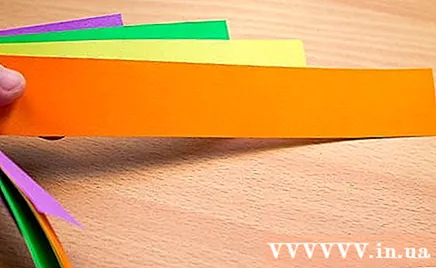
Cut 9 strips of paper. Use sturdy paper like cardboard or patterned craft paper. You will need 9 strips of paper with four different lengths. Each strip should be 5 cm wide.- Three strips of paper are 25 cm long.
- Two strips of paper are 32 cm long.
- Two strips of paper are 40 cm long.
- Two strips of paper are 50 cm long.
Stack the strips of paper on top of each other, and staple one end in the correct order. The strips must be arranged in a certain order to be bent into hearts.- Put four overlapping strips of paper in turn, in order from shortest to longest. The longest strip will be at the bottom and the shortest strip will be at the top.
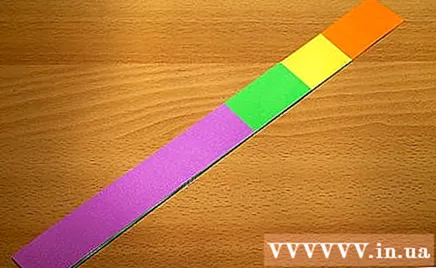
- Turn the 4 strips of paper upside down so that the longest strip is on top. Then place a strip of 25 cm paper on top of the 50 cm strip to make the place for the string to hang in the center of the heart.

- Continue to stack the remaining strips of paper up in the order from longest to shortest until the paper runs out. This means you will place the longest strip of paper on top of the strip used to thread the hanging rope just now, followed by the shorter strips of paper. The last strip of paper to be loaded will be again the shortest strip.
- Put four overlapping strips of paper in turn, in order from shortest to longest. The longest strip will be at the bottom and the shortest strip will be at the top.
Pin the strips in place. Make the ends of the paper evenly aligned. Press the end staple to fix the strips of paper together.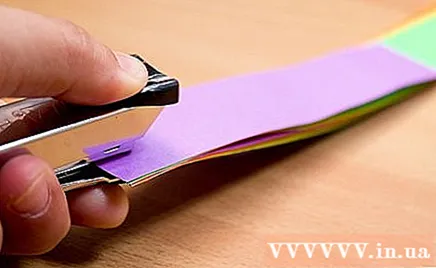
Bend each strip of paper downwards. Holding the strips of paper near where you stapled, curl the strips down. Begin to curl the shortest strips of paper on both sides first, then bend each other in the same direction.
- Bending the four strips of paper on the right side in turn, starting with the shortest strip and ending on the longest strip. Bend them down to the right side of the pin.
- Bend the remaining four strips of paper to the left.
- Leave the strip in the center and hold all the remaining strips with your thumb and index finger at the bottom of the heart.
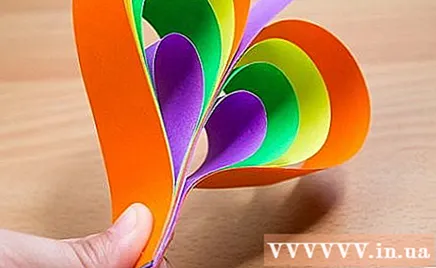
- Be careful to are not create creases on the strips of paper as they bend them down.
Pin the end of the heart. Thus, the paper strips are kept in position as bent. You can staple as many times as you like, as long as the strips can be fixed.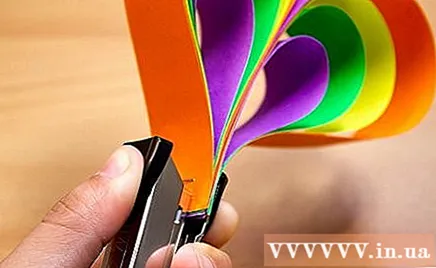
- You may have to put more pins along the center to give the heart a shape. Those pins will be exposed, so decide whether or not to add them.
- You may have to put more pins along the center to give the heart a shape. Those pins will be exposed, so decide whether or not to add them.
Press a hole in the strip of paper used to hang the heart. Use the punching tool to make a small hole in the end of the strip of paper above the top of the heart.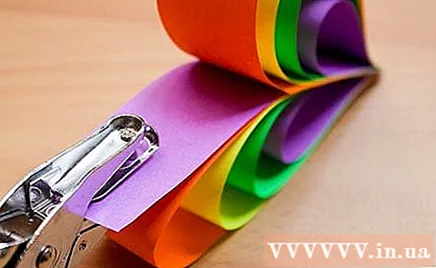
- Make holes at the top of the strip, in the middle and about 2.5 cm from the top edge.
- Make holes at the top of the strip, in the middle and about 2.5 cm from the top edge.
Pass a string through the hole. Use an umbrella string, ribbon, thread or hemp rope to thread through the hole and tie it in a loop. You can hang this decorative heart with that rope.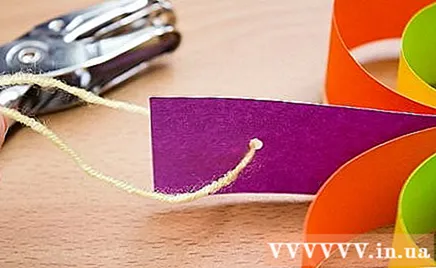
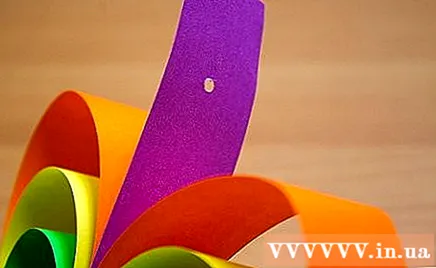
Hanging hearts up. Your paper heart is ready, you can hang it anywhere you like. You can also make a few more hearts and hang them on a wreath if you want. advertisement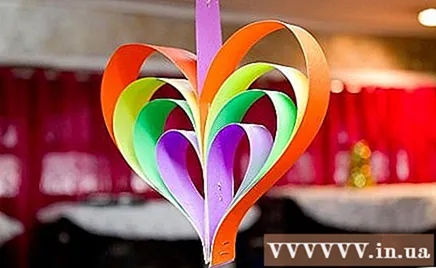
Method 2 of 4: Making Paper Heart Chain
Make a string of paper hearts to have a row of hearts with just one sheet of paper. The paper heart chain will consist of a series of identical heart shapes linked together. This is very easy to do and also a craft activity that is great for kids.
Take out a sheet of paper. You can use any size of paper, but the most reasonable is a standard lettering paper (22 x 28 cm) or an A4 size to create two heart chains. Please choose your favorite color.
- Fold and then open the paper vertically. Cut the fold to divide the paper into two equal halves.
- Let's very carefully and give to young children a safe, round tip.
- You only need half a sheet of paper to complete a chain of hearts. However, if you want, you can use the other half to make one more string.
- Fold and then open the paper vertically. Cut the fold to divide the paper into two equal halves.
Fold the paper up and down into equal folds. Start with the short edge of the paper, fold the bottom edge of the paper to the back, then hold the fold upside down again to form a fold about 3 cm wide.
- You can freely adjust the width of these folds. For letter sizes, the fold widths above will create about 4 consecutive hearts. The larger the fold, the fewer hearts will be created.
- Repeat the above step again.
- Next, fold the created fold on the back of the paper.
- Fold it up and down until the paper is out.
Draw half of a heart shape on paper. The line between the heart is the fold line of the top paper. The curvy line of the heart will be drawn out from the edge of the paper slightly opposite the crease.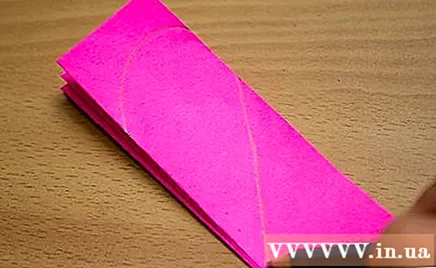
- In other words, the heart will be drawn a bit lacking on the side. If you draw enough and cut it out, the hearts will be split apart. Therefore, do not draw curved lines that fit neatly inside the paper.
Cut along the contour just drawn. Use a sharp pair of scissors to cut out half of the heart. When cutting, keep the creases straight.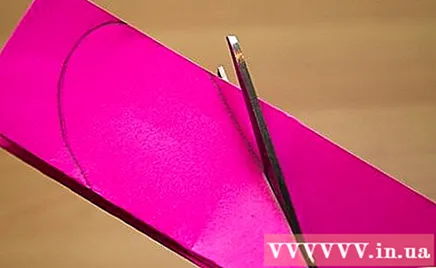
- Keep the sides straight on either side of the heart. If you try to round the part next to the heart, you will separate the entire sequence.
- You can also cut off a small inside of hearts. This will create empty cells in the heart, just like you would for snowflakes. Make sure this doesn't change the shape of the heart.
- Always use care when using scissors. Do not cut hands and use only scissors that are safe for children.
Open the chain of hearts. Slowly open the piece of paper you just cut and a series of matching hearts will appear.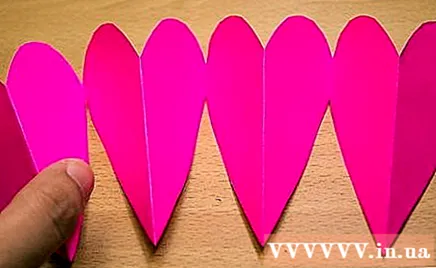
Trim excess parts. Usually, there will be a little extra paper left in the last heart.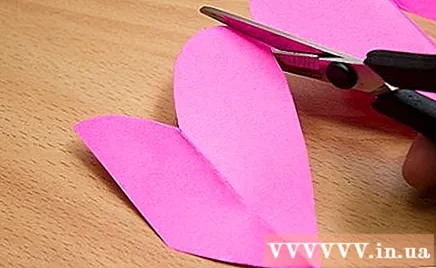
Decorate as you like. You can use oil paint, emulsion, sticker, stamp or whatever you like.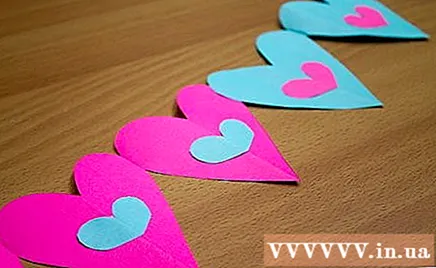
- If you have created gaps in hearts, you can attach tissue or cellophane to the back for a stained glass-like effect.
- For a longer heart chain, you can use a longer piece of paper, or tie the strings of hearts together using tape or string.
Method 3 of 4: Making Paper Heart
Use this method for a heart of stuffed paper. The stuffed heart is bigger and heavier than other paper hearts, so it is also suitable for decoration or as a gift. The heart border will be stitched up and you can comfortably decorate all kinds of things on it.
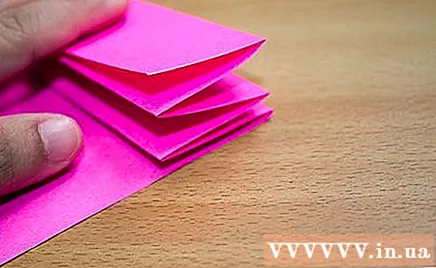
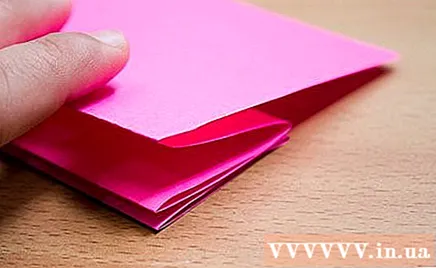
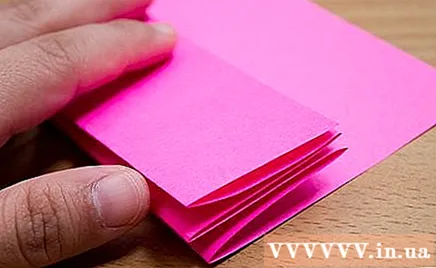
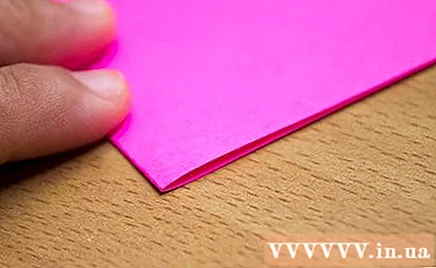
Fold the two sheets in half. Fold the two sheets in half horizontally so that the short sides match. Please choose the color of the paper you like.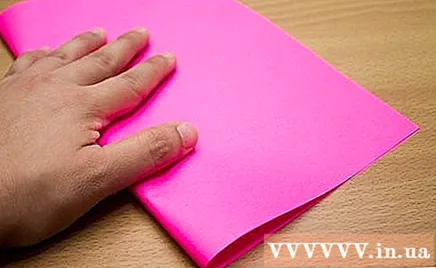
- Tighten the folds so that the two halves of the paper are straight.
- Tighten the folds so that the two halves of the paper are straight.
Draw half a heart on the folded paper, the center line of the heart is the fold of the paper. If you are confident with your hand flowers, you can draw a heart shape yourself without a pattern. If not, find a heart-shaped pattern that you can draw.
- You can use a cake mold or a heart-shaped paperweight as a template, or you can print a heart shape and cut it out to use as a template.
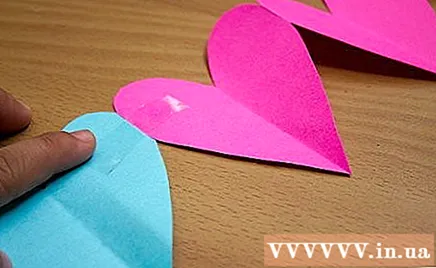
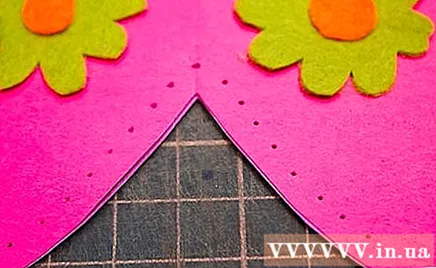
Cut out the heart. Cut it according to the outline you just drew and open the sheet of paper for a symmetrical heart shape.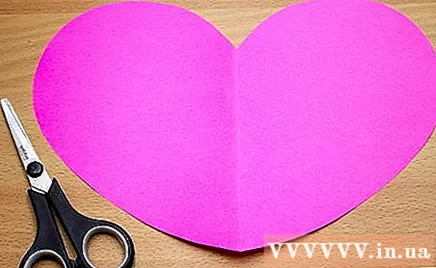
- Use the cut heart to make another heart with the rest of the paper. Fold the heart in half again and use it to add a similar shape on the other paper. Cut out the second heart. You will have two similar hearts.
Decorate the heart. If you're going to decorate this heart, do it before proceeding with stitching and stuffing it. You can use prints, stickers, markers, crayons, crayons, oil paints, emulsion, sequins, or whatever you like.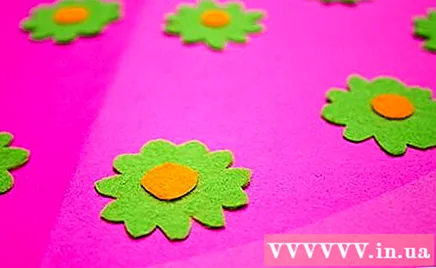
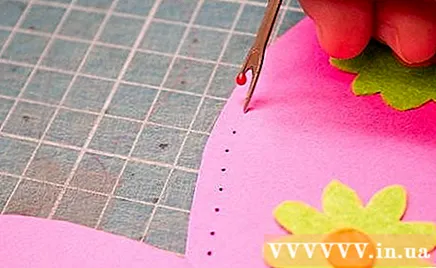
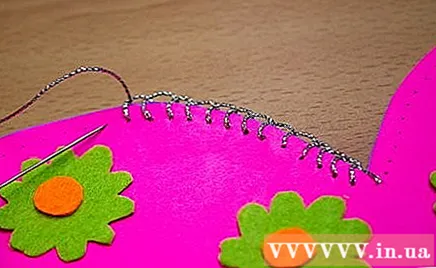
Poke each hole evenly spaced along the contour. Use a large sewing metal to poke small evenly spaced holes along the edge of the heart. If the children do this, give them a round-tip needle.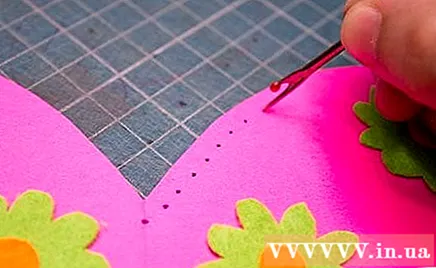
- You can also use a chisel tool or a compass point instead of sewing needles.
- Make sure that both heart shapes have the same punctures.
- Please poke near the edge of the heart but do not too close to tear the paper. Poke about 1 cm from the edge of the picture is sufficient.
Sew the thread through the holes just poked up to of the heart shape. Thread a thread into the needle and begin to stitch the hearts together, looping the stitches up and down. The sewing thread reaches of the heart and leaves a place for stuffing.
- Use a large thread or tuck 2 to 3 threads together.
- Start a stitch from bottom to top.
- Don't stretch through just the first hole. Instead, leave about 7 to 8 centimeters of excess thread on the first stitch.
- You can apply lacing stitches. It will create a very nice border like in the image. To do the stitching, you will poke the needle through the first hole through the two shape layers. Before pulling out the thread, thread the needle through the loop at the edge of the heart. Pull the thread tight and you've got a suture stitch.
Heart stuffing. Use a plastic, cotton or tissue bag to stuff the heart where you left it open earlier. Gently stuff your hand so that your heart won't tear.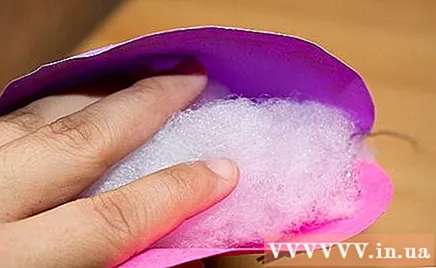
- Use scissors or a pen to stuff the heart's intestines.
- Use scissors or a pen to stuff the heart's intestines.
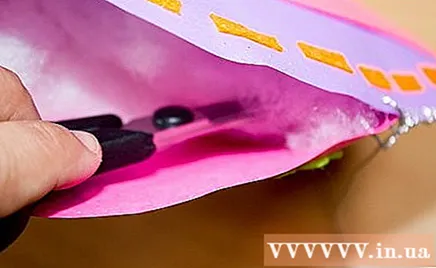
Sew on the edge of the heart. Please sew the remaining border. Tie the two ends together on the back of the heart. You've got a beautiful stuffed heart to decorate with! advertisement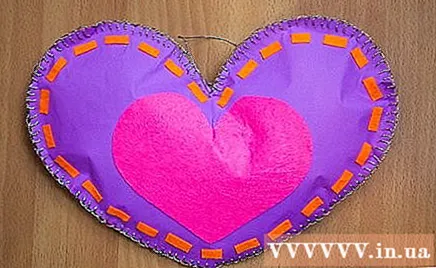
Method 4 of 4: Making Heart-shaped Basketry
- Hang a basket of hearts for decoration or use as a small basket of candies. These beautiful little hearts also function as a basket. You can hang them on the tree and add some candies to it as a gift.
- Take out two sheets of paper. You should choose two different colors to create an eye-catching heart. The traditional colors are still white and red, but you can combine any color you like. Choose medium-thick paper.
- Paper that is too thick will make it difficult to stitch the two pictures together.
- The paper is too thin to hold the contents.
- Cut the paper to the size you want. If you are using letter paper or A4 paper, you can fold the paper in half horizontally. Cut a line from the midpoint of the fold to the midpoint of the opposite edge of the paper to divide the piece of paper. You will use a rectangular piece of paper for each color.
- The size of the paper depends on your choice, it will affect the size of the heart you create.
- Fold the two pieces of paper in half.
- Place one stack of folded paper perpendicular to the other. The top piece will be vertical and the bottom piece will be horizontal. The two sides on the left side will have to fit so that the "wing" part of the lower piece of paper sticks out to the right. Use a pencil to draw a fuzzy line over the underlying piece of paper along the vertical edge of the top piece of paper.
- Place two overlapping rectangles, the fold lines must also overlap. The two pieces of paper must be facing in the same direction. Let the piece with the pencil line up to make it easy to see.
- Draw a straight line from the bottom (crease) of the piece of paper to the line you just drew earlier. Draw a few lines along the piece of paper until it touches the lead just now. The piece of paper will be divided into strips of paper along its length. Cut both pieces of paper following these lines.
- Cut strips of paper at least 1 cm wide, otherwise they will tear easily. The size and number of strips does not matter, it is up to you. However, keep in mind that the size and number of strips will affect the difficulty of knitting. For children, you should only cut up to 3 strips of paper.
- Cut a curve in the upper part of the piece of paper. While the two pieces of paper are still overlapping, cut the curve where the strips are free. These curves will form curves in the heart shape. They will look like half oval shapes.
- Continue to place the two pieces of paper perpendicular to each other. Place one piece horizontally and one piece vertically. The round end of the vertical piece will face up, the round end of the other piece will face to the right.
- The two fold lines will form a 90 degree angle on the left corner.
- Knitting the strips of paper together. This heart-shaped knitting will be different from the usual fashion, you will knit strips of paper "through" and "around" each other, instead of "up" and "down".
- Hold the top strip of paper horizontally and weave it through the first strip of the vertical strip. "Through" means it gets between two layers of paper.
- Continue to hold the top strip of paper, and wrap it around the second strip of the vertical strip. "Bypass" means two layers of paper will be on and below the second strip of paper.
- Continue to knit the top strip of the horizontal strip into the vertical strips of the strip. The strip of horizontal paper will be woven into all vertical strips.
- Take the first strip of paper (on the right side) of the vertical strip and knit it into the horizontal strips of paper. Because the first vertical strip has been woven around the first horizontal strip of paper, simply knit it through the second horizontal strip of paper, and continue until the paper is gone.
- Do the same with the rest of the strips until all vertical and horizontal strips have been woven.
- Open the basket. Once the strips are interlocked, you will have a basket heart. Open it by placing your finger between the two layers of paper. You can put candies or any other cute item in it.
- Attach a handle or strap. Cut a long piece of paper of the same color as desired to make the handle. Use tape or staples to attach it to the inside of your heart.
- Or you can punch a hole in the center of the upper part of your heart and thread a ribbon or hemp rope through it. Tie the ends of the string to hang up the heart.
- If you make a hole, you can attach a small piercing to make your heart look better, although this is not necessary.
Advice
- There are many ways to make a paper heart. You can make a heart symmetrical, fold money into a heart shape, make a floating heart card, or make a heart with stained glass effect.
- You can fold the heart according to the origami method. Try making a simple heart first, or a heart with slightly more elaborate folds on the front, a pocket heart on the front, a winged heart, and many more. .
Warning
- Keep sharp tools out of reach of children. Scissors and needles should be round heads so that children will not be injured when using them. Also, let adults do the work for you with paper cutting and needle poking.
What you need
Decorative Heart
- Colored or patterned paper.
- Stapler
- Punching tools on paper
- Hemp rope, thread or umbrella
Chain Of Paper Hearts
- Paper
- Pencil
- Drag
- Small decorative details
Stuffed Heart
- Thick paper
- Heart pattern
- Pencil
- Small decorative details
- Drag
- Large metal stitches
- Just
- Intestines stuffing
Heart Knitting Basket
- Two different colored sheets of paper (or felt fabric)
- Ballpoint pen or pencil
- Drag
- Glue or staples


