Author:
Laura McKinney
Date Of Creation:
6 August 2021
Update Date:
1 July 2024

Content
To make PowerPoint presentations more interesting, good background music is not a bad choice. Although in previous versions you may have to resort to a bit of tricks, in general, PowerPoint allows playing any WAV or MP3 file in the background. To run multiple threads continuously, you should first merge them into a single file.
Steps
Method 1 of 3: Run a single post
Open the slide from which you want to start playing music. If you want to play music at the beginning of your presentation, select the first slide.
- See also online instructions for Office 2007 and 2003.
- If you want to play multiple cards during a presentation, you can organize them by distributing slides. However, by merging music tracks into a new file, things will be much simpler and easier to control. Refer to the next section for more details.

Click the Insert tab. You can insert MP3 and WAV files.- To use songs from iTunes, first of all, you need to convert to MP3 format by right clicking on the music track in iTunes and selecting "Create MP3 Version". Click here for more details.
- WAV files can be quite heavy and make sharing PowerPoint content more difficult. Consider switching to MP3 format. You can do so by importing a WAV file to iTunes or using a free online converter.

Click the "Audio" option in the "Media" group. Select "Audio from My PC" from the list of options.- Note: The "Online Audio" option is no longer available. Therefore, if you want to use music online, you will have to download it first.

Browse to the music you want to play. You can choose any WAV and MP3 file on your computer or network drive.
Choose run automatically or run when clicked. There are two basic options for starting music playback. You can let the music play when you click a button or automatically play in the background. The two presets below allow you to quickly choose:
- To have the music play and play continuously through the entire slide, select "Play in Background" on the Playback tab. The track will automatically play, not pausing when switching slides, and repeat when the song is over. The audio button is also hidden in this case. The track starts as soon as you open the slide.
- To start playing the music when you press the button, select "No Style" from the Playback tab. The music will play when you press the audio button. You can change the look of this button with the Format tab: it allows you to design or choose which shapes to use.
Preliminary editing of audio files. Powerpoint provides some basic audio editing tools, allows you to change where music starts playing, adjust volume, use zoom in and out, and more. Select the audio object to open the Playback tab if it is not already open.
- Add bookmarks to the track. When hovering over the audio object, the track's timeline slider will appear. Select a location on the track and click the "Add Bookmark" button to create a clickable bookmark at this point on the track. Thanks to that, you can skip to certain passages quickly.
- Click the "Trim Audio" button to trim out any unnecessary parts of the music track. This button is very useful for tracks that are too long or in cases where you only need to use part of the track. Use the sliders in the Trim Audio window to choose a new starting and ending point of music.
- Use the Fade Duration option to set the tone up time to enter and decrease tones to close. The longer the time, the slower this process will take place.
- Use the volume buttons to adjust the main volume of music tracks. Don't forget to try first and adjust the volume accordingly so that the listener won't be startled.
Share presentations. Since 2007, PowerPoint embeds MP3 files in presentations, allowing you to share without bothering to attach music files. Remember that the size of the presentation will increase with the size of this MP3 file.
- If the presentation doesn't exceed 20 MB, chances are you can attach it to an email and send it to others. If you're older, you should consider using services like Dropbox or Google Drive for sharing.
Method 2 of 3: Run multiple tracks
Understand the process. You can distribute music files during a presentation so that music moves from one song to another. However, any change could cause tracks to overlap or excessively prolong the transfer waiting time. For stable background music during long presentations, it is recommended that you combine the tracks into one continuous track and play from scratch.
Download and install Audacity. This is a free and open source audio editor that allows you to quickly merge music tracks. You can download it from.
Open the tracks you want to include in Audacity. Click the File menu and select "Open ...". If the files are in the same folder, you can hold down the Ctrl key and select each file to open at the same time.
Opens the window displaying the second track. You will add each track after the first track. Therefore, open a window showing the second track in your playlist.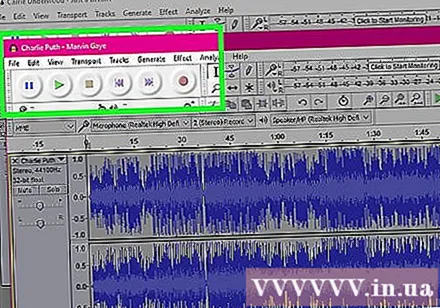
Press Ctrl + A to select the whole song.
Press Ctrl + C to copy the selected track.
Open the first track window and position the cursor at the end of the track.
Press Ctrl + V to paste the copied track to the end of the first track.
Repeat for each song you want to add.
Eliminate excess silence. You can look at the chart to identify times with music and times without sound. You can remove the gaps that arise from joining songs before adding them to PowerPoint.
- Long press and drag to select a quiet portion of the track. Don't delete the deliberate silence of the songs: the music can become forced.You should also pause for a second or two before starting a new lesson.
- Click the "Cut" button at the top of the window to delete the selected portion.
Save the new merge file. Once you've added the music, you'll need to save the new file in MP3 format to load it into PowerPoint
- Click the File menu and select "Export Audio ...".
- Don't forget to select "MP3 Files" for the "Save as type" field.
- Name the file to identify it and save it somewhere easy to find.
- Click Save then OK, unless you want to change the MP3 tag information.
- Wait for the file export to complete. It may take a few minutes for Audacity to combine and save your new MP3 file.
Insert this file into PowerPoint. Follow the steps at the beginning of this article to insert the merged file into PowerPoint and have it run in the background automatically. advertisement
Method 3 of 3: Use PowerPoint 2007 and 2003
Open the slide you want to start playing music. To play music at the beginning of your presentation, open your first slide. To play music from a specific place in the presentation, open the slide from which you want the music to start.
Click the Insert tab, click the "Sounds" button then "Sound from File". At this point, you can browse WAV and MP3 files.
- For Office 2003, click the Insert menu, choose "Movies and Sounds" and then choose "Sound from File".
- Since PowerPoint 2003 and 2007 cannot embed MP3 files, it's best to create a new folder on your computer and place the presentation in the same place as the audio file.
- You can embed a WAV file, but doing so can make the presentation very heavy. Therefore, linking to MP3 files is a more recommended approach.
Determine how to start playing music. In the "Sound" tab you can select "Automatically" or "When Clicked" from the "Play Sound" menu.
- If you choose to run automatically, check the "Hide During Show" box to hide the audio file control.
Right-click on the new audio object and select "Custom Animation". Usually the track stops playing as soon as you move on to the next slide. With the effect customization, you can keep your music going.
Click the "Multimedia Settings" tab and select "Continue slide show".
Select "After" then select the number of slides to continue playing before stopping. To play the background music for the entire presentation, use the total number of slides included. Click "OK" when done.
Package file. Since the music files are not embedded in the presentation, you will have to "package" them together using the "Package for CD" feature. This way, you can easily share the presentation and don't actually need to burn it to a CD.
- Click the Office button, select "Publish" then "Package for CD".
- Enter the name of the folder you want to create in the "Name the CD" box.
- Click the "Options" tab, make sure "Include linked files" is checked.
- Click the "Copy to Folder" button. A new folder containing the presentations and audio files and a launcher so anyone can view the presentation, even if they don't have Office, will be created.


