Author:
Laura McKinney
Date Of Creation:
10 August 2021
Update Date:
1 July 2024

Content
Highlights add depth to the hair, making it appear thicker and more vibrant. Highlight hair also enhances your appearance, helping you look younger and more active. Highlighting in a salon can be very expensive, but luckily, the process at home is simple and much more economical. Check out this article to learn how to dye yourself highlight like a professional with highlight dye kit and natural method.
Steps
Part 1 of 3: Properly prepared
Choose the right color. With highlighting, you will need to use bleach or dye that is lighter than your hair, depending on your hair color and condition. It's best to choose a color that is one or two tones lighter than your hair. Colors that are too bright will create an unnatural stripe effect. If possible, choose a toner kit with toner. This is a product that controls strong tones so that colors appear naturally.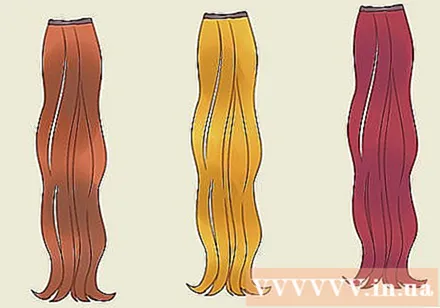
- It's best to choose a dye that is nourishing and drip-free, which will usually be on the packaging. Dyeing your hair is bad for your hair, so if you can keep your hair moist, your hair will not be damaged.
- If you have dark hair, make sure your natural hair color matches the color on the package of your dye of choice. Hair will be the same color.
- If you have dyed your hair before, your hair will only be able to lighten it with the bleaching step. Hair that has been dyed with henna or vegetable dyes will not lighten.
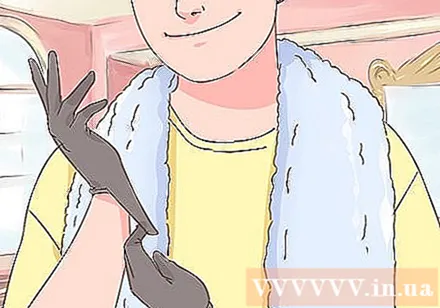
Skin and clothing protection. Put a scarf around your shoulder or cut a hole in a large nylon bag and stick it over your head. Wear the gloves that come in the dye box to protect your hands from the effects of bleach. You don't want the bathroom to be stained with dye.- For hairline contours, you can apply vaseline cream if you want. This way, you will not need to remove the dye from the ears and neck. However, do not apply vaseline to the roots of your hair!

Get familiar with the tools. Most highlight dye kits come with an applicator that can be quite troublesome if you are new to hair coloring. If you have time, you can practice applying conditioner to your hair. You will find that sometimes this can become dirty and sticky if not handled properly.- If the applicator is too big (usually is) then you should buy a children's toothbrush to use. Sometimes brushing too loud will lead to an irregular application of the dye, which is not expected to color the hair.
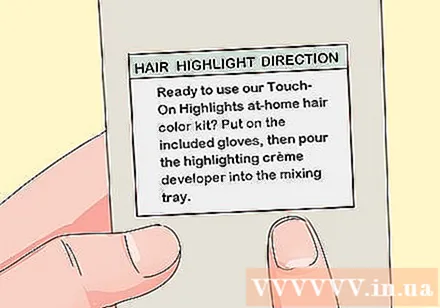
Read the information on the packaging. The most important thing that you need to do is follow the instructions on the packaging. The materials for hair dyeing (and the dye manufacturing companies) have been around for a long time, the implementation process is also innovative and reliable, so you should read the instructions. Read it one more time to be sure.- The only thing you do are not should do is use caps. If you have long or thick hair then using a hat will be even more troublesome than not. If you are afraid that the dye will stick to the unwanted area, you can place a cotton ball / towel or paper towel underneath the parts you are done with.
Test on part of hair. Before dyeing all of your hair, it is a good idea to try dyeing on a small portion of your hair to make sure you will be satisfied with the results when you're done. Select the hair section below and go through the dyeing process as instructed to assess the correct results. advertisement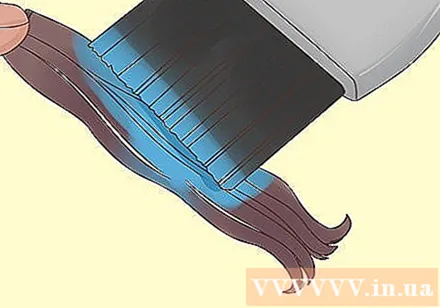
Part 2 of 3: Coloring your hair
Prepare the dye. Follow the instructions in the dye kit to learn how to mix the colors. Don't be alarmed if the dye is white, blue or purple - this is perfectly fine.
- If you've never dyed your hair, you can skip the bleaching step and use a color that will last for a long time. This will reduce damage to the hair and can lift hair color up to 3 tones.
- Don't bleach your hair if you're going to create natural hair color.
- If using bleach, you will pour it into a small bowl to make it easier to dip the brush in and apply it to your hair.
Divide your hair into at least 4 sections. If you want to split your hair into 12 sections then that's not a bad idea. Use hair clips or elastic hair ties to keep your hair in place. You don't want the dyed hair to stick to the untreated hair.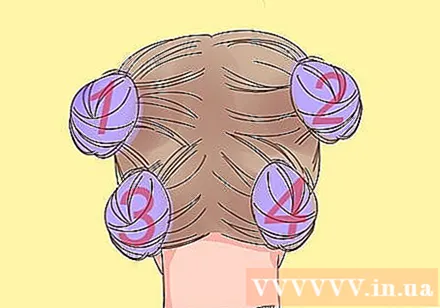
- If you have time, try dyeing on a portion of your hair to make sure you have chosen the right color for your hair and how long to do the bleaching. This will help you avoid catastrophic hair color. Hair disaster? Impossible!
Highlight dye. Start a little bit from the roots and apply bleach from there down to the ends of a fine section of hair. The thinner the highlight, the more natural the hair will look, while the thicker highlight will create a zebra-like stripe effect. When the brush is about to dry and there is only a little medicine left, you will apply it towards the roots of your hair. This creates a natural, graceful color effect and avoids uneven dark spots or stains.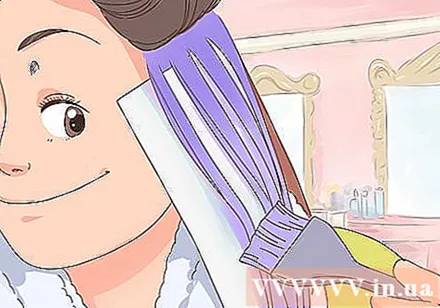
- Do not start applying medication from the root of the hair. You run the risk of applying the dye to unwanted hair and leaving a large streak with too much dye - something you should avoid when dyeing your hair.
Leave the dye and bleach on your hair for the allotted time. If you are using dye for highlighting, keep it in your hair for the time stated in the instructions. Leaving the medicine for a longer period of time will not make the color darker. If you are using bleach, observe your hair closely so that the highlights don't get too bright.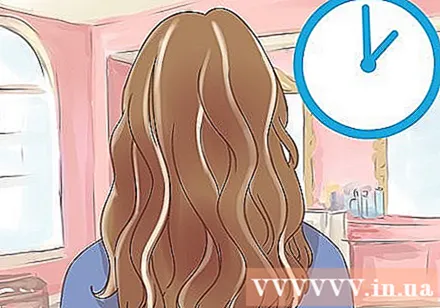
- If using bleach, you need to rinse your hair as soon as you see the highlight has been raised to the color you want. Bleach that stays on your hair for too long can seriously damage the hair.
- If you are unsure how long to leave the dye in your hair, make an estimate with caution. If the highlight isn't bright enough, you can always dye it again.
- Note that the highlight will continue to be brighter with the sun exposure and subsequent shampooing.
Apply toner (optional). Some highlight dyes made at home come with toner, which helps the highlight to blend in with the rest of the hair. This is a very good idea. Your hair will look more natural and shiny. In fact, if your dye kit doesn't come with toner, you can buy it separately.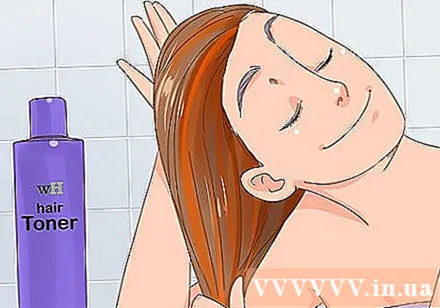
- As with other products, you should still follow the instructions. The instructions are usually very clear.
Rinse off the dye. Wash your hair twice, then condition your hair with the special conditioner that comes with the dye box if available. Rinse your hair thoroughly to make sure there is no dye left in your hair.
- Bleaching can dry out your hair (if you dye it a lighter color, it's called bleaching), so leave the conditioner on for 2-3 minutes before rinsing it off to help retain moisture. At this point, it is essential to moisturize the hair.
Dry your hair or let it dry naturally. Check the final result through the mirror in natural light. And don't panic! If the hair is not as beautiful as you would like, wait a few more days. The first one or two washes can correct hair color.
- If you really don't like the new hair color, consider going to a hair salon to fix it. Do not cause any further damage to the hair. Hair coloring can be done twice, but if you can avoid it, you should avoid it.
Part 3 of 3: Using natural methods
Use lemons. Lemon juice with its natural bleaching feature can give a light highlight to the hair without damaging the hair like a bleaching method. In this regard, the lemon is likened to the sun in the form of a fruit.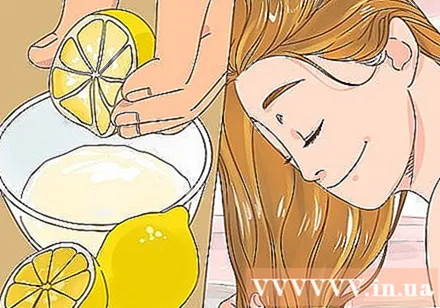
- Squeeze a few lemons into a small bowl. Apply lemon juice to your hair from root to tip with paint brush, fingers or by dipping your hair in a bowl of lemon juice. Then you need to sit in the sun for 20-30 minutes to create the bleaching effect.
- This method works best on light-colored hair, as dark hair will turn orange or brass.
Use powder for drinking water Kool Aid. If you want to add more color to your hair, look for ingredients in the kitchen! Kool Aid drink powder helps to create highlights in purple, red, pink and green hair.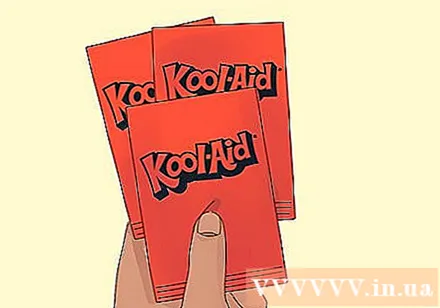
- Boil water in a medium-sized pot. Add 4-5 packets of Kool Aid without sugar and stir until dissolved. Apply Kool Aid water to each part of hair with paint brush, fingers or dip hair in water.
- Leave the color on your hair for 10-15 minutes before rinsing.
Use chamomile tea. If you have reddish-brown hair and want to make your hair lighter for added depth, wash your hair with chamomile tea until your hair is the color you want. Just make a pitcher of tea, let it cool and use it to rinse the conditioner out of your hair. Then just sit back and rest in the sun!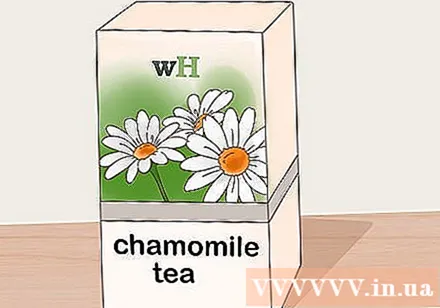
- This doesn't completely change your hair color - it just adds natural sunburn tones. It will take a week to see the change.
Highlight your hair with chalk. If you want to temporarily dye your hair, you can "dye" it with chalk. This is easier on light-colored hair, but dark hair will also be soft, mischievous. Of course, hair color is only temporary.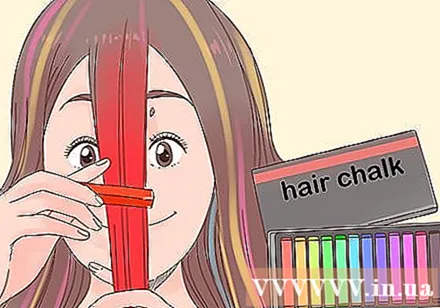
- If you have light colored hair, your hair will lose color after a wash or two. If the color does not go away immediately, it will disappear after a few washes.
Advice
- Always highlight dye on dry hair. For best results, wash your hair 1 to 2 days before dyeing.
- Consider deeply moisturizing your hair the day before dyeing. This will help protect the hair from chemicals during the dyeing process.
- If you have dyed or straightened your hair, do not highlight your hair at home as this can cause additional damage to your hair.
What you need
- Highlight dye set
- Paint brush (if not available in dye kit)
- Gloves (if not available in dye kit)
- Small bowl
- Towels
- Vaseline cream (optional)
- Lemon, Kool Aid powder, chamomile tea, or powder (for the natural method)


