Author:
Peter Berry
Date Of Creation:
20 February 2021
Update Date:
28 June 2024

Content
Want to upgrade your gaming performance? A dedicated graphics card can significantly increase gaming performance, especially if you've previously used the integrated graphics card on your motherboard. Installing the graphics card means removing the computer, but the process is simpler than you might think. Read the following tutorial to learn how.
Steps
Part 1 of 3: Choose Card
Check the power supply. The graphics card is one of the most energy-consuming devices, so you need to make sure it's right for the machine. You can check the power consumption capacity on the device's packaging.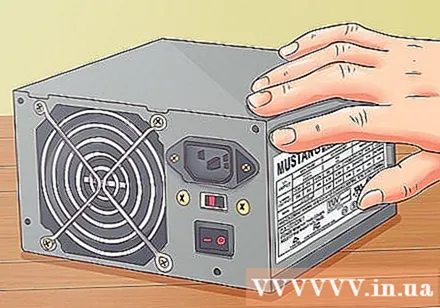
- If the power is weak, the hardware cannot function properly and the computer cannot be started.
- There are several power calculation tools out there that allow you to enter complete equipment and calculate the amount of electricity consumed.
- When choosing your energy supply unit, avoid untrustworthy brands. Even though they can supply enough power to the computer, inexpensive devices are more likely to explode or damage equipment in the computer, including new graphics cards. Even if the total power consumption of the computer equipment is lower than the maximum power and the PSU can provide, no damage cannot be guaranteed.

Be sure to use a compatible motherboard. This problem is less common than in the past, however if you upgrade an old computer it is very likely that this error occurs.Modern motherboards have a PCI-E slot for installing newer graphics cards. Older motherboards only have slots, so be sure to find a card that supports this connection.- Read the motherboard documentation if you have any questions.
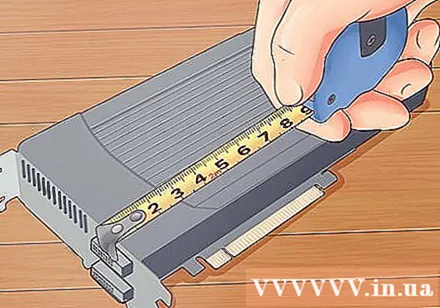
Estimate free space. Many newer graphics cards are quite large in size, so you often encounter the problem of not fitting the slot. Find out the size of the card and then estimate the position to suit the length, width and height of the card.
Examine your needs. There are hundreds of different types of graphics cards on the market, with prices ranging from 1 million to 20 million VND. The first thing to do when deciding to buy a graphics card is determine its intended use. Find the right card for both price and performance.
- If you do not have high requirements for gaming but only need stable performance, you can buy cards with prices ranging from 2-4 million VND. Some popular options are the Radeon R9 270 or the Geforce 750 Ti.
- If you want to play games at maximum settings, you need to find a card priced from 6-8 million VND like a GeForce GTX 970 or Radeon R9 390.
- If you need the best card, look to the high end. The average user doesn't notice the difference between cards, but for high-end overclockers or builders they want the best performance. One of the most popular cards in this range is the GeForce GTX 980 itself.
- If you need the best graphics card, choose a GTX Titan X.
- If you need a business-quality graphics card, choose the Quadro K6000.
- If you need video coding or graphic design work, you need a card with lots of VRAM, 3 or 4 GB.
Part 2 of 3: Removing the Computer
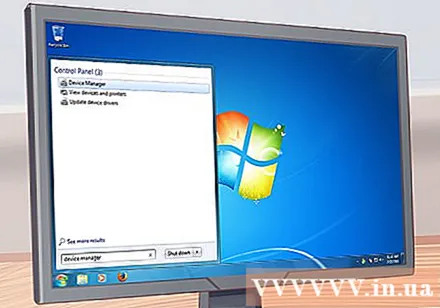
Uninstall old drivers. Before unpacking your computer you need to uninstall the old graphics drivers. This is a program that allows the hardware to communicate with the operating system.- On Windows, you can uninstall the driver through Device Manager. You can access Device Manager by typing device manager in the Search box in the Start menu or the Start screen.
- Expand the Display Adapters section in the Device Manager window. Right-click on the converter display and select "Uninstall". Follow the request to remove the drivers from the system. The rendering quality will be degraded and blurred.
- Mac OS X users do not need to uninstall the drivers before installing a new card.
Unplug the computer. Turn off the power after removing the driver. After turning off the machine, unplug all the plug from the back and unplug the power cable.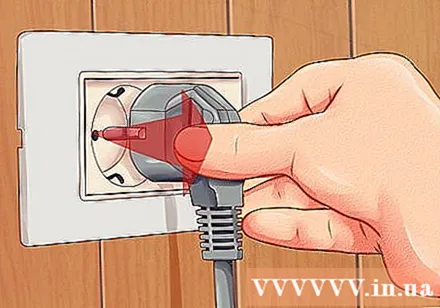
Remove the case. Set the case tilted, the back of the machine containing the connector is near the table. These ports attached to the motherboard will help you determine from which side you can open the machine. Remove the protective screw on the side of the computer.
- Most modern cases use a screwdriver, however you may still need a screwdriver to screw the screw if it is screwed too tight.
- You should place the machine on the table to make it easier to do. Avoid leaving the device on the carpet.
- If the machine is in use before turning off the power, you should wait a bit before removing the cover so that the connectors can cool down.
Determine the expansion slot. Modern graphics cards are typically connected via a PCIe slot located near the processor. You will see the old graphics card installed here, or nothing if the machine uses the integrated card on the motherboard.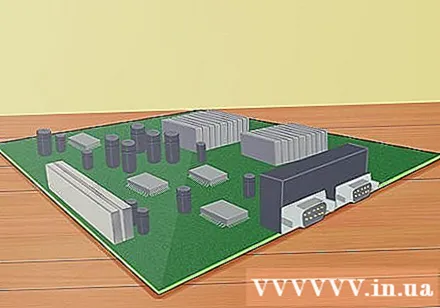
- If you are having difficulty identifying the PCIe slot, check your motherboard or the documentation.
Self-grounding. Whenever working with sensitive computer parts, you need to ground yourself. This is a way to limit electrostatic discharges that damage electronic equipment in the machine.
- If possible, connect an electrostatic bracelet to the computer's metal case.
- If you don't have a bracelet, you can discharge static electricity by touching anything metal like doorknobs and faucets.
- Wear rubber sole when working with a computer.
Remove the old card (if necessary). If you have an old graphics card, you will need to remove it before you install a new one. Remove the protective screw and remove the tab at the bottom of the card, right behind the slot.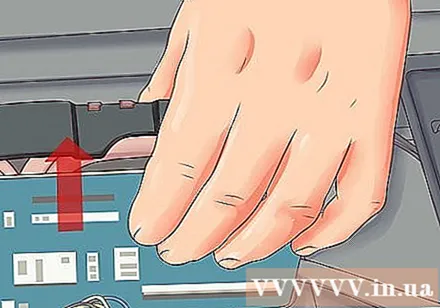
- When removing the old card, pull it straight out to avoid damaging the slot.
- Be sure to disconnect all display ports before removing the graphics card and the computer not connected to the power source.
Part 3 of 3: Card Installation
Dust cleaning. When removing the case, you should take this opportunity to remove dirt from inside the computer. Dust can lead to heat overload and damage to hardware.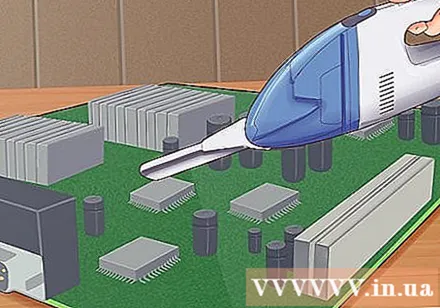
- Use an air compressor or a small vacuum cleaner to remove dirt inside. Be sure to clean every corner of the machine.
Insert a new graphics card. Remove the new card from the antistatic bag, carefully insert it into the slot. Avoid touching the contacts before the card hits the bottom.
- If you didn't have a graphics card installed before, you'll need to remove the metal covering the chassis attached to the PCIe slot.
- Insert the new card directly into the PCIe slot and press lightly. You should hear a click when the card locks into place. Be sure to screw the screw into the outer frame after inserting the card.
- You may have to remove the surrounding panel, just behind the case if the new card requires two frames.
- Make sure no cables or devices are connected when inserting the card. It is recommended that you remove all the cables and reinsert them once you have inserted the card.
Protect your graphics card. Use the screws to secure the card to the bracket on the back of the case. If it's a large two-frame card, you'll need two screws to protect it.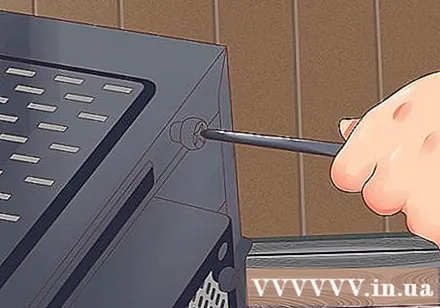
- Make sure the card is installed securely. When replacing the case, the card is rotated horizontally, so protecting the connection is important to avoid damage.
Plug in the power supply. Most modern graphics cards have one or two power connections, usually located directly on the card. You need to connect them to power via PCIe port. If there is no such port, the card uses a Molex-to-PCIe converter.
Close the case. After inserting the card and attaching the necessary cables, you can close the case. Don't forget to use screws to secure the case.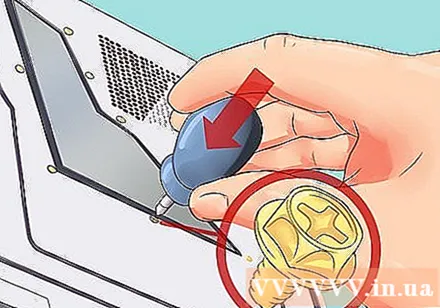
- Reattach the devices that were previously removed to make space for the graphics card.
Connect to the monitor. To take advantage of the new graphics card, you need to connect your monitor to one of the two display ports on the card. Use HDMI or DisplayPort (if available) for best quality. If the monitor does not have a DVI cable, the graphics card will use a VGA-to-DVI converter.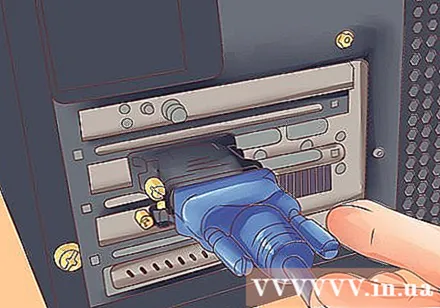
Install new drivers. Reconnect all connecting cables and then start the machine. The operating system will automatically detect the graphics card and configure the machine itself. If not, you can download the driver from the manufacturer's website or install via the disc provided with the device. If you want to get the most out of the new card's performance, you should install the drivers.
- If you install the drivers from a disc, you should check for newer versions as they may be old. You can download the latest version from the manufacturer's website.
Test. Now that you have your card and drivers installed, it's time for them to work. Start the program you want to test, be it a high-graphics game or a video encoder. With the new card, the device can experience better graphics and faster encoding.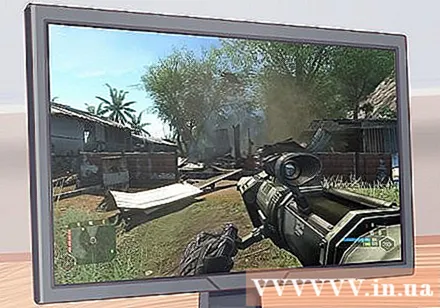
- Gaming performance is affected by many factors, including RAM, processor speed and free space of the hard drive.
Warning
- When installing or removing a graphics card, hold it only by the side, never touch any other connection or part.
- Laptops usually do not support dedicated graphics cards. If the computer does not support the card upgrade, you will need to buy a higher-end model.


