Author:
John Stephens
Date Of Creation:
2 January 2021
Update Date:
29 June 2024
Content
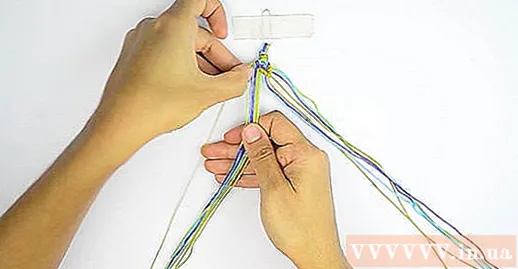
- To tie the knot to the right, create a 90 degree angle by placing the first thread on the second thread. Next, you thread the first paragraph below the second thread and tighten it.
- Note: Remember to create two knots on each thread.
- After you have columned the outer-only paragraph to the next-only paragraph, do the same for the inner-only paragraph. Continue this process until the knots are in the middle.
- Note: the first paragraph you used (the rightmost) should now be in the middle.
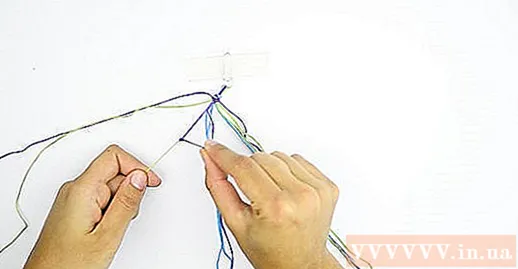
- To tie the knot on the left side, do the same as with the knots on the right, but in the opposite direction. Create a 90 degree angle by placing the first thread on the second thread and thread the first thread below the second thread and then tighten.
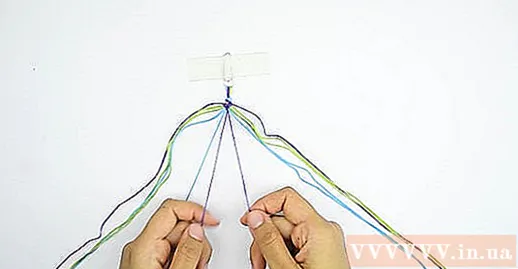
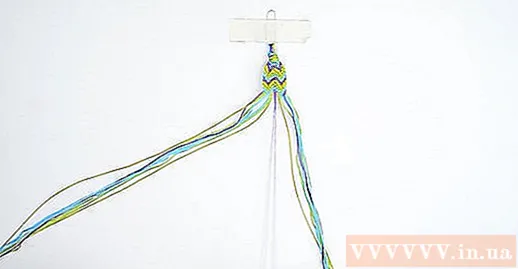
Create middle knots. Tie the knot in the left or right direction with two middle threads to connect the two sides (remember to tie the knot twice).
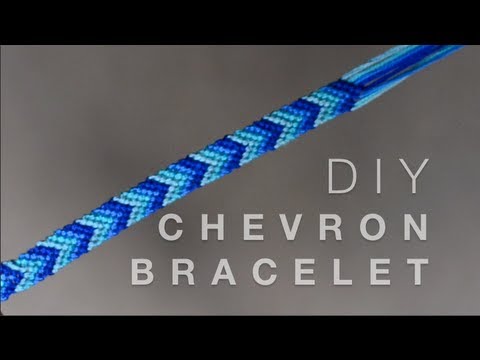
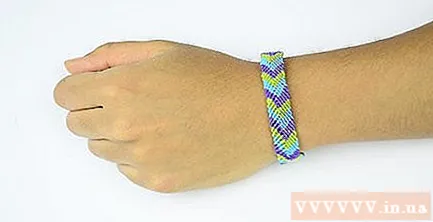
- Note: If you have followed the correct procedure, by this point, the two segments just in the middle will have the same color and you will see a V-shaped pattern appear.
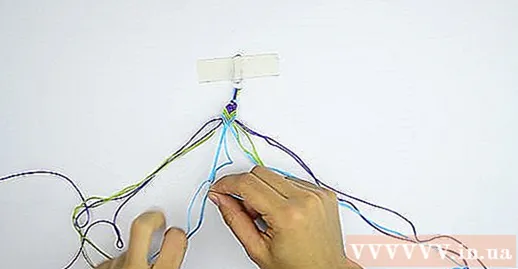
Start creating knots on the right side. First, you take the rightmost thread, tie the two knots to the side thread (second from right).
- To tie the knot to the right, create a 90 degree angle by placing the first thread on the second thread. Next, you thread the first paragraph below the second thread and tighten it.
- Note: Remember to create two knots on each thread.
- After you have columned the outer-only paragraph to the next-only paragraph, do the same for the inner-only paragraph. Continue this process until the knots are in the middle.
- Note: the first (rightmost) thread should now be in the middle.

Start creating knots on the left. Take the leftmost piece of cord symmetrical with the right side just tied and start making knots towards that part.
- To tie the knot on the left side, do the same as with the knots on the right, but in the opposite direction. Create a 90 degree angle by placing the first thread on the second thread and thread the first thread below the second thread and then tighten.
- So you're done with half of the double V motifs
- Note: If you have followed the correct procedure, by this point, the two segments just in the middle will have the same color and you will see a V-shaped pattern appear.


- Or, you can attach a button to wear the bracelet easily. Attach the button to the end of the bracelet by inserting the two thread segments into the two holes on the button. Next, you column the two paragraphs together and cut the remainder of all the only paragraphs (including the paragraph just not used for button columns). On the other end of the bracelet, you should already have a circle created from tying the knot to keep the bundle in place. Attach the button to that circle after you have completed the steps.
Advice
- Tie the knots tightly so they don't come loose.
- If the bracelet is twisted, you just need to be flat.
- You can buy embroidery threads at any sewing material store.
- Choose a different color combination for each event, for example pink, red, and white for Valentine's Day or red and green for Christmas.
- Every time you make a bracelet, remember to arrange the paragraphs only according to the rule above.
- Make friendship bracelets to give friends for Christmas.
- After cutting the excess thread on the button of the bracelet, you should stick the glue in the cut so that the knot does not come off.
What you need
- Embroidery thread (at least 3 colors)
- Report cover, hand needle, paper tape or cuffs, and butterfly clip
- Tape measure
- Drag


