Author:
Randy Alexander
Date Of Creation:
25 April 2021
Update Date:
1 July 2024
Content
Study timetable is a convenient and inexpensive tool to help you keep track of your study time. A timetable helps you figure out what you should accomplish and when. If you want to be organized and motivated to get things done as well as you can, make a separate schedule.
Steps
Part 1 of 3: Building a timetable
Make a list of things you need to do. You need to think about and write things down so that you can put them in the correct order in the list. By pre-planning it before writing it to a schedule, it will be easier for you to get it done.
- You should include classes, chores, chores, sports and exercise, and activities that you normally do during study time.
- Don't forget to list everyone's birthdays and major holidays.
- You probably won't think much more - but that's okay - you can still add more information later.

Gather information about class / essay. This means that you will consolidate your study plan and when to submit your essay or course project. You can find information at the faculty office or on the school's intranet.
Consider the most effective time spent studying. Think about when you are best focused on studying. Are you a person who works in the morning or at night? Thinking about this will help you best plan for critical study times during peak times.
- When you complete this step, don't think about any other responsibilities you will have to assume (like a part-time job); just write down how long you are most productive without the need to do other things.

Decide what your schedule looks like. You can make timetables on paper or in digital formats, such as on a spreadsheet or on a phone app.- Microsoft Excel or Apple Numbers spreadsheets give you the best solution. Besides, word editing software also has templates to help you make schedules easier.
- You can use network service. My Study Life is a software with many good reviews developed in web interface and mobile application.
- Whether you regularly go online or check your phone, a paper schedule comes in handy. You can also use this in case you cannot use your phone in the classroom.
- The paper and digital time both have their advantages. Digital Timeline is easy to set up, giving you an overview, while you can make smaller changes using a paper schedule. Paper schedules are also easy to make (or at least more enjoyable) as you can color the decorations to your liking.
- You can also choose a combination of digital and paper timetables: use your computer to print out a table with small cells so you can add dates and times, and then print as many panels as you want (depending according to the number of weeks you plan to plan) and fill in it.
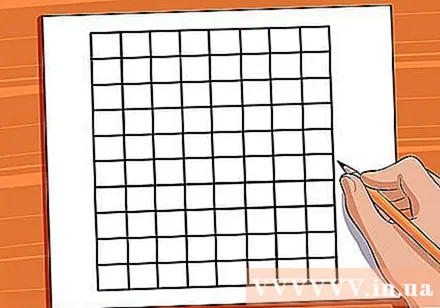
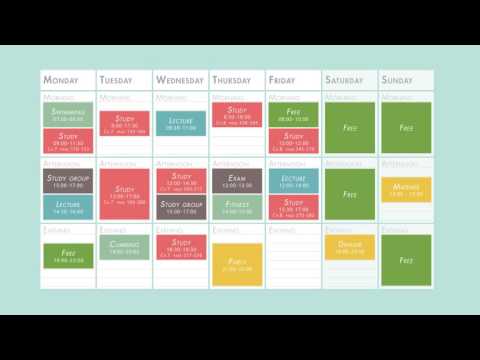
Plot the timetable. Any timetable should be a multi-column table with "days" and "hours" with the number of days of the week listed horizontally and hours vertically.- If you are designing your own paper schedule by hand, you will need to make your own chart. You can use plain paper or plain paper. Then use a very neat board ruler.
- The biggest downside to making a schedule by drawing your hands on paper is that it is difficult to change when needed. Even when using a pencil, changing the number of rows or columns is also a real challenge. Furthermore, if you need a lot of paper, such as one sheet per month, you will have to draw it all over.
Part 2 of 3: Adding information to a timetable
Choose as a permanent schedule or an interchangeable one. You can keep a fixed schedule unchanged for each week. Or you can build a separate schedule for each week that will vary depending on the specific job of that week. You can work on multiple variable schedules at the same time.
- With a schedule changing weekly, you will plan backwards. Start with a big project or exam and plan on getting closer to the present. Your class schedule will vary according to when your essay is submitted.
- Don't forget to fill in the information you wrote down earlier. You should do the listed steps before you fill in the schedule. This includes routine routines such as exercise. You need to do this step first to know how to arrange your time properly.
- If you make the schedule change weekly, don't forget to list birthdays and holidays.
Set up a study time frame. You should set a relatively long study time frame, such as 2-4 hours at a time. This way, you will be drawn to learning and use your time more efficiently.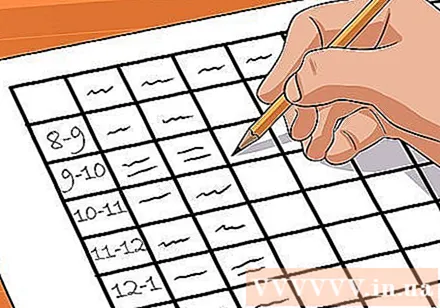
- However, if you don't have a lot of time, you can still plan your studies. If you feel more productive when planning to study 45 minutes or 1 hour at any given time, then do so.
- You will spend more time on difficult subjects.
Plan to rest. Rest is essential for success. You are not a robot so you cannot work continuously. You will do things more efficiently by giving yourself a break during the process.
- Experts recommend working 45 minutes and resting for 15 minutes. However, everyone's needs are different, so you need to experiment to find the solution that best suits you.
Write as specific as possible. Remember the step of gathering information about your essay and study plan? This is when you will use that information. You can set a time frame for each class and then write down when to submit your essay and give yourself time to work on it.
- Of course things will change over time and what you have planned for two months ago may not be appropriate anymore. However, don't let that stop you. See it as a helpful guide to keeping you on the right track and helping you break your big essay into smaller sections.
- If you have a certain amount of exercise for a particular subject each week, don't forget to add it to your schedule. For example, if you have 20 problems per week, you can evenly divide the time on your schedule.
Plan to study multiple subjects in each session. Taking more than one subject in a single session can help you avoid exhaustion from one subject and not having the energy to do other things.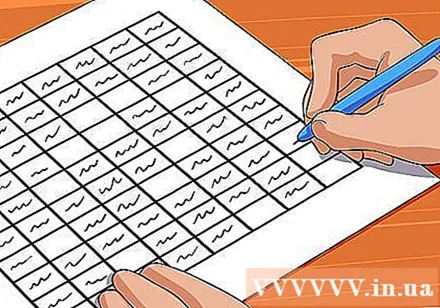
- Of course, you can still make adjustments to exams when you need to spend time on a particular subject!
Make the timetable look eye-catching. Coloring subjects and tasks will make it easier to see and use your schedule. Since you will have to see it many times, make it your own signature!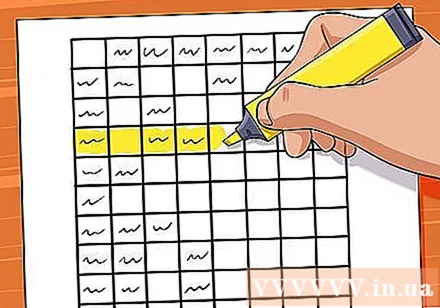
- You can use crayons if you make a paper schedule. Or you can color the text on the computer and print it on paper. If using a phone app, your timetable is already colored, but you can still edit to some extent.
Part 3 of 3: Using a timetable
Always follow the schedule. It may take a while to get used to applying a timetable calendar, but stick to it. When it comes to routine, there are many benefits to you.
Do not be stressful. Don't think that you have to stick to the exact timetable. This is just a small chart to help you learn more effectively. You just need to set the time, not necessarily too pressured to comply with the exact time.
Adjust the schedule. See what works and don't work, then adjust accordingly. If you've worked hard on your schedule, there's no reason to leave when you can make small changes to make things better. Always follow the plan. advertisement
Advice
- If planning backwards and working on a changing schedule each week is exhausting, you can still easily schedule a standard study schedule. While the weekly schedule is the same, you will see many benefits in using it.
- Try searching for images online or use Flickr or Pinterest to find templates or templates that you can use for free as a timetable.
- Note, if there is a change in class timetables, you should correct them in the timetable.


