Author:
Louise Ward
Date Of Creation:
6 February 2021
Update Date:
1 July 2024

Content
The seashells can make a fine memento of a memorable beach trip. You can use shells for indoor decoration or handmade. If you are collecting shells on the beach, it is important to clean both the shells inside and out and polish them for a long shelf life. Please start with step 1 below.
Steps
Part 1 of 4: Collecting shells
Find shells in your favorite places. Maybe it's the beach where you live or where you go to play on vacation. You can also buy shells from craft stores or from online sources.

Don't pick up shells with live marine life inside. Be mindful of nature and do not touch live cockles. You can know this when you flip the shell and see a creature inside.- Check the laws of the country you are visiting to make sure you don't collect unauthorized shells. For example, in US territorial waters, it is illegal to collect the queen conch. They are protected species because they are vulnerable to the destruction of fishing.

Determine if the shell is alive or dead. A live seashell will have animal tissue attached to it. This is different from a live seashell because another organism lives inside but the animal tissue is dead. A dead shell is when there is no animal tissue inside.- Determining whether the shell is alive or dead determines the method of cleaning the shell. Live seashells, for example, will require you to remove the internal animal tissue.
Part 2 of 4: Removing tissue from live shells
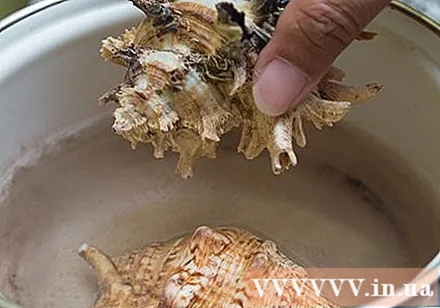
Boil the shells to remove animal tissue. The process of boiling or boiling raw shells will make the animal tissues loosen and easier to remove. You will need a pot and tweezers or something like a dental tool to remove animal tissues. Here's how to boil it to clean raw shells:- Place the shells in a large pot and cover the shell with cool water about 5 cm. It is important to use room temperature water and put the shells in the pot before you heat them, as a sudden rise in temperature can crack the shells.
- Boil water. Let the water boil for about 5 minutes. If you boil a lot of shells, you need to boil it a little longer. Larger clams also need to boil longer.
- Remove the shells with tongs and gently place it on a soft surface, such as a hot towel.
- Carefully remove the animal tissue from the shell with tweezers or some other tool and discard it.
Burying raw shells. This method may take the longest time, but many people choose to avoid damaging the shells. Boiling and freezing processes as well as removing animal tissue by hand can crack shells. A safe place to bury live shells protects the shell from damage and is a natural way to remove animal tissues. Ants, worms and other insects will eat the clam and clean the shell. Clean the shells by burying them in the ground like this: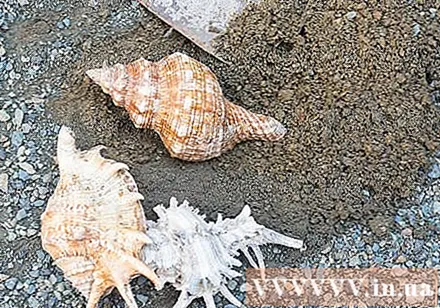
- Dig a hole in the soil. Remember that the pit should be large enough to bury all shells with a generous gap between the shells. The hole should be about 45-60 cm deep to prevent animals from digging up shells or humans walking over them breaking shells.
- Place the shells in the hole with evenly spaced intervals.
- Fill the shells with soil.
- Wait a few months for the insects, larvae, worms, and bacteria to remove the tissue inside the shell. The longer you bury, the better the results.
- Dig up the shells and check that the animal tissue is gone.
Frozen raw shells. Freezing kills the remaining animal tissue inside the shell and makes it easier to remove. Here's how to freeze raw shellfish:
- Put the shells in a plastic zippered bag. You may need to use multiple bags if you want to handle multiple shells.
- Fill the bag with water until the shell is completely covered.
- Put the shell bag in the freezer.
- Let it freeze for a few days.
- Remove the shell bag from the freezer and wait for complete thawing.
- Remove the shell and remove the animal tissue inside.
Part 3 of 4: Cleaning dead shells
Soak the shells in water for about a week. The water will dissolve the soil on the seashell, so your shells will be clean and light up after a week.
- Change water every day. The shells will be even cleaner if soaked in clean water.
- You can also boil dead shells after a week of soaking to ensure all dirt or animal tissue from the shell is removed.
Clean the shells with bleach. Bleach will definitely remove all dirt, impurities and animal tissue inside the shell. However, some collectors warn that bleach can spoil the color of the shell and the smell of bleach will permanently hang on the shell. Here's how to clean a clamshell with bleach:
- Fill the pot with equal proportions of water and detergent to cover all the shells.
- Soak the shells in the solution. You should see a skin scaly peeling off a shell. This is the outer horny layer, or the organic crust, or the "skin" of the shell.
- Once the shell has come off, remove the shell from the solution. You can use a toothbrush to scrub away dirt from the shells.
- Wash the shells thoroughly and let dry completely.
- Apply baby oil or mineral oil to the shells to restore shine.
Use toothpaste to clean the shells. Toothpaste is a milder alternative to bleach for clamshell cleaning. How to clean the clamshell with toothpaste is as follows:
- Spread a thin layer of toothpaste on one side of the shell.
- Leave the toothpaste on the shell for at least 5 hours to soak it. You can leave it on overnight for the toothpaste to work.
- When the toothpaste becomes sticky and / or hardens depending on the thickness of the cream spread, use an old toothbrush and a cup of warm water to scrub the shells off. Be sure to scrub both small cracks and crevices that are hard to see.
- Be sure to rinse the toothpaste thoroughly, even if the shells have to be rinsed under running water after brushing. This will cleanse the particles and other ingredients in the toothpaste, remove anything rough and sharp, leaving a smooth surface with very little blemishes.
Removes clinging on the shells. If there is mussel on a clamshell, use a dental instrument, a soft toothbrush or a iron brush to remove it.
- This is most effective if the shells have been previously cleaned by soaking in water or bleach.
Part 4 of 4: Clamshell polishing
Apply mineral oil to each shell to create a shine. Wait at least a day for the shells to dry, then apply the oil to the shells.
- Mineral oil not only restores the shine of the seashell but also helps to preserve the shell.
- Similarly, you can spray WD-40 on the shells. Remember to wear gloves when using this material.
Spray paint on the shells. You can use PU wood polish spray or clear nail polish. This glossy paint will preserve the natural look of the shells, making them more shiny.
- Each day processing a shell. Allow the shell to dry completely before handling the other side. Each face can take up to a day to dry.
Advice
- Leave the shells alive on the beach. The seashell is home to many animals, and there are countless shells with no creatures in them so you don't have to take them out. Drop the animal shells into the ocean and look for other ones.
- Another option is to place live shells near the trash or landfill. Find a trash can with fly larvae or maggots crawling around, and make sure to leave it open so they can crawl into the shell. Flies can lay eggs in a shell, and their larvae will eat the dead meat in it. This may take a week or more.
- While it may not be possible to collect very nice seashells, it is best to pick up dead seashells on the beach instead of gathering sea creatures, as this would be better for the environment, than Also, you do not have to worry about removing the flesh inside the shell.
Warning
- Some types of shells do not tolerate boiling, especially soft or fragile ones. If you are afraid of breaking the cockle, you should only boil it until the water is almost boiling instead of boiling it completely.
- Certain types of shells (famously speckled porcelain snails) can be damaged by using bleaching and other methods. If you have a shell that you value very much, you should identify its species and research the proper handling. You can also experiment with other shells of the same type that you don't appreciate.
- Always wear safety glasses and gloves when using bleach.
- Be careful not to burn when taking out the shells from the pot of hot water. You should always use protective gloves.
- Bleach sometimes discolor the shells. If you don't want your shells to be "white", check and / or dilute the bleach solution regularly (you can add bleach as needed).


