Author:
Randy Alexander
Date Of Creation:
26 April 2021
Update Date:
1 July 2024

Content
This wikiHow teaches you how to use a Windows or Mac computer to print documents on both sides of the paper. If the printer does not support duplex printing, you can still set up two-sided printing manually.
Steps
Method 1 of 3: On a PC
Click the card File (File). This option is usually located in the upper left of the window.
- If you have not opened the document to print, you need to do so before proceeding.
- If you don't see the card FileFind the key Ctrl on the computer keyboard.

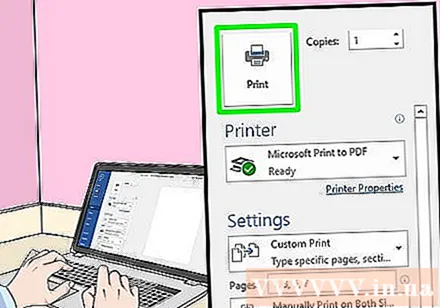
Click Print (Print). Knot Print This is usually located in the drop-down menu below the card File or can be displayed on a separate window that appears after you click it File.- If no card is found FileYou can replace it by pressing a key combination Ctrl and P same time.
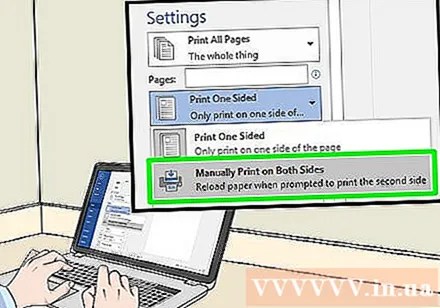
Click the two-sided printing option. Usually you need to click on the current printing option (example: Single Sided - Single sided) and choose to print duplex from the drop-down menu.- Page options are typically below the "Page Layout" or "Duplex Printing" heading.
- On Microsoft Word, click the button Print One Sided (Single-sided printing) to view two-sided printing options.

Make sure that the computer is connecting to the printer. The name of the printer currently selected is displayed below the "Printer" heading near the top of the window.- You may need to connect the printer's cable to a USB port on your computer first (if Wi-Fi is not available).
- To change the current printer, click the printer name and then select the device you want in the drop-down menu.
Click Print. This button is usually at the top (in Microsoft Word) or at the bottom of the window. Your document will begin to print. advertisement
Method 2 of 3: On a Mac
Click File menu bar at the top left of the screen.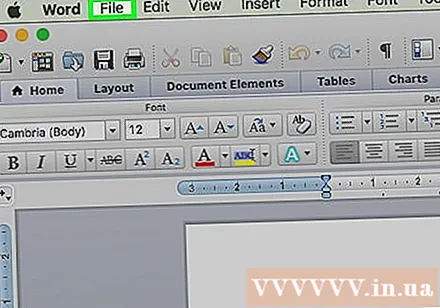
- If you have not opened the document to print, you need to do so before proceeding.
- If you don't see the card FileFind the key ⌘ Command on the Mac computer keyboard.
Click an option Print in the drop-down menu File. The Print window opens.
- If no card is found FileYou can replace it by pressing a key combination ⌘ Command and P same time.
Click the bar Copies & Pages (Copy & page). The option is near the top of the window.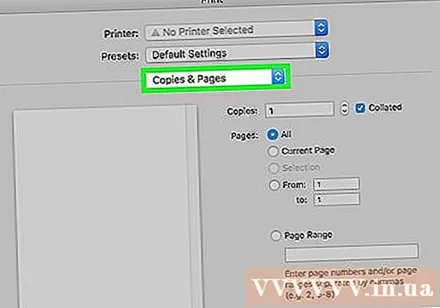
- If you're printing from an online document, skip this step and the next.
Click Layout (Layout) is near the middle of the drop-down menu.
Find two-sided printing options. The position of the option will be different depending on the document that you have open.
- For example, if you are using Safari, check the box "Two-Sided".
- If you are using Word, click the box next to "Two-Sided" to bring up the drop-down menu. In most cases, you can choose Long-Edge Binding from the drop-down menu.
Make sure that the computer is connecting to the printer. The name of the printer currently selected is displayed below the "Printer" heading near the top of the window.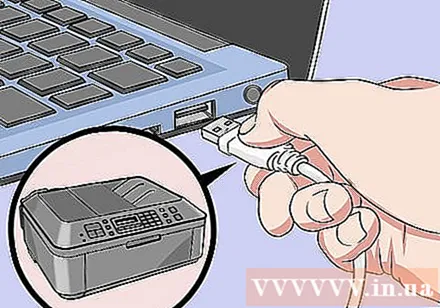
- To change the current printer, click the printer name and then select the device you want in the drop-down menu.
Click Print at the bottom of the window. The document will start printing in two-sided format. advertisement
Method 3 of 3: Manually print two sides
Use a pencil as a small mark on the top of the page. This will be the face up, near the short edge facing the printer.
Click File and choose Print. Option File usually located in the upper left corner of the screen, also Print is in that drop-down menu. The Print window will appear.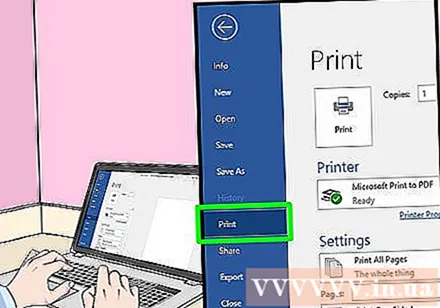
- If you have not opened the document to print, you need to do so before proceeding.
- You can also press ⌘ Command+P (Mac) or Ctrl+P (PC) to open the Print window.
Look for the "Page Range" item. This section will allow you to choose which pages to print.
- You may need to click the "Pages" circle button to choose the Page Range option before proceeding.
Enter an even or odd number. These are the pages on the document that will be printed on the first print.
- For example, if the document has 10 pages, you need to import 1, 3, 5, 7, 9 or 2, 4, 6, 8, 10.
Make sure that the computer is connecting to the printer. The name of the printer currently selected is displayed below the "Printer" heading near the top of the window.
- To change the current printer, click the printer name and then select the device you want in the drop-down menu.
Click Print. According to your request, the machine will start printing even or odd pages on the document.
Look for the pencil mark on the printed side. This will help you see the direction to put the paper back in the printer:
- Print down the pencil mark - Place the print-side down so that the top of the paper is facing the printer.
- Print out the pencil mark on the opposite side - Place the print-side up so that the top of the page is facing the printer.
Reinsert the printed pages in the printer. Remember to follow the pencil mark.
Open the Print window again. The fastest way is to press ⌘ Command+P (Mac) or Ctrl+P (Windows).
Enter another page range. For example, if you entered an even range last print, you need to enter an odd number this time.
Click Print. As long as you align them correctly, the unprinted pages will be printed on the back of the printed pages. advertisement