Author:
Laura McKinney
Date Of Creation:
8 August 2021
Update Date:
1 July 2024
Content
Want to update your Windows Vista operating system to your old computer? Maybe the reason why you want it is because your computer is running slow so you want to delete and reinstall from scratch. You should be aware that the installation of the Vista operating system is quick and almost completely automatic. You just need to prepare a few things to be able to complete the installation in about an hour. Read on to learn how.
Steps
Part 1 of 3: Change Your Operating System to Windows Vista
Check the machine's specifications. To be able to run Windows Vista, your computer must have at least 800 MHz processor (1 GHz recommended), 512 MB RAM (1 GB recommended), 15 GB hard drive space (20 recommended) GB) and DirectX 9 graphics card. Different programs have different system requirements.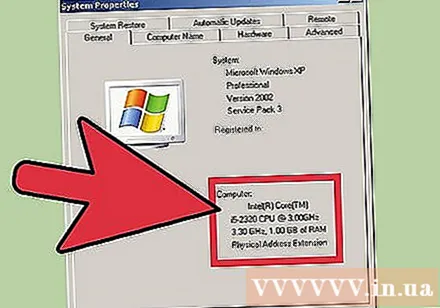
- To check the system specifications of a computer running Windows XP, click Start and right-click My Computer and then click Properties in the menu that appears. You will see the system Properties window. On the General tab, your computer's system specifications will be displayed under Computer.
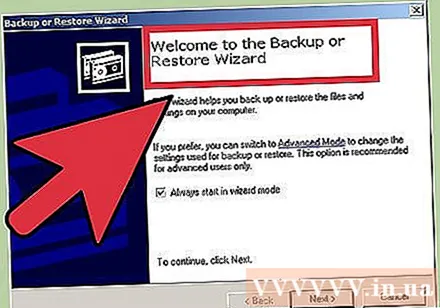
Backup (Backup) your data. If you are updating to Vista from another operating system, you will lose all your files and programs. Since you cannot back up your programs, you will have to reinstall them. You need to copy all the text, music, photos, and video files you want to keep to the backup location.- You can use DVD, CD, external hard drive, Flash drive, or online cloud backup (Cloud) depending on how much data you want to back up.
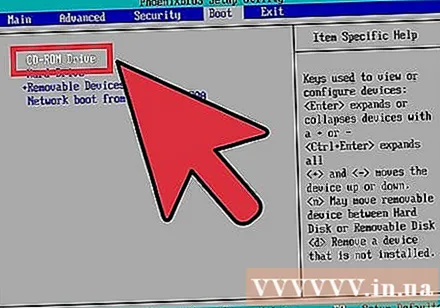
Setup BIOS to boot from CD. To perform this step, you will need to restart your computer and go to the Setup screen when the manufacturer's logo appears. The key to press to enter this screen will be displayed. The key differs depending on the manufacturer. The most common keys for entering screen are F2, F10, F12 and Del.- Once in the BIOS menu, click Boot. You need to change the device sequence so that your computer prioritizes booting from CD over booting from hard drive. Save your changes and exit. Your computer will restart.
- If you are installing from a Flash drive, you will need to set up your BIOS to boot from that drive.
Part 2 of 3: Installing Windows Vista Operating System

Restart your computer. Make sure you have run the installation DVD or have a USB thumb drive inserted. If you have set the boot sequence correctly, you will see the following message: “Press any key to boot from CD…”. Press any key on the keyboard and Windows Vista will install.- The system will probably start the setup program by itself without asking you to press any keys.
Wait for the Windows files to be installed. After the installation is completed, the Windows Vista logo will appear, but no files on your computer have been changed. Your data will be deleted later.
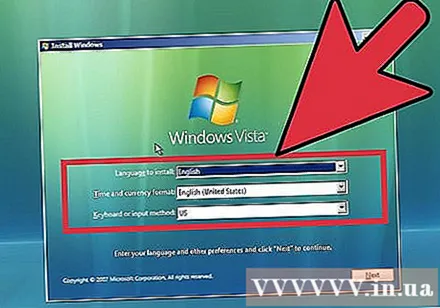
Optional as you like. You will be prompted to choose your language, time & currency (Language, Time & Currency), keyboard or input method. Make your preferences and click Next.
Click Install Now. Do not click "Repair your computer" even if you want to repair your computer by reinstalling Windows. After pressing the command, the files required for the installation will be loaded to continue this process.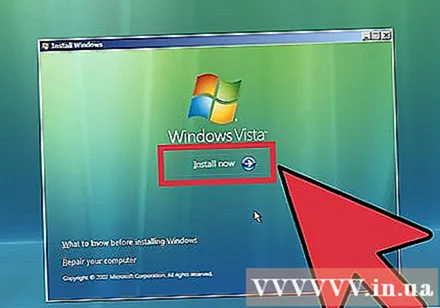

Download the update. If your computer is connected to the Internet, you should be able to download the update before the installation can take place. Here's how you save a lot of time and you can start using Windows as soon as the installation is complete.
Enter your Product key. This is the 25-character code included with your version of Windows. Please check the box "Automatically activate Windows when I'm online" so that the Windows operating system automatically verifies your code when the computer connects to the Internet.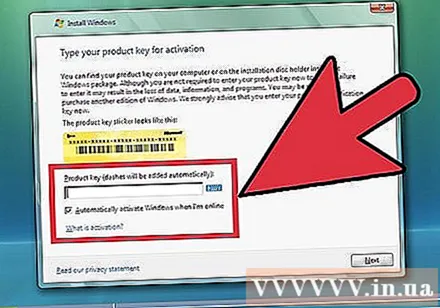
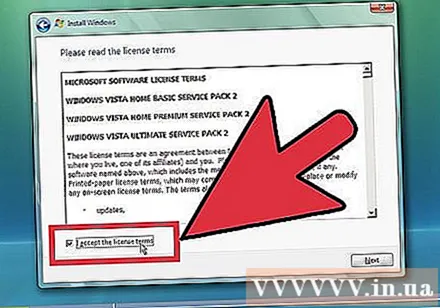
Read and accept the terms. To continue with the installation, you must confirm that you have read and agreed to the Microsoft Terms of Use. Be sure to read through to see your rights and limitations as a user.
Select the Custom installation type. This is how to help you install a completely new (clean install) as you like. Even if you are updating from an old version of Windows to a new one, you should still do a clean install. If you install the upgrade type (Upgrade), it will often cause some devices and programs to not work and not work as expected.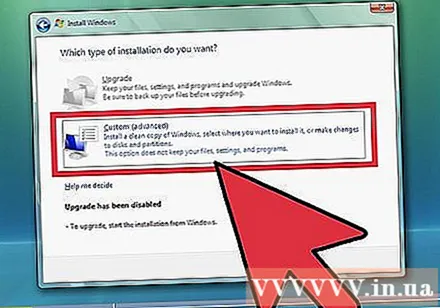
Partition Erase. A window will pop up asking where you want to install the Windows operating system. For a clean install, you need to delete the old partition and start with a new one. Click “Drive options (advanced)” to delete and create partitions.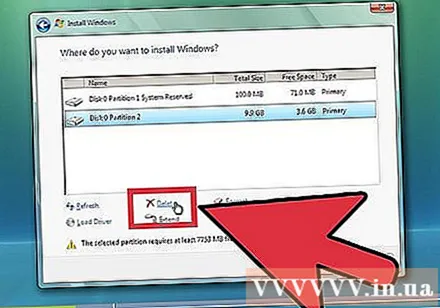
- Select the current operating system's partition and click the Delete button.
- If you first install the operating system to the hard drive, you will not see any partitions to delete.
- If your hard drive has multiple partitions, make sure you delete the correct partition. All data in the deleted partition will be permanently lost.
- Confirm the deletion.
Select Unallocated Space and click Next. You do not need to create partitions before you install Windows Vista operating systems. The computer will create it for you.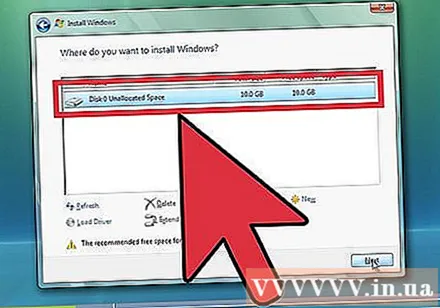
Wait for the Windows operating system to install the files. The percentage next to the "Expanding files" line will increase steadily. The amount of time you have to wait can be up to 30 minutes.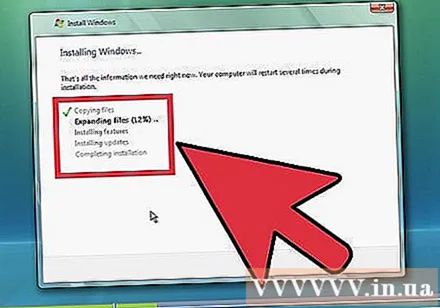
- The Windows operating system will automatically restart your computer when the installation is completed.
- The Setup section will appear again and a message is being displayed that is updating the Registry settings (the Windows user's configuration information database).
- Setup will customize programs on your computer. Every time you run Windows, this process will happen but next time it will be done in the background (background).
- A window will appear to inform you that Windows is completing the installation process. Your computer will reboot once again when the process is complete.
- Setup will now load the driver and check the video settings. In this step, you do not need to press any key.
Enter your username and computer name. Username will be used to log into the computer and customize the account according to personal preferences. Your computer's name is the name that appears on the computer network.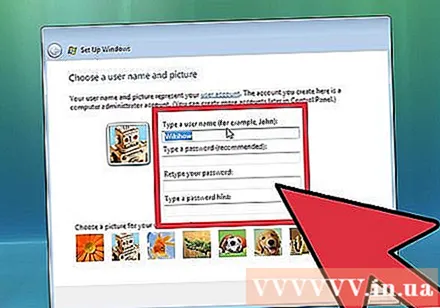
- You can add multiple users later in Control Panel of Windows Vista operating system.
- Windows will ask you to set a password. You don't have to set a password, but you should do this, especially if your computer is used by many other users. If you don't like setting a password, leave the box blank and click Next.
Select Windows update option. To ensure that your version of Windows runs smoothly and safely, you should choose one of the first two options. The first option will install all updates automatically and the second option will let you know every time an important update is available.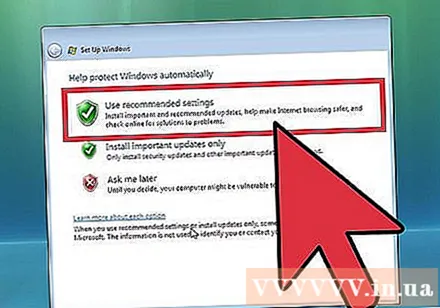
Select a date and time. Usually this information is correct as it is linked to the BIOS, but you can change it if the date and time are not correct. Check the box to automatically set the clock if the area in which you live has Daylight Savings.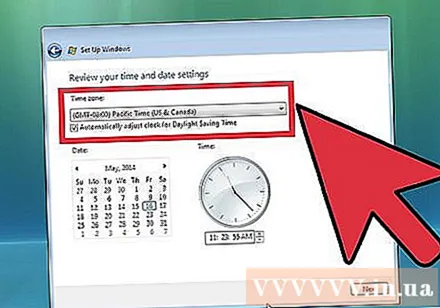
Choose the right network. If your computer is connected to a network, you will see an option to identify that network. Most users will choose the home network (Home) or network for work (Work). If you are using your computer in a public place then select Public Network. People who use services with fast Internet access over a mobile broadband should always choose Public network.
- Windows will try to connect your computer to the network. This process will take place automatically.
Explore your desktop. Once done, you will see the desktop of Windows Vista operating system. The installation is now complete. Read on to learn how to update and protect your computer. advertisement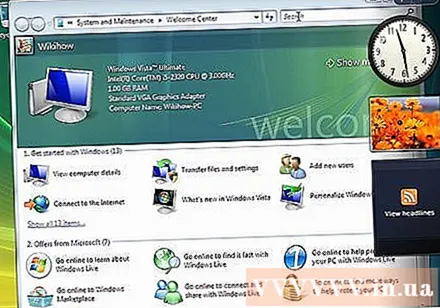
Part 3 of 3: Completing the Installation Process
Activate Windows Vista operating system. Before you can use all the features of the Windows operating system, you will need to activate it. You can activate it automatically over the Internet. Click the activation icon in the System Tray to begin the process.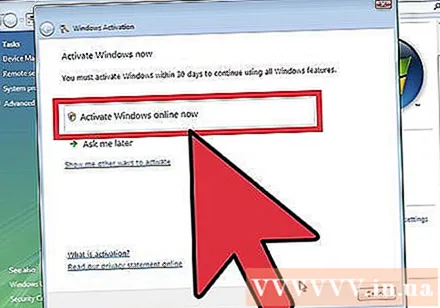
Run Windows Updates. If you don't click on the option to automatically update then you should manually run the Windows update as soon as possible to ensure that the security of the operating system is highest and you can fix many errors to get the machine running stability. If you click on the option to automatically update, your computer will begin downloading and installing the updates as soon as you connect to the Internet.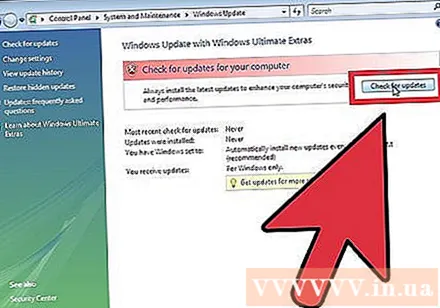
Check devices and drivers. Usually your hardware is automatically installed, but you may have to find a driver to be able to use some specialized hardware or download the latest version from the manufacturer. You will see things that require a driver in the Device Manager.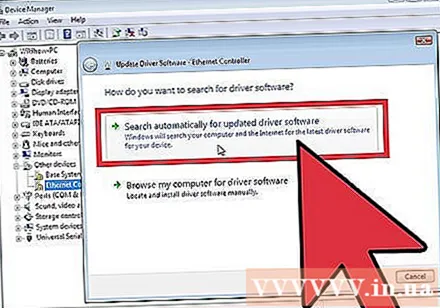
Install an antivirus program. Although Microsoft provides users with a free antivirus program called Microsoft Essentials, it is quite rudimentary, not capable enough to prevent and remove viruses. For this reason, you should install a third-party anti-virus program to protect your computer and information. You can find both free and paid antivirus software.
Install your programs. Once you have Windows updated and protected, you can proceed to install the programs you need. Remember that not all of the programs you use in an earlier version are compatible with the Windows Vista operating system. advertisement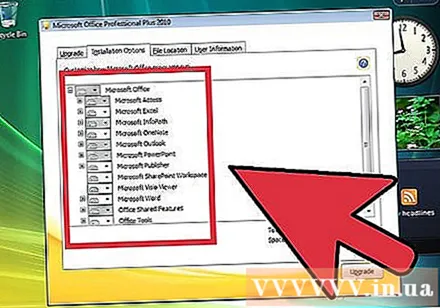
Advice
- To activate your version of Windows Vista immediately after installation, you need to properly connect and customize the Internet. If you are not connected to the Internet, you can activate later or call the duty-free number in the installer to contact Microsoft and register by phone. If you don't activate your version, it will expire after 30 days. You won't be able to use the Vista operating system until you register or reinstall it.
Warning
- If your computer is running a newer version of Windows then do not try to install Windows Vista operating system as this may prevent your computer from booting. This is because the boot files do not recognize old files. For example: If you are installing Windows Vista on a computer that already has Windows 8, the computer may not start.
- Before installing Windows Vista operating system, make sure that your computer meets the minimum system requirements. You can use the Upgrade Adviser tool to scan your system before installing Windows Vista to see if your personal computer can run Windows Vista.


